HVAC Not Blowing Warm Air? Your Troubleshooting Guide
- Oct 12, 2025
- 17 min read
Updated: Oct 13, 2025
When your HVAC system decides to blow cool air instead of the comforting warmth you’re expecting, the fix is often surprisingly simple. More often than not, the culprit isn't a catastrophic failure but something basic like an incorrect thermostat setting or a tripped circuit breaker.

Before you start worrying about a hefty repair bill, taking a few minutes to run through some quick checks can often get your heat back up and running.
Your First Checks When Warm Air Stops Flowing
That sudden, unwelcome chill from your vents is jarring, especially on a cold day. It’s easy to let your mind jump to the worst-case scenario, and the expensive repairs that come with it.
But hold on. In my experience, a surprising number of "no heat" calls end up being resolved in the first five minutes with a simple adjustment. Before you pick up the phone, let's walk through the first-line checks that every homeowner should know. These steps are designed to rule out the most common and easily fixable causes.
Think of this as your five-minute HVAC diagnostic. It might just save you the cost and hassle of a service call. The very first place to look is right on your wall.
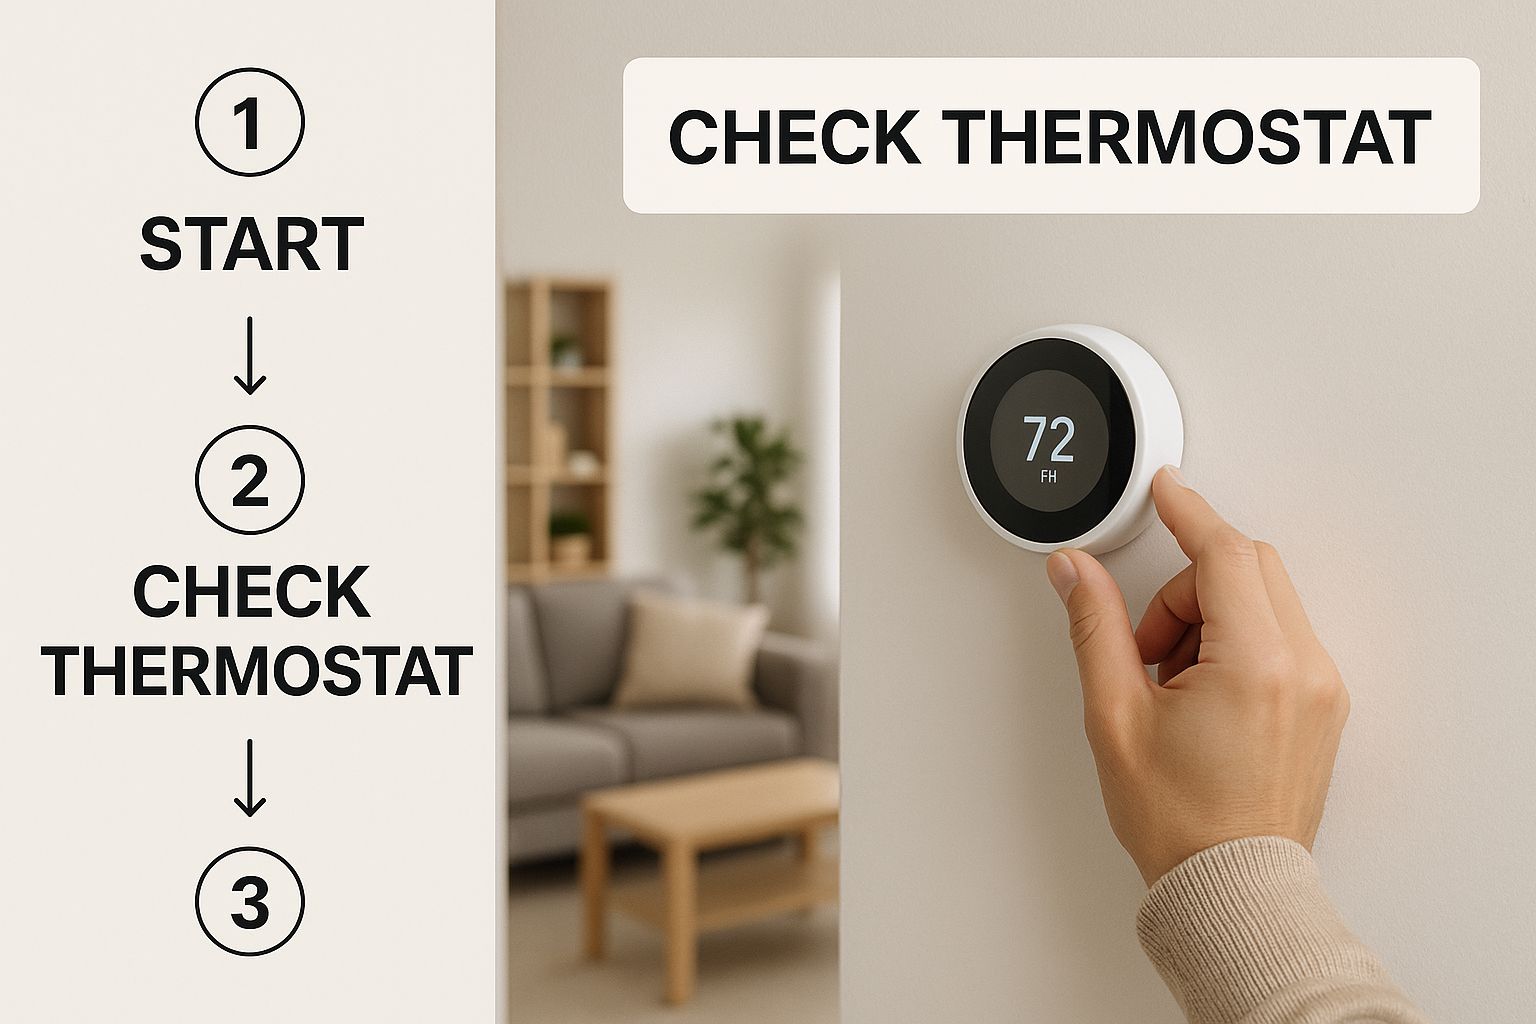
Your thermostat is the command center for your entire system, and a simple mix-up there is the number one reason for heating headaches.
Quick DIY Checklist for Heating Issues
Before diving deeper, run through this quick checklist. It covers the most common culprits we see in the field and can often solve the problem in minutes.
Check | What to Look For | Simple Solution |
|---|---|---|
Thermostat Mode | Is it set to "Cool" or "Off"? | Switch the mode to "Heat." |
Temperature Setting | Is the set temperature lower than the room temperature? | Raise the temperature 5 degrees above the current room temp. |
Fan Setting | Is the fan set to "On" instead of "Auto"? | Change the fan setting to "Auto." |
Circuit Breaker | Is the breaker labeled "Furnace" or "HVAC" tripped? | Flip the breaker completely off, then back on to reset it. |
Power Switch | Is the furnace power switch (often near the unit) off? | Make sure the switch is in the "On" position. |
Completing these checks first will eliminate the simplest issues and give you a clear starting point for any further troubleshooting.
Confirm Your Thermostat Settings
Your thermostat is the brain of the operation, so a wrong setting can easily make you think the whole system is broken. It happens all the time: someone accidentally bumps the switch to "Cool" mode, and the next thing you know, the AC is running in the middle of winter.
Another classic mix-up is the fan setting. If your fan is set to "On" instead of "Auto," it will blow air constantly, even when the furnace isn't firing up. This leads to blasts of room-temperature air between heating cycles, which can definitely feel like the heat isn't working right. For a deeper dive, our guide explains the difference between the thermostat fan's "On" or "Auto" setting.
Key Takeaway: Before you do anything else, make sure your thermostat is set to "Heat," the fan is on "Auto," and the target temperature is at least five degrees higher than the current room temperature. This forces the system to kick on if it's able.
Inspect Breakers and Power Switches
Even if your furnace runs on gas, it still needs electricity to power its fans, controls, and safety sensors. A loss of power will shut the whole thing down. Both your indoor furnace and the outdoor unit (if you have a heat pump) will have their own dedicated circuits.
Head over to your main electrical panel and look for breakers labeled "Furnace," "Air Handler," "HVAC," or something similar. If a breaker is sitting in the middle position or flipped to "Off," it's been tripped. To fix it, push it firmly all the way to the "Off" position, then flip it back to "On."
One more thing to check: many furnaces have a separate power switch, which usually looks just like a light switch. It's typically mounted on or near the furnace itself. These get flipped off by mistake more than you'd think, killing power to the unit completely. Make sure it's in the "On" position. This one little check has saved countless homeowners from an unnecessary service call.
If these initial steps don't solve the problem, you might be dealing with a more complex issue. For a wider range of potential fixes, you might find a comprehensive Austin HVAC troubleshooting guide helpful for your next steps.
Why a Dirty Air Filter Can Stop Your Heat
It sounds almost too simple to be true, but a dirty air filter is genuinely one of the most common culprits when your furnace suddenly stops blowing warm air. This single, inexpensive part is the gatekeeper for every bit of air your system pulls in. When it gets choked with dust, pet hair, and whatever else is floating around your home, it essentially suffocates your furnace.
This restricted airflow forces your system’s blower motor to work much harder just to pull air through. All that extra strain creates a dangerous domino effect, causing the furnace's heat exchanger to get dangerously hot.
Thankfully, your system has a built-in safety net. A component called the limit switch detects this overheating and immediately shuts down the burners to prevent serious damage or even a fire. The fan, however, often keeps running to help cool things down, which is exactly why you start feeling that lukewarm or even cold air coming from your vents instead of the cozy warmth you were expecting.
How to Locate and Inspect Your Filter
First things first, you need to find your filter. Where it’s hiding depends on your specific HVAC setup.
In the Blower Compartment: A lot of filters are tucked into a slot right on the furnace or air handler unit.
In the Return Air Duct: You might find a filter housing in the main ductwork just before it connects to the furnace.
In a Wall or Ceiling Grille: Some homes have the filter inside a large return air vent right in a wall or ceiling.
Once you’ve found it, just slide the filter out of its housing. The best way to check it is to hold it up to a light. If you can't see the light shining through, it’s completely clogged and needs to be replaced right away. A dirty filter will look visibly gray or brown, caked with a nasty layer of dust.
Pro Tip: Grab a marker and write the date you swapped the filter directly on its cardboard frame. This little trick takes all the guesswork out of it and helps you stick to a regular replacement schedule.
Knowing how often you need to swap it out is the key to preventing this headache in the future. For advice specific to our climate, take a look at our guide on how often you should change your A/C air filter in Arizona.
Choosing the Right Filter Replacement
When you’re at the store, you'll see a MERV (Minimum Efficiency Reporting Value) rating on the filter packaging, which ranges from 1 to 20. The higher the number, the more particles it can trap.
It’s tempting to just grab the filter with the highest MERV rating, thinking it’s the best for your air quality. But that can be a mistake. A super high-MERV filter is much denser and can restrict airflow too much for some systems, leading you right back to the same overheating problem. For most residential systems, a filter in the MERV 8 to 11 range is the sweet spot, offering a great balance between clean air and healthy airflow.
Don't Forget to Check Your Vents
A clogged filter isn't the only thing that can choke your system. Blocked vents can cause similar airflow problems, just on a smaller scale. If your hvac not blowing warm air problem is isolated to just one room, a blocked vent is a very likely suspect.
Do a quick walk-through of your house and check both the supply vents (where air blows out) and the return vents (where air gets sucked in).
Supply Vents: Is a couch, a rug, or a set of drapes sitting right on top of a vent? Make sure the louvers are open, too.
Return Vents: These are usually the bigger vents and are absolutely critical for proper circulation. Blocking even a single return vent can throw off the heating for an entire floor.
Making sure every vent is clear and unobstructed is a simple, no-cost step that makes a huge difference. Good airflow is non-negotiable if you want your furnace to heat your home safely and effectively.
Diagnosing Common Furnace and Heat Pump Faults
So, you’ve already checked the thermostat settings and swapped out that dirty air filter, but you’re still not getting any warm air. Now it’s time to roll up your sleeves and dig a little deeper. More often than not, the problem is a specific component inside your furnace or heat pump that’s either dirty or has failed completely.
These parts are the heart and soul of your heating system. They're responsible for everything from creating the flame in your furnace to managing the complex heat transfer process in a heat pump. Figuring out what’s wrong often starts with just listening to your system and looking for some simple clues.
The Clicks and Codes of a Failing Furnace
When a modern gas furnace fires up, it goes through a very specific startup sequence. If you learn to recognize the sounds of this sequence, you can often pinpoint exactly where things are going wrong.
One of the most common culprits is the ignitor, which is the part that actually lights the gas. If you can hear the furnace's inducer motor whirring away but you never hear that distinct click of the gas valve opening or see the ignitor start to glow, there's a good chance the ignitor itself has failed.
Another part that frequently causes trouble is the flame sensor. This is a small metal rod positioned right in the path of the burners. Its one and only job is to tell the furnace, "Yep, we have a flame," right after the gas valve opens.
If that sensor gets covered in carbon buildup, it can't detect the flame. The furnace sees this as a major safety risk and immediately shuts off the gas supply, usually within just a few seconds.
What to Listen For: A furnace with a dirty flame sensor will often sound like it's trying to work. You'll hear the burners ignite for just a moment, and then... silence. The whole thing shuts down abruptly. This cycle might repeat a few times before the system locks itself out for safety.
Many newer furnaces will even help you out with a small LED light on the main control board. The furnace panel usually has a little peephole so you can see the light without taking anything apart. A specific pattern of flashes corresponds to an error code, which you can look up in your owner's manual to find the exact problem.
It's surprising how often heating systems run into trouble. One study on commercial buildings found that on any given day, an average of 40% of air handling units and 30% of air terminal units are faulted. Plus, improper installation can hike up a home's heating energy use by as much as 30%, showing just how important it is for every part to work correctly for both comfort and your wallet.
The Role of Condensate Lines in High-Efficiency Systems
High-efficiency furnaces are so good at their job that they pull a massive amount of heat from the combustion process. This causes the exhaust gases to cool down enough to create condensation: basically, acidic water. This water has to drain away safely through a condensate line, which is usually a PVC pipe that leads to a floor drain.
If this line gets clogged with gunk or, in colder climates, freezes solid, the water will back up.
To prevent a nasty flood, these furnaces are equipped with a condensate overflow switch. The moment this switch detects backed-up water, it shuts down the entire heating operation. A clogged condensate line is a surprisingly simple but very common reason for a high-efficiency furnace to stop working.
You can often clear a minor clog yourself with a wet/dry vacuum by suctioning the blockage out from the end of the drain line.
Key Furnace Components and Their Failure Signs
Knowing what each part does makes it much easier to figure out what’s wrong. Here’s a quick rundown of the most important components and what to look for when your furnace isn’t blowing warm air.
Ignitor: This part gets incredibly hot to light the gas. If it's cracked or just burned out, you'll never get a flame. You'll hear the system try to start, but the ignition process will never complete.
Flame Sensor: This thin metal rod just needs to confirm a flame is present. If it’s coated in carbon, it can't do its job, and the furnace will kill the gas supply a few seconds after the burners light up.
Limit Switch: Think of this as a safety sensor. It detects if the heat exchanger is getting dangerously hot, which is often a side effect of a clogged filter restricting airflow. If the limit switch itself is faulty, it can trip too early and shut down the burners when there’s no real danger. Our article on the heat exchanger in your HVAC explains more about this critical part.
Inducer Motor: This is a small fan that does two things: it clears out old gases before ignition and pushes exhaust out while the furnace is running. If this motor fails, the furnace won’t even try to light because a pressure switch that monitors it won't give the "all-clear" signal.
Checking Your Fuel Supply and Outdoor Unit
Your furnace or heat pump is a powerful machine, but it can't conjure heat out of thin air. It’s completely dependent on a steady supply of fuel, or in a heat pump's case, the ability to draw heat from the outside. If your system sounds like it's running but the air coming out of your vents is stubbornly cold, the next logical step is to make sure it has what it needs to actually create warmth.
For furnaces, this is all about the fuel source. For heat pumps, the focus shifts to the outdoor unit, where ice, snow, or even yard debris can bring everything to a grinding halt.
Confirming Your Furnace Fuel Supply
A furnace starved of fuel acts a lot like one with a dead ignitor. You'll hear the blower kick on, but the burners will never light up, leaving you with nothing but lukewarm air being pushed around. It’s a surprisingly common issue that’s often overlooked.
Here’s what to check:
Natural Gas: Look for the gas line running into your furnace. You should see a small shutoff valve, often with a red or yellow handle. For the gas to be flowing, this handle must be parallel to the pipe. If it's perpendicular, it's closed; turn it so it lines up with the pipe.
Propane (LP Gas): If you have a propane tank, head outside and check the gauge. It's easy to run lower than you think, especially during a sudden cold snap. If that needle is hovering at or near empty, you'll need to get a refill scheduled.
Heating Oil: Similarly, for oil furnaces, you'll have to check the gauge on your oil tank. Just like with propane, it's possible to run low without realizing it.
If you find a closed valve or an empty tank, you’ll likely need to reset your furnace after getting the fuel restored. If a pilot light went out because of the interruption, it's worth figuring out why. We have a great resource that walks you through what to do if the pilot light on your furnace keeps going out.
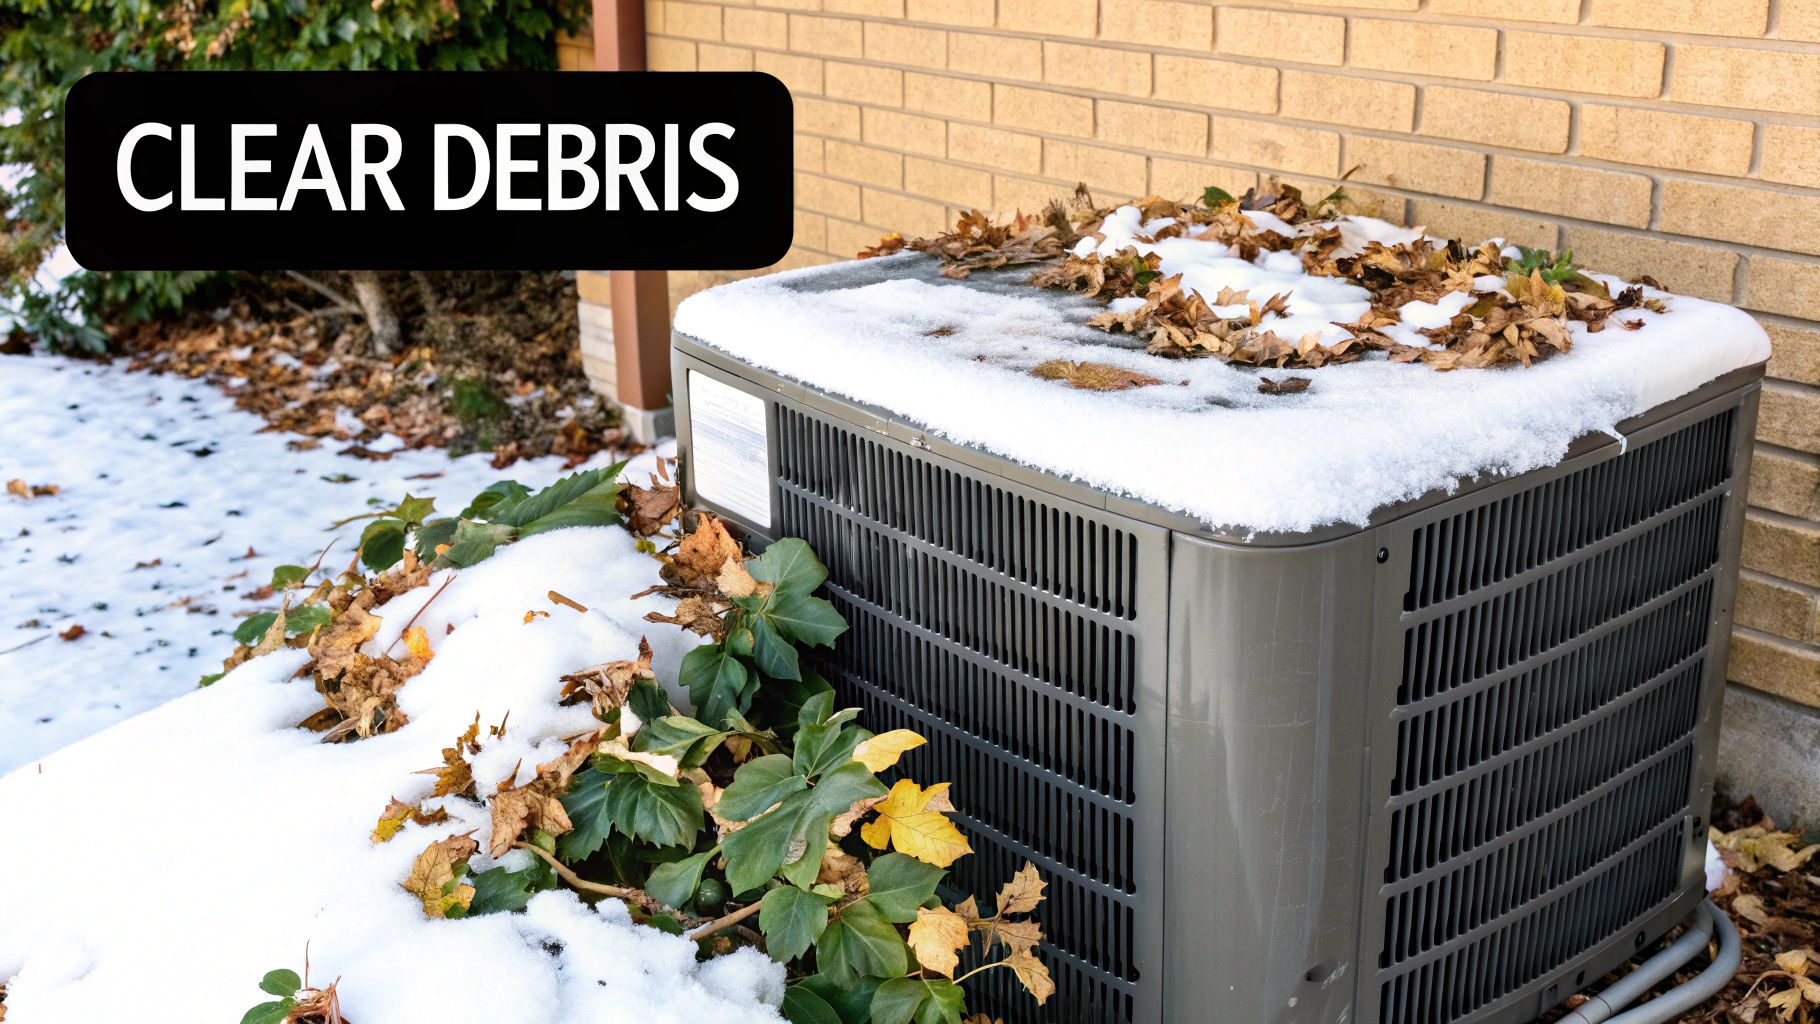
Inspecting Your Heat Pump's Outdoor Unit
A heat pump plays by different rules. Instead of burning fuel, it cleverly moves heat from the outside air into your house. This entire process grinds to a halt if the outdoor unit (the condenser) is dirty, blocked, or encased in ice.
This isn't just about comfort. Properly maintained systems are crucial for energy efficiency. Residential heating is a huge slice of our total energy use, and poorly maintained systems suffer massive efficiency losses and have shorter lifespans, often declining sharply after 15 years.
Clearing Debris and Obstructions
Your outdoor unit needs to breathe, literally. It pulls in enormous amounts of air to make the heat exchange process work.
Take a walk outside and give your condenser a good look. Is it choked by fallen leaves, overgrown bushes, or last night's snow drift? Anything blocking airflow will seriously cripple its ability to heat your home. Make sure to clear a two-foot space all the way around the unit so it has plenty of breathing room.
A Quick Story From the Field: I once got a "no heat" call and found a perfectly good heat pump that just wasn't working. After checking everything inside, I went out back to discover the homeowner had neatly stacked a winter's worth of firewood right up against the side of the condenser, completely suffocating it. We moved the wood, and the heat kicked right on. Sometimes, it’s that simple.
Dealing with Ice Buildup
It's perfectly normal for a heat pump to get a thin layer of frost on its coils, especially on cold, damp days. Your system is built for this and will periodically run a defrost cycle. This cycle, which usually lasts about 10-15 minutes, briefly reverses the unit's operation to melt that frost away.
However, a thick, solid block of ice covering the whole unit is a red flag. This points to a deeper problem, like a bad defrost control, low refrigerant, or a failing fan motor. When the unit is a solid block of ice, it simply can't transfer heat. You can try gently pouring lukewarm water over the coils to help it along, but this is only a temporary fix. If it ices over again quickly, it's time to call a pro.
Knowing When to Call an HVAC Professional
While rolling up your sleeves for some basic troubleshooting can be satisfying, there’s a definite line in the sand where DIY attempts should stop and a professional needs to step in. Knowing where that line is isn't just about getting your heat back on; it’s about keeping your home and family safe. When the problem is more complex than a dirty filter or a tripped breaker, calling a licensed HVAC technician is always the right move.
Trying to perform complex repairs without the right training and tools can turn a small hiccup into a full-blown, expensive disaster. More importantly, it can be dangerous, especially when you're dealing with high-voltage electrical systems or natural gas lines. Let's walk through the clear red flags that mean it's time to put down the tools and pick up the phone.
Serious Warning Signs That Demand a Pro
Some symptoms aren't just minor malfunctions; they're urgent warnings that need an expert's attention immediately. If you notice any of these, shut your system down and call for help right away.
The Smell of Gas: If you catch a whiff of rotten eggs near your furnace, you could have a natural gas leak. This is a true emergency. Leave the house immediately, call your gas company from a safe location, and then get an HVAC professional on the line.
Loud, Alarming Noises: A furnace should be a background hum. If you suddenly hear loud banging, screeching, or grinding, it’s a sign of a serious mechanical failure, like a broken blower motor or another critical component giving out.
Frequent Circuit Breaker Trips: A breaker that trips once isn't a huge deal, but if it keeps happening, you've got a deeper electrical issue. This could be anything from a short circuit to an overloaded motor, both of which are major fire hazards.
Visible Soot or Burn Marks: Any sign of scorching, black soot, or a yellow burner flame (it should be blue) points to a dangerous combustion problem. This is serious because it can lead to the production of deadly carbon monoxide gas.
Crucial Takeaway: Your safety is non-negotiable. Any issue involving gas, persistent electrical faults, or loud mechanical failures is a clear signal to stop troubleshooting and call a certified technician immediately.
When Electrical Issues Are Beyond DIY
Many heating problems trace back to the system's electrical components. Resetting a breaker is one thing, but anything beyond that requires specialized knowledge. When your troubleshooting points toward an electrical fault in your furnace or heat pump, it's time to call in certified electrical service providers to handle it safely and correctly. A pro has the right diagnostic tools, like a multimeter, to safely test high-voltage parts and find the exact source of the problem.
The HVAC industry is constantly getting smarter, too. Researchers are now using massive datasets, some with over 8 billion data samples, to create sophisticated fault detection algorithms. These advanced tools help technicians quickly diagnose complex issues that a homeowner could never spot, from failing sensors to faulty control boards.
The Risk of Causing More Damage
Sometimes, the biggest risk of a DIY repair isn't hurting yourself; it's causing even more damage to your HVAC system. A simple mistake, like installing the wrong part or messing up the wiring, can create a costly domino effect.
For example, trying to replace a capacitor without discharging it first can fry the main control board. Or, attempting to patch a refrigerant leak without the proper equipment can lead to total system failure. In situations like these, what might have been a straightforward repair can quickly escalate into needing a full system replacement.
Ultimately, knowing when your furnace is on its last legs is key, and a professional can give you an honest, clear assessment. You can learn more by checking out our guide on the signs and costs associated with furnace replacement. An expert diagnosis doesn't just fix the immediate problem; it protects your long-term investment.
Still Have Questions About Your Heating Problems?
Even after you've checked all the usual suspects, it's normal to have a few more questions. When your home is cold, you want clear answers, not confusing jargon. We get it. Here are some of the most common questions we hear from homeowners trying to figure out why their heat isn't working.
Our goal is to cut through the confusion and give you the practical info you need to decide what to do next, whether that’s a simple fix you can handle yourself or knowing when it’s time to call in a pro.
Why Is My Furnace Blowing Cold Air When I Have the Heat On?
This is one of the top calls we get, and it usually points to one of a few things. The simplest culprit is your thermostat setting. If the fan is switched to “ON,” it’s going to run 24/7, even when the furnace isn't actively heating. That means you’ll feel cool air blowing through the vents between heating cycles. The quick fix? Switch it to “AUTO.”
Another very common cause is an overheated furnace. If your air filter is clogged with dust and debris, it can’t breathe. This restricted airflow makes the furnace work too hard and get dangerously hot, tripping a high-limit safety switch that shuts off the burners. The fan, however, keeps running to cool the unit down, and that’s the cold air you’re feeling. It could also be a problem with the ignition system, like a bad ignitor or a dirty flame sensor that’s preventing the furnace from lighting in the first place.
How Often Should I Really Change My Air Filter?
The answer isn't one-size-fits-all; it really depends on the type of filter you use and what’s going on inside your home. But staying on top of it is probably the single best thing you can do to prevent heating headaches.
Here are some good starting points:
Basic Fiberglass Filters: These are the cheap, flimsy ones. They need to be changed every 30 days, no exceptions.
Pleated Filters: These offer better filtration and can typically last up to 90 days. They're a great middle-ground for most homes.
But think of those as minimums. If you have pets that shed a lot, live in a dusty part of town, or have family members with allergies or asthma, you should be checking your filter every single month. A clean filter is the cheapest insurance policy you can buy for your HVAC system.
Key Insight: Your air filter is like the lungs of your HVAC system. When it gets clogged, it’s like trying to breathe through a straw. The whole system has to strain, leading to overheating, poor performance, and extra wear and tear on expensive parts like the blower motor.
Is It Normal for a Heat Pump to Blow Cool Air in the Winter?
Sometimes, yes! It might sound strange, but a heat pump will occasionally blow cool air when it goes into its defrost cycle. This is a totally normal and necessary function. In cold, wet weather, ice can build up on the outdoor coils. To melt it off, the heat pump briefly reverses its operation for a few minutes. You might feel a bit of cool air during this short cycle, but it should switch back to heating quickly.
However, if your heat pump is constantly pushing out cool air, that’s a red flag. It could signal a serious issue like a refrigerant leak, a bad reversing valve (the component that switches from heating to cooling), or even a failing compressor. These are complex problems that definitely aren't DIY-friendly and need a certified technician to handle safely.
What’s the Average Cost to Fix a Furnace That’s Not Heating?
The cost can swing wildly depending on what’s actually wrong. A simple fix, like swapping out a dirty air filter, will only set you back about $20.
If you need to call a professional, the costs generally fall into a few tiers:
Minor Repairs: Things like cleaning a flame sensor or replacing a faulty thermostat typically run between $150 and $400.
Moderate Repairs: For parts like a new furnace ignitor or a draft inducer motor, you're likely looking at a cost of $300 to $800.
Major Repairs: Big-ticket items, like replacing the main control board or the blower motor, can easily go over $1,000.
Our advice? Always ask for a clear, itemized quote before you give the green light for any work. No one likes surprise charges on their final bill.
If you’ve gone through this list and your vents are still blowing cold, it’s time to bring in the experts. The certified technicians at Covenant Aire Solutions are ready to find the root of the problem and get the heat back on fast. Contact us today for reliable service you can count on.