Your Ultimate HVAC Install Checklist: 7 Steps for 2025
- Jul 16, 2025
- 13 min read
A new HVAC system represents a significant investment in your property's comfort, efficiency, and value. However, the success of this investment doesn't just depend on the quality of the equipment; it hinges on the precision of the installation. A rushed or incomplete setup can lead to years of high energy bills, poor performance, and premature system failure. To empower homeowners and property managers, we've developed the ultimate HVAC install checklist.
This comprehensive guide breaks down the seven critical stages of a professional installation, from initial calculations to the final system sign-off. By understanding these essential steps, you can confidently oversee the process, ask your contractor informed questions, and verify that your new system delivers optimal performance from day one. In Arizona's demanding climate, getting the installation right the first time is non-negotiable for long-term reliability and comfort. This checklist serves as your essential roadmap to achieving a flawless and efficient HVAC system that will serve you well for years to come, ensuring peace of mind and maximum return on your investment.
1. Load Calculation and System Sizing
The absolute cornerstone of any successful HVAC installation is a precise load calculation, often referred to as a "Manual J" calculation. This engineering-based process is the first critical step in our HVAC install checklist because it scientifically determines the exact heating and cooling capacity your property requires. It meticulously analyzes how your home gains and loses heat, ensuring the equipment you invest in is perfectly matched to your space.
An oversized system will short-cycle, turning on and off too frequently. This leads to poor humidity control, increased wear and tear, and wasted energy. Conversely, an undersized unit will run constantly without ever reaching the desired temperature, driving up utility bills and straining components. Proper sizing is the key to achieving optimal efficiency, consistent comfort, and a longer lifespan for your equipment.
The Sizing Process in Action
A certified technician performs a Manual J calculation by measuring and assessing dozens of factors. These include:
Building Envelope: Dimensions of walls, ceilings, floors, windows, and doors.
Insulation: The R-value of insulation in walls, attics, and crawlspaces.
Air Leakage: The tightness of the building's construction.
Occupancy & Internal Gains: The number of occupants and heat generated by appliances and lighting.
Local Climate: Specific weather data for your region, including average temperatures and solar gain.
For example, a historic Tucson home with thick adobe walls and single-pane windows will have a vastly different heat load than a modern, well-insulated new build of the same square footage. A professional calculation prevents guesswork, ensuring you don’t pay for a 4-ton unit when a 3-ton system is the perfect fit.
The following infographic illustrates the core components that feed into this crucial calculation.
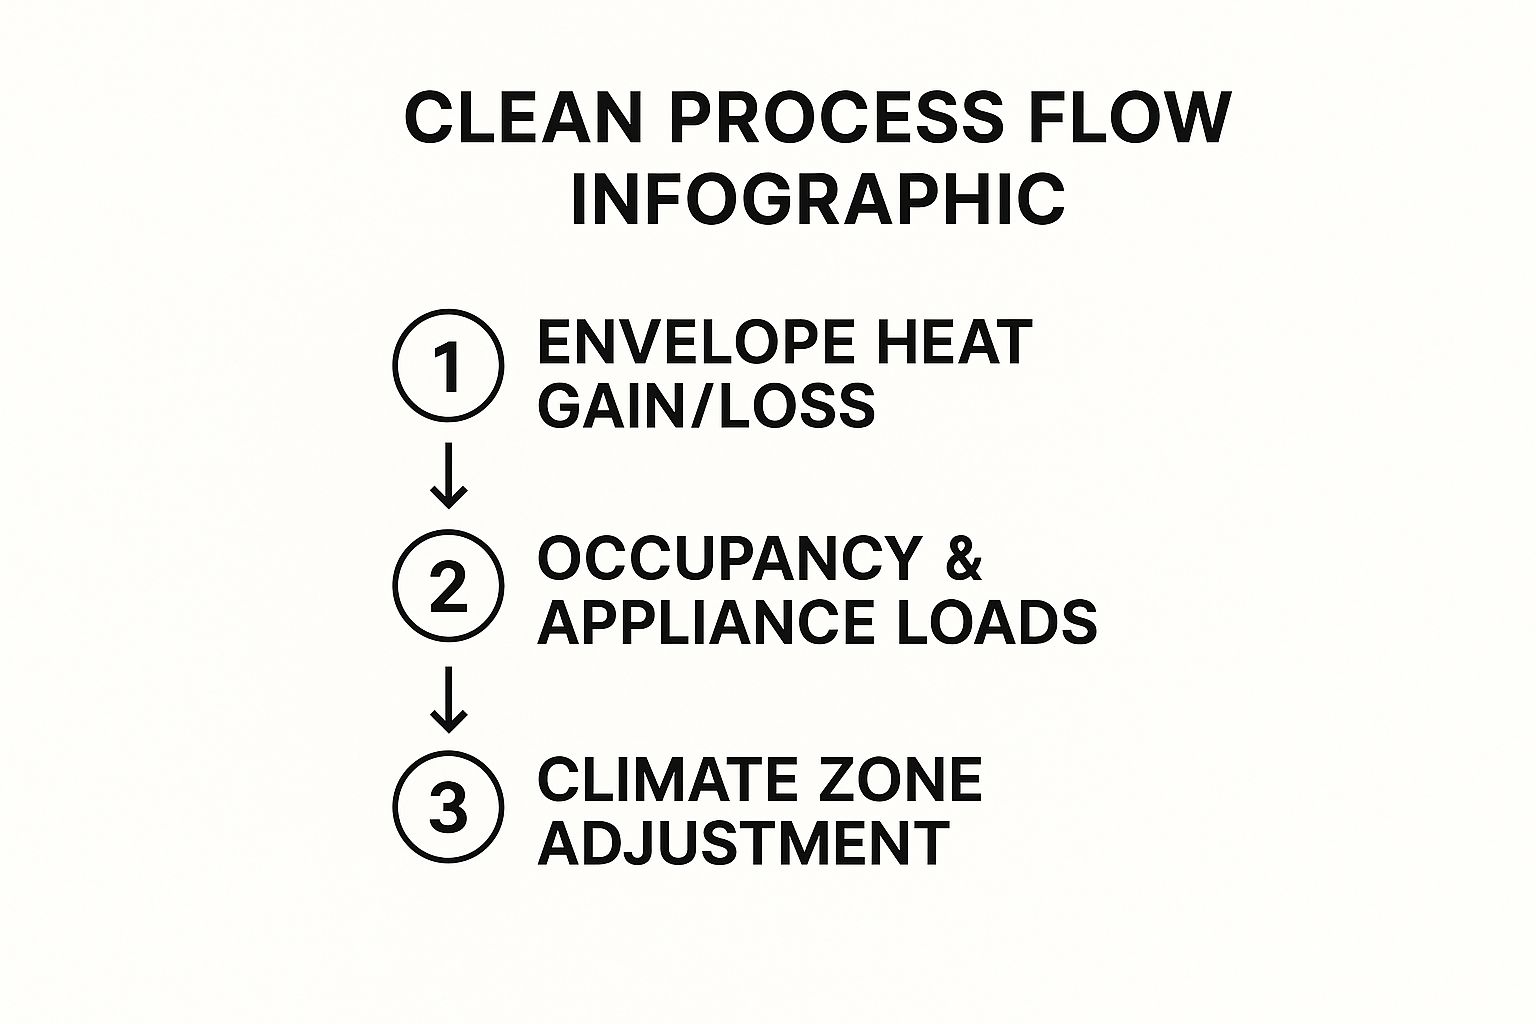
This visual flow highlights how a comprehensive load calculation moves beyond simple square footage to include structural, internal, and environmental factors for a truly accurate result. To get a deeper understanding of this vital first step, you can learn more about how to size an air conditioner for your home.
2. Ductwork Design and Installation
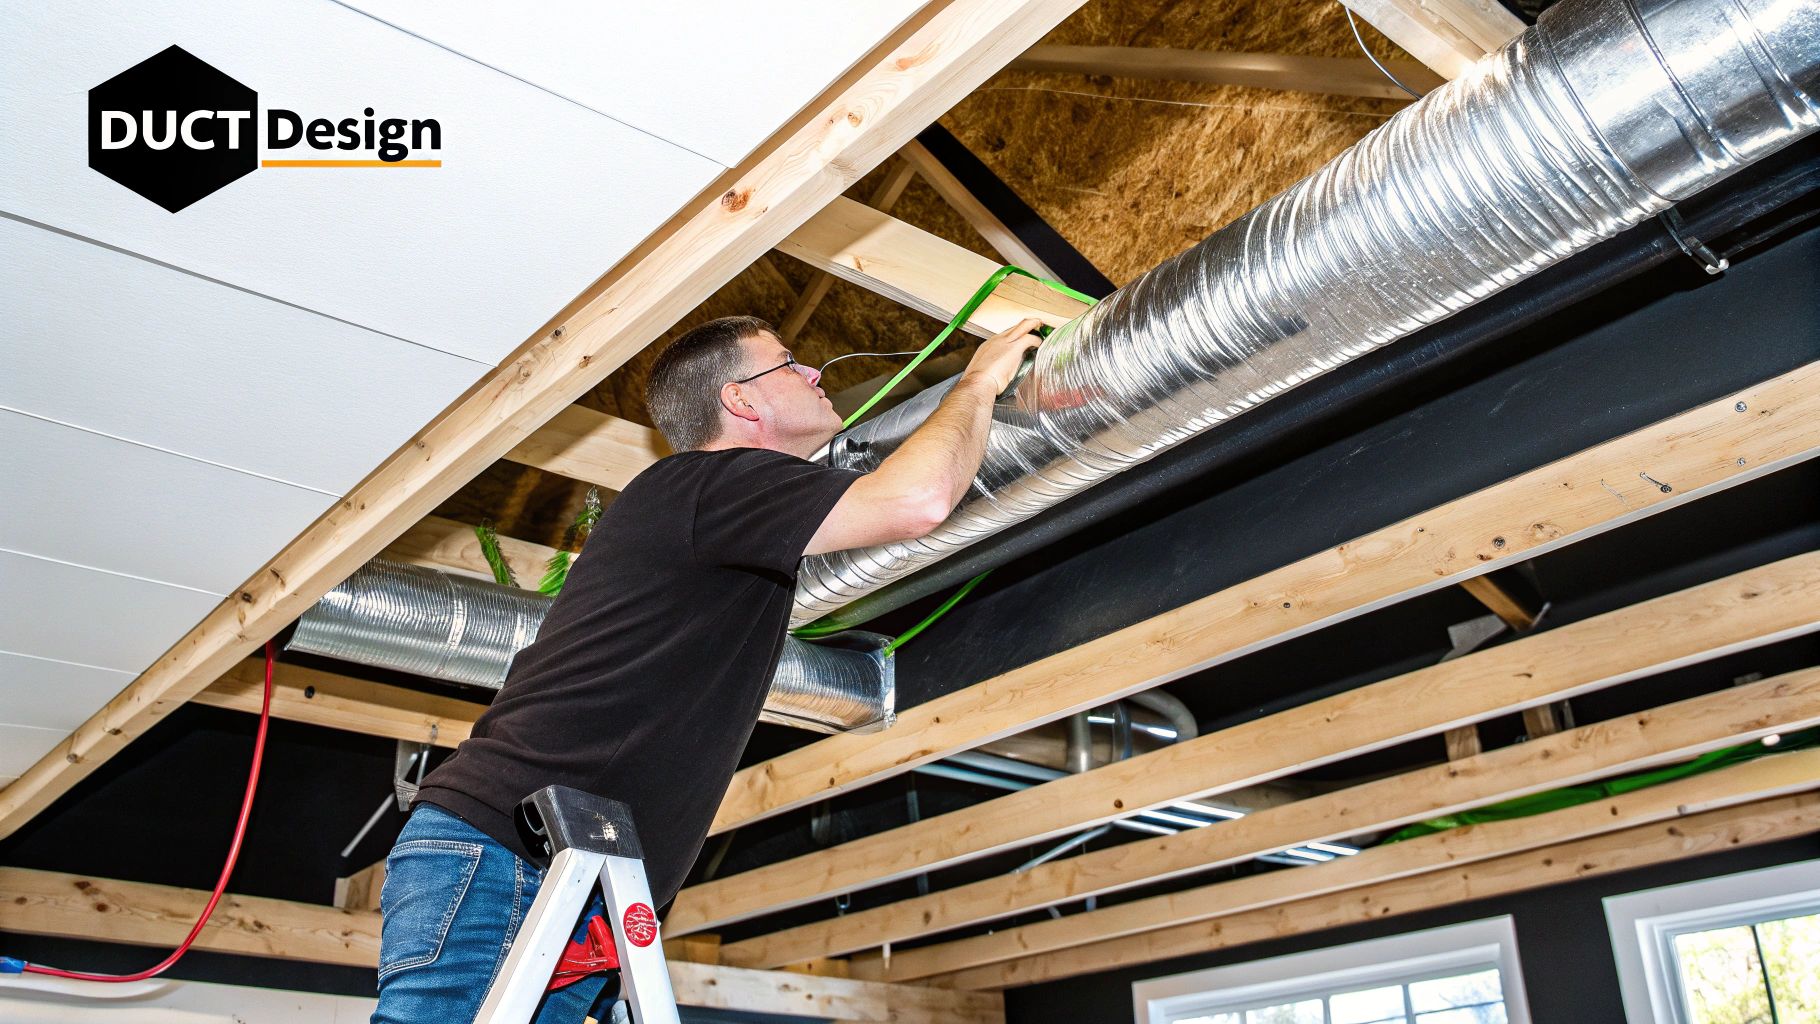
If the HVAC unit is the heart of the system, the ductwork is the circulatory system responsible for delivering comfort. Proper ductwork design and installation is a critical component of any HVAC install checklist, ensuring the conditioned air produced by your new equipment actually reaches every room efficiently and quietly. This involves a comprehensive plan for duct layouts, sizes, and materials, creating a balanced and effective air distribution network.
Poorly designed or installed ducts can lose up to 30% of conditioned air through leaks, holes, and bad connections. This forces your system to work harder, negates the efficiency gains of a high-SEER unit, and results in uncomfortable hot and cold spots throughout your property. A professional approach, guided by standards from organizations like the Sheet Metal and Air Conditioning Contractors' National Association (SMACNA), guarantees optimal airflow and performance.
The Ductwork Process in Action
A technician designs the duct system based on the Manual J load calculation and the building's layout. This ensures each room receives the correct volume of air.
Trunk-and-Branch System: In a typical Tucson-area ranch home, a large central duct (the trunk) runs down a main hallway, with smaller ducts (branches) extending to individual rooms.
Zoned Systems: For a two-story home, separate supply and return ducts for each floor allow for independent temperature control and improved efficiency.
Proper Sizing and Sealing: Ducts are sized to match the required airflow (CFM) for each space. All joints, seams, and connections must be sealed with mastic or UL 181-rated tape, not just "duct tape," to prevent costly air leakage.
Return Air Pathways: Adequate return air ducts are just as important as supply ducts. They must be sized correctly to pull the right amount of air back to the unit, preventing pressure imbalances and system strain.
For example, a common installation mistake is using undersized return ducts. This starves the system for air, reducing efficiency and putting stress on the blower motor. A professional ensures the return side is large enough to handle the system’s total airflow, a step that is fundamental to a quality installation.
Ensuring your ducts are clean is also a key part of maintaining system efficiency and air quality. You can explore how professional services maintain your air ducts for optimal performance.
3. Electrical Connections and Safety
A fundamental yet often overlooked part of any professional HVAC install checklist is the meticulous handling of electrical connections. This critical stage involves far more than simply plugging in the new unit. It ensures every wire, circuit, and safety device is installed to meet stringent national and local codes, safeguarding your property, your equipment, and your family from electrical hazards.
Incorrect wiring is a leading cause of premature equipment failure, tripped breakers, and, in worst-case scenarios, electrical fires. Professional technicians ensure that dedicated circuits have the correct voltage and amperage, that wiring is properly gauged to handle the electrical load, and that all safety mechanisms, like disconnect switches, are installed correctly. This attention to electrical detail guarantees the system operates reliably and safely for its entire lifespan.
The Wiring Process in Action
A licensed and qualified technician will execute the electrical setup with precision, following manufacturer specifications and the National Electrical Code (NEC). This process includes verifying and installing several key components:
Dedicated Circuits: A central air conditioner requires a dedicated 240V circuit, while the furnace may use a standard 120V circuit. These must be properly installed with appropriately sized breakers.
Disconnect Switch: A weather-proof disconnect switch must be installed within sight of the outdoor condenser unit. This allows for safe power cutoff during maintenance.
Control Wiring: Low-voltage (24V) wiring is run from the indoor unit to the thermostat. These connections must be clean and secure to ensure accurate communication between the system and its controller.
Proper Grounding: All equipment must be correctly grounded to protect against electrical surges and prevent shock hazards.
For example, a technician installing a new rooftop unit for a commercial property in Tucson will not only run the main power but also install GFCI protection as required by code for outdoor receptacles. They will also meticulously label each circuit in the electrical panel, a small step that proves invaluable for future troubleshooting and service. This systematic approach, guided by standards from organizations like the National Electrical Contractors Association (NECA), prevents dangerous guesswork and ensures a safe, code-compliant installation.
4. Refrigerant Line Installation and Testing
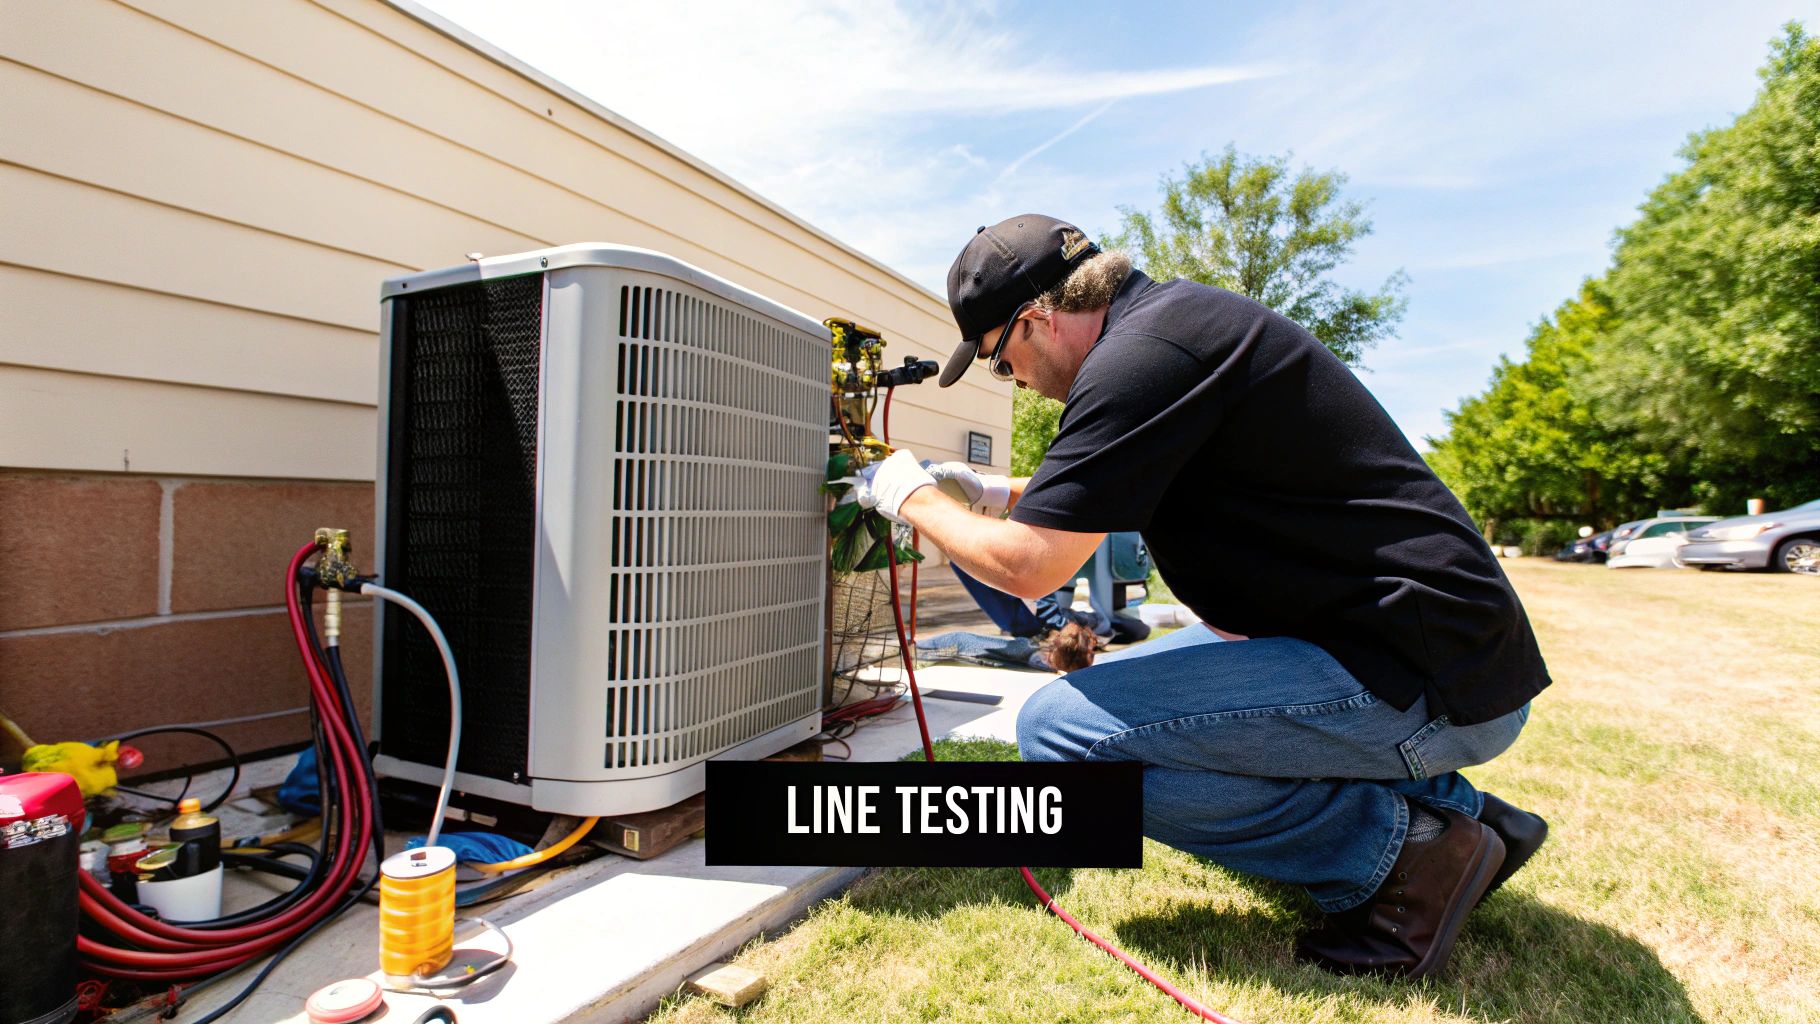
The refrigerant lines are the circulatory system of your HVAC unit, transporting refrigerant between the indoor and outdoor components to move heat. Proper installation of this piping is a non-negotiable part of any professional HVAC install checklist. This critical process ensures the system operates at its specified efficiency, prevents catastrophic component failure, and protects the environment from harmful leaks.
A poorly installed line set can lead to restricted refrigerant flow, oil return issues that starve the compressor, and leaks that diminish performance over time. Meticulous attention to brazing, insulation, evacuation, and charging is what separates a short-lived, problematic system from a reliable, high-performance one. It's the technical heart of the physical installation process.
The Installation and Testing Process in Action
A certified technician follows a strict, multi-step procedure to guarantee the integrity of the refrigerant circuit. This involves more than just connecting two copper pipes.
Proper Sizing & Routing: The line set diameter must match the manufacturer's specifications for the system's capacity and the length of the run. Lines are routed with a slight pitch to ensure lubricating oil can return to the compressor.
Brazing with Nitrogen: When joining copper sections, technicians use a high-temperature brazing technique. A continuous flow of nitrogen is purged through the pipes during this process to prevent oxidation and internal contamination, which can clog sensitive system components.
Insulation: The larger of the two lines, the suction line, must be fully insulated to prevent condensation ("sweating") and to stop it from absorbing excess heat, which would reduce system efficiency.
Pressure & Vacuum Testing: First, the lines are pressurized with dry nitrogen to check for any leaks. Then, a deep vacuum is pulled using a micron gauge to remove all air and moisture. A proper vacuum down to 500 microns or less ensures no contaminants are left to corrupt the refrigerant.
Charging: Finally, the precise amount of refrigerant, specified by the manufacturer, is weighed into the system. This step is crucial for performance; both undercharging and overcharging will damage the unit and increase energy consumption.
This video demonstrates the essential practice of pulling a vacuum, a key step in removing contaminants before charging the system. For a Tucson homeowner, correct line set installation is vital for handling the extreme summer heat, as even a small flaw can significantly impact the air conditioner's ability to cool effectively and efficiently.
5. Thermostat and Control System Setup
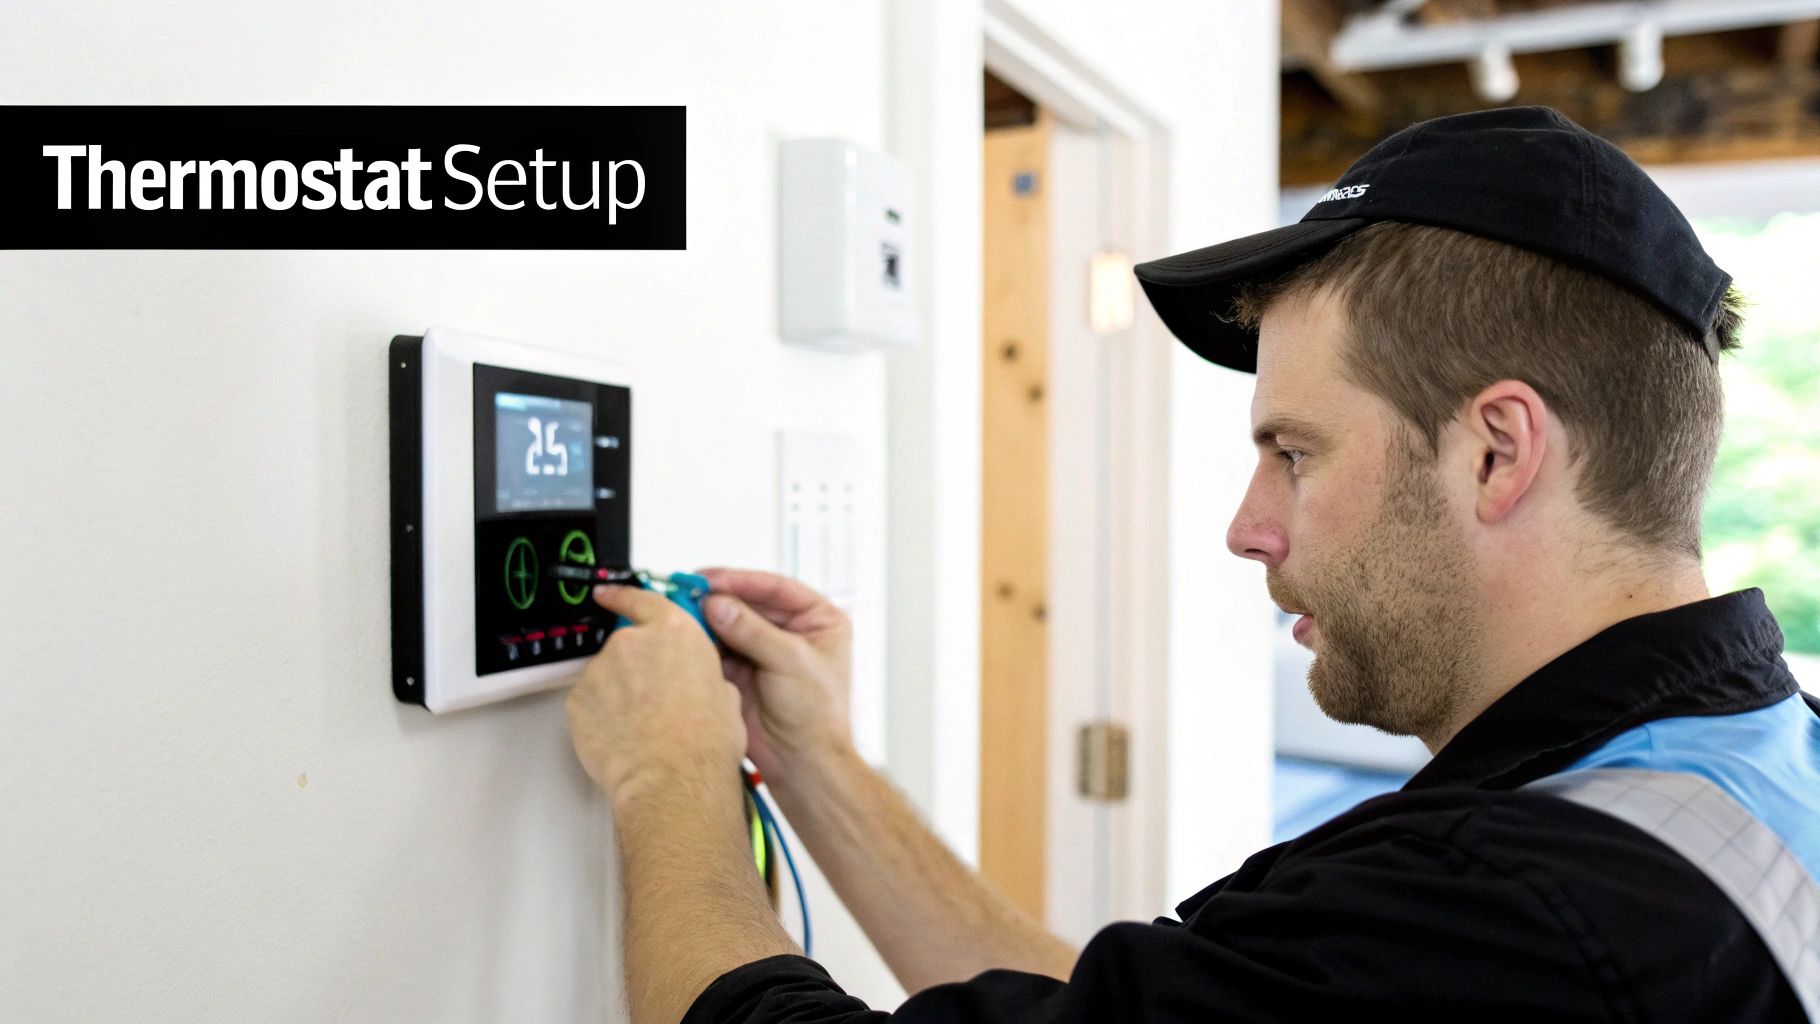
The thermostat is the brain of your entire HVAC system, acting as the primary interface between you and your home's comfort. A crucial part of any professional HVAC install checklist is the meticulous installation and configuration of this control system. Proper setup ensures the equipment operates as designed, responds accurately to your commands, and maximizes energy efficiency.
Simply mounting a thermostat on the wall is not enough. The process involves precise wiring, strategic placement, and careful programming. An incorrectly placed thermostat, for example, can get false readings from direct sunlight or drafts, causing the system to run inefficiently. Professional setup guarantees your new HVAC system is controlled by a well-calibrated, properly located, and correctly programmed device.
The Control Setup Process in Action
A technician's approach to thermostat installation is systematic, ensuring every function works flawlessly from day one. This involves more than just connecting wires; it's about integrating the control system with the HVAC unit for optimal performance.
Strategic Placement: The thermostat must be mounted on an interior wall, away from direct sunlight, drafts from windows, and heat sources like lamps or kitchen appliances. This central location provides a more accurate reading of the home's average temperature.
Correct Wiring & Configuration: Technicians use the proper gauge wire and ensure secure connections for reliable communication. They then configure the thermostat for the specific equipment installed, whether it’s a standard furnace, a multi-stage heat pump with auxiliary heat, or a dual-fuel system.
System Calibration & Testing: After installation, the thermostat's reading is checked against a calibrated thermometer to ensure accuracy. The technician will then test all modes: heating, cooling, fan-only, and emergency heat (if applicable) to confirm the system responds correctly.
Programming & User Training: For smart or programmable models, the technician will help set up initial schedules for energy savings. A crucial final step is walking you through the basic functions, ensuring you know how to operate your new system with confidence.
For instance, installing an Ecobee smart thermostat with remote sensors requires placing those sensors in different rooms to create a more balanced temperature throughout a home, a step often overlooked in DIY installations. This professional attention to detail ensures your system delivers true whole-home comfort and efficiency.
6. Ventilation and Air Quality Systems
An HVAC installation is about more than just temperature; it's about creating a healthy and comfortable indoor environment. A crucial part of any modern HVAC install checklist involves integrating systems for proper ventilation and air quality. As homes become more tightly sealed for energy efficiency, they can trap pollutants, moisture, and stale air inside. A dedicated ventilation strategy ensures a continuous supply of fresh, filtered air while expelling contaminants.
This process is vital for preventing issues like mold growth, lingering odors, and the buildup of allergens and volatile organic compounds (VOCs). Systems like Energy Recovery Ventilators (ERVs) bring in fresh air while transferring heat and humidity to the outgoing stale air, preserving energy. Paired with high-efficiency filtration and humidity control, these components transform your HVAC system from a simple heater and cooler into a comprehensive life-support system for your home.
Key Ventilation and IAQ Components
A professional installation considers how to best manage airflow and purity based on your home's specific needs. This often involves a multi-pronged approach:
Mechanical Ventilation: Installing an Energy Recovery Ventilator (ERV) or Heat Recovery Ventilator (HRV) is standard practice in new, airtight homes. It exchanges indoor and outdoor air while minimizing energy loss, complying with modern building codes and ASHRAE 62.2 standards.
Targeted Exhaust: Proper sizing and installation of exhaust fans in kitchens and bathrooms are critical. These fans must be ducted directly to the outside to effectively remove moisture and odors at their source.
Advanced Filtration: For allergy sufferers or health-conscious families, upgrading to a high-MERV filter or a dedicated HEPA filtration system can capture microscopic particles like pollen, dust mites, and bacteria.
Humidity Control: In a climate like Tucson's, managing moisture is essential. A whole-home dehumidifier integrated into the HVAC system prevents the sticky, uncomfortable feeling of high indoor humidity and protects your home from mold.
For instance, a tightly built modern home in Marana would benefit immensely from an ERV to ensure fresh air without compromising its energy-efficient design. Meanwhile, an older home with known allergy issues might prioritize the installation of a whole-house air purifier and a robust dehumidification system. Properly controlling humidity is a cornerstone of maintaining a healthy indoor environment. If you want to dive deeper into this topic, you can learn more about how to control humidity in your house for a healthier home.
7. System Startup and Commissioning
The final, critical phase of any professional HVAC install checklist is the system startup and commissioning process. This isn't just about flipping a switch; it's a meticulous, systematic procedure of testing, adjusting, and verifying that every component is installed and functioning exactly as designed. This step ensures the system operates safely, efficiently, and in compliance with manufacturer specifications, which is often a requirement for validating your warranty.
A proper commissioning validates the performance promised during the design and selection phases. It confirms that the unit delivers the right amount of conditioned air to each room, that all safety mechanisms are operational, and that the controls are accurately calibrated. Neglecting this process can lead to immediate performance issues, reduced efficiency, and premature component failure, undermining the entire investment.
The Commissioning Process in Action
A certified technician will follow a detailed, multi-point checklist that is part science and part art, ensuring the system performs optimally from day one. This verification includes:
Manufacturer Startup Procedures: Adhering strictly to the manufacturer's specific startup sequence to prevent damage and ensure warranty compliance.
Performance Testing: Checking refrigerant pressures, electrical readings (voltage and amperage), and temperature differentials across the coil to confirm the system is running at peak efficiency.
Airflow Balancing: Measuring and adjusting the airflow at each individual register to ensure consistent comfort throughout the property.
Safety Control Verification: Testing all safety shutoffs, like high-pressure switches and limit controls, to confirm they will protect the unit in an emergency.
Control Calibration: Calibrating thermostats and sensors to ensure they accurately read and respond to the home's conditions.
For instance, during a new residential installation in a multi-story Tucson home, a technician might find that upstairs rooms are receiving too much airflow while downstairs rooms are starved. By adjusting dampers in the ductwork during commissioning, they balance the system, preventing hot spots and ensuring even temperatures. This final quality control step transforms a collection of installed parts into a fully functional, high-performance climate control system.
This meticulous startup is the first step in a lifetime of proper care. To keep your system running as efficiently as it did on day one, it's vital to follow a consistent maintenance plan. You can get more details by exploring your essential HVAC maintenance schedule.
7-Step HVAC Installation Checklist Comparison
Aspect | Load Calculation and System Sizing | Ductwork Design and Installation | Electrical Connections and Safety | Refrigerant Line Installation and Testing | Thermostat and Control System Setup | Ventilation and Air Quality Systems | System Startup and Commissioning |
|---|---|---|---|---|---|---|---|
Implementation Complexity 🔄 | Moderate - requires detailed calculations and software training | High - involves precise layout, sealing, and balancing | Moderate - must comply with codes, requires licensed electrician | High - specialized tools and EPA certification required | Moderate - wiring and programming with compatibility concerns | Moderate to High - integration of multiple systems | High - thorough testing, adjustment, requires skilled techs |
Resource Requirements ⚡ | Software tools, accurate measurements, trained personnel | Materials (ducts, sealants), space, skilled installers | Licensed electrician, testing tools | Specialized HVAC tools, refrigerant handling equipment | Control devices, programming tools, proper wiring | Fans, filters, sensors, energy recovery devices | Testing equipment, documentation tools, skilled technicians |
Expected Outcomes 📊 | Correct equipment sizing, energy efficiency, comfort consistency | Balanced airflow, reduced energy loss, noise reduction | Safe electrical operation, code compliance, equipment protection | Leak-free refrigerant lines, optimal system performance | Precise temp control, energy savings, user-friendly interface | Improved IAQ, moisture control, energy-efficient ventilation | Verified system operation, optimized performance, warranty validation |
Ideal Use Cases 💡 | New installations, remodels, custom building designs | New building duct installations, system upgrades | All HVAC electrical hookups, equipment replacements | HVAC refrigerant piping installations and replacements | Smart/home automation, retrofit or new HVAC control systems | Homes/buildings requiring fresh air and air quality solutions | Post-installation verification, performance tuning |
Key Advantages ⭐ | Prevents oversize/undersize, reduces costs, extends system life | Maximizes airflow efficiency, enhances comfort and system lifespan | Ensures safety, reduces fire risk, meets regulations | Maximizes system lifespan, prevents leaks, environmental compliance | Energy savings, remote control, system diagnostics | Healthier indoor environment, meets codes, reduces energy use | Detects issues early, improves efficiency, meets warranty terms |
From Checklist to Comfort: Partnering with the Right Professionals
Navigating the complexities of an HVAC installation can feel daunting, but this comprehensive checklist serves as your roadmap to a successful, efficient, and long-lasting system. We have journeyed through the critical stages, from the foundational science of load calculations to the final, meticulous steps of system commissioning. Each point on this list is not merely a suggestion; it represents a vital component in the chain of quality that defines a professional installation.
A rushed or incomplete process can lead to significant problems down the line, including diminished comfort, inflated energy bills, and a drastically shortened lifespan for your equipment. For homeowners and business managers in Tucson and the surrounding communities, understanding this hvac install checklist empowers you to ask the right questions and demand the highest standards from your chosen contractor. It transforms you from a passive customer into an informed partner in your own comfort and investment.
Key Takeaways for a Flawless Installation
Let's distill the most crucial lessons from our checklist:
Precision Over Guesswork: The most critical takeaway is that a high-performance HVAC system is built on data, not assumptions. Proper Manual J load calculations, correct ductwork design, and precise refrigerant charging are non-negotiable for achieving peak efficiency and comfort.
Safety is Paramount: Electrical connections and refrigerant handling are not areas for compromise. Ensuring your installation team adheres strictly to local codes and safety protocols protects your property, your family, and your investment.
The System is More Than the Box: True climate control extends beyond just the heating and cooling unit. It encompasses the entire ecosystem, including thermostat controls, ductwork integrity, and advanced indoor air quality solutions that impact your health and well-being.
The Final Check Matters Most: The commissioning process is the final quality assurance step. This detailed system startup and testing phase verifies that every component is working in harmony as designed, catching potential issues before they become major headaches.
Ultimately, mastering this hvac install checklist is about safeguarding your investment and ensuring your home or commercial property becomes a sanctuary of consistent comfort. For residents of Southern Arizona, from year-round homeowners to seasonal snowbirds, this knowledge is your first line of defense against the extreme climate. By prioritizing a thorough, professional installation, you are not just buying an HVAC unit; you are investing in years of reliable performance, energy savings, and a healthier indoor environment.
Ready to ensure your new system is installed with the meticulous attention to detail this checklist demands? The certified professionals at Covenant Aire Solutions treat this process as our unwavering standard for every project in the Tucson area. Partner with us for an installation experience that prioritizes integrity, technical excellence, and your complete peace of mind.