How to Clean Condenser Coils: Easy DIY Guide
- Aug 10, 2025
- 14 min read
Updated: Aug 11, 2025
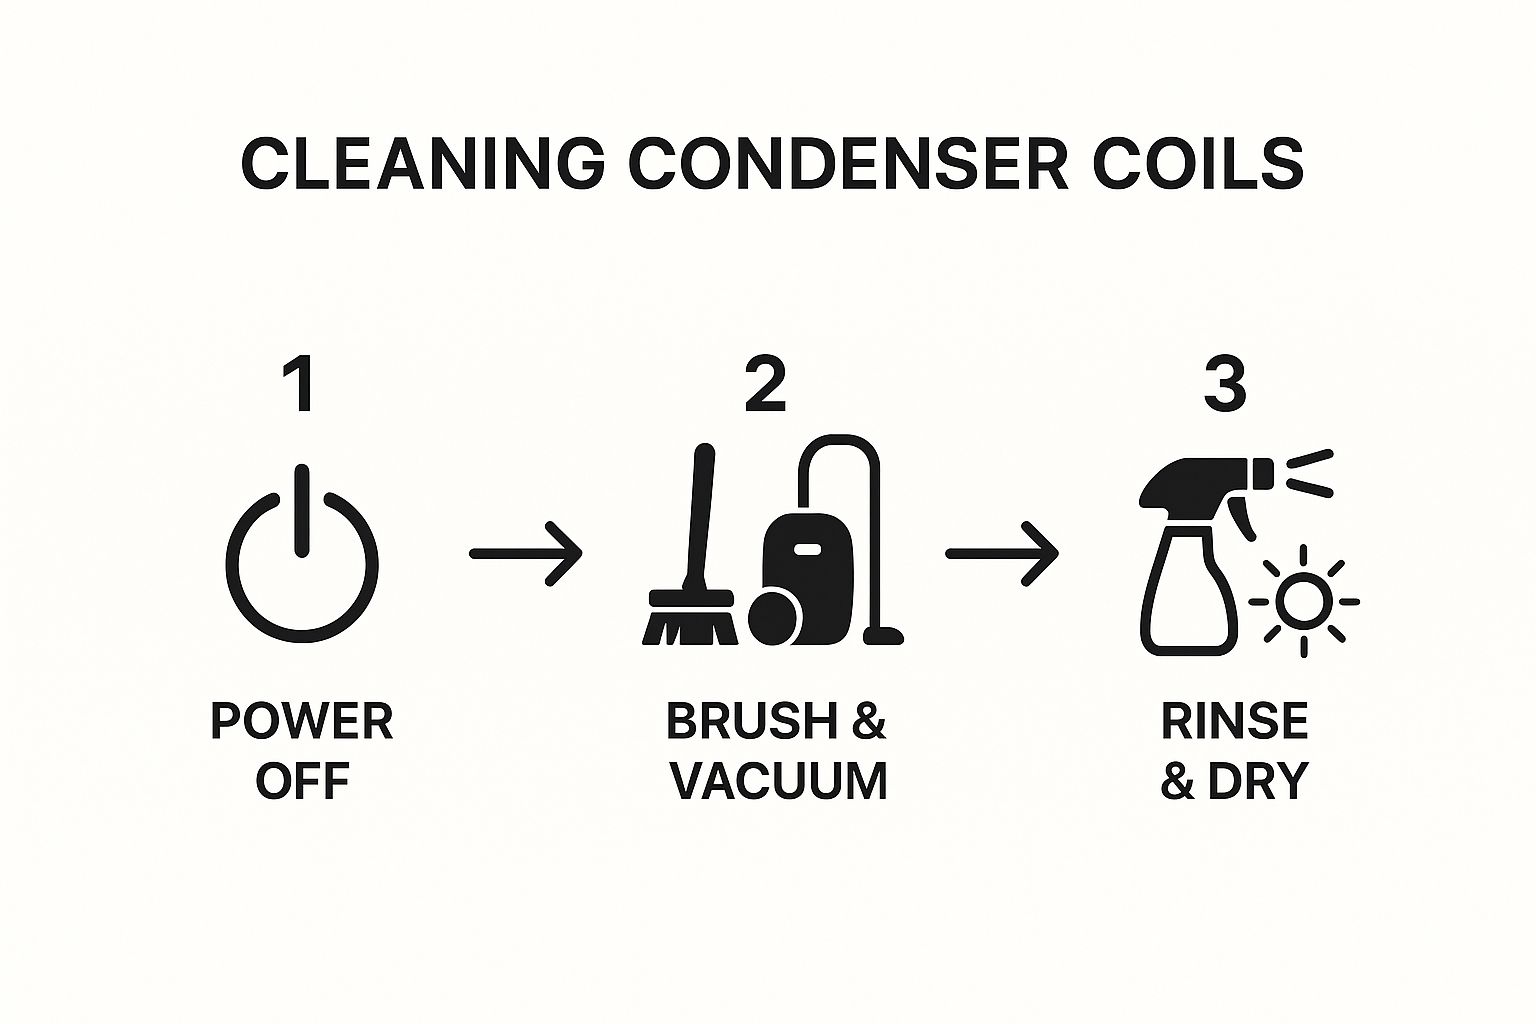
Learning how to clean your HVAC condenser coils is surprisingly straightforward. It often starts with just two simple steps: cutting the power and giving the outdoor unit a good rinse with a garden hose. This quick action clears away the worst of the gunk, instantly improving airflow and helping your system breathe easier. But knowing why this simple task is so crucial is the key to heading off expensive repairs and shocking energy bills down the line.
Why Cleaning Your Condenser Coils Is a Critical Task

When these coils get caked in dirt, grass clippings, dust, and pollen, they can't do their job. It's like trying to cool off on a hot day while wearing a thick winter coat. This forces your entire system, especially the compressor, to work much harder and longer just to keep your home comfortable.
To truly understand the difference, just look at the direct impact of dirty versus clean coils on your system's performance and your wallet.
Impact of Dirty vs Clean Condenser Coils
Metric | Dirty Coils (Neglected) | Clean Coils (Maintained) |
|---|---|---|
Energy Consumption | Significantly higher; can increase usage by up to 30% | Optimal; runs efficiently as designed |
Cooling Performance | Struggles to cool; runs longer to reach set temperature | Cools home quickly and effectively |
Component Strain | High stress on compressor and fan motor, leading to early failure | Minimal strain, promoting a longer system lifespan |
Monthly Utility Bills | Noticeably higher month after month | Lower and more predictable |
Repair Frequency | Prone to frequent, costly breakdowns | Fewer unexpected repairs |
System Lifespan | Significantly shortened | Can operate reliably for 10-15+ years |
The table above isn't just data; it represents a choice between proactive care and reactive, expensive fixes.
The True Cost of Neglect
This extra strain isn't some minor inconvenience, it hits your wallet directly. A struggling AC unit is an energy hog, leading to utility bills that creep up month after month.
The connection between clean coils and efficiency is not trivial. A dirty system can easily become one of the biggest energy hogs in your home, silently driving up your monthly expenses.
On top of that, the constant overwork causes accelerated wear and tear on the most important parts of your system, like the compressor and fan motor. These aren’t cheap fixes. Their failure often leads to a complete system breakdown, which, from my experience, almost always happens during the most sweltering days of the year.
More Than Just Efficiency
Beyond just saving money, keeping your coils clean delivers several other key benefits for your home and your comfort:
Improved Cooling Performance: Clean coils transfer heat like they're supposed to, meaning your AC cools your home faster and more evenly.
Extended System Lifespan: By taking the pressure off the compressor, you can add years to the life of your entire HVAC system.
Better Indoor Air Quality: A clean outdoor unit means less dust and fewer allergens getting kicked up and potentially circulated around your system.
According to the U.S. Department of Energy, simply keeping your condenser coils clean can boost your HVAC system's efficiency by up to 30%. That's a massive reduction in energy use from a simple maintenance task.
A quick, annual cleaning is a fundamental part of responsible homeownership. While this guide will walk you through the DIY process, making it part of a professional plan is an even smarter move. Looking into a dedicated AC maintenance program ensures this critical task is handled correctly and never forgotten.
Assembling Your Tools and Preparing the Area
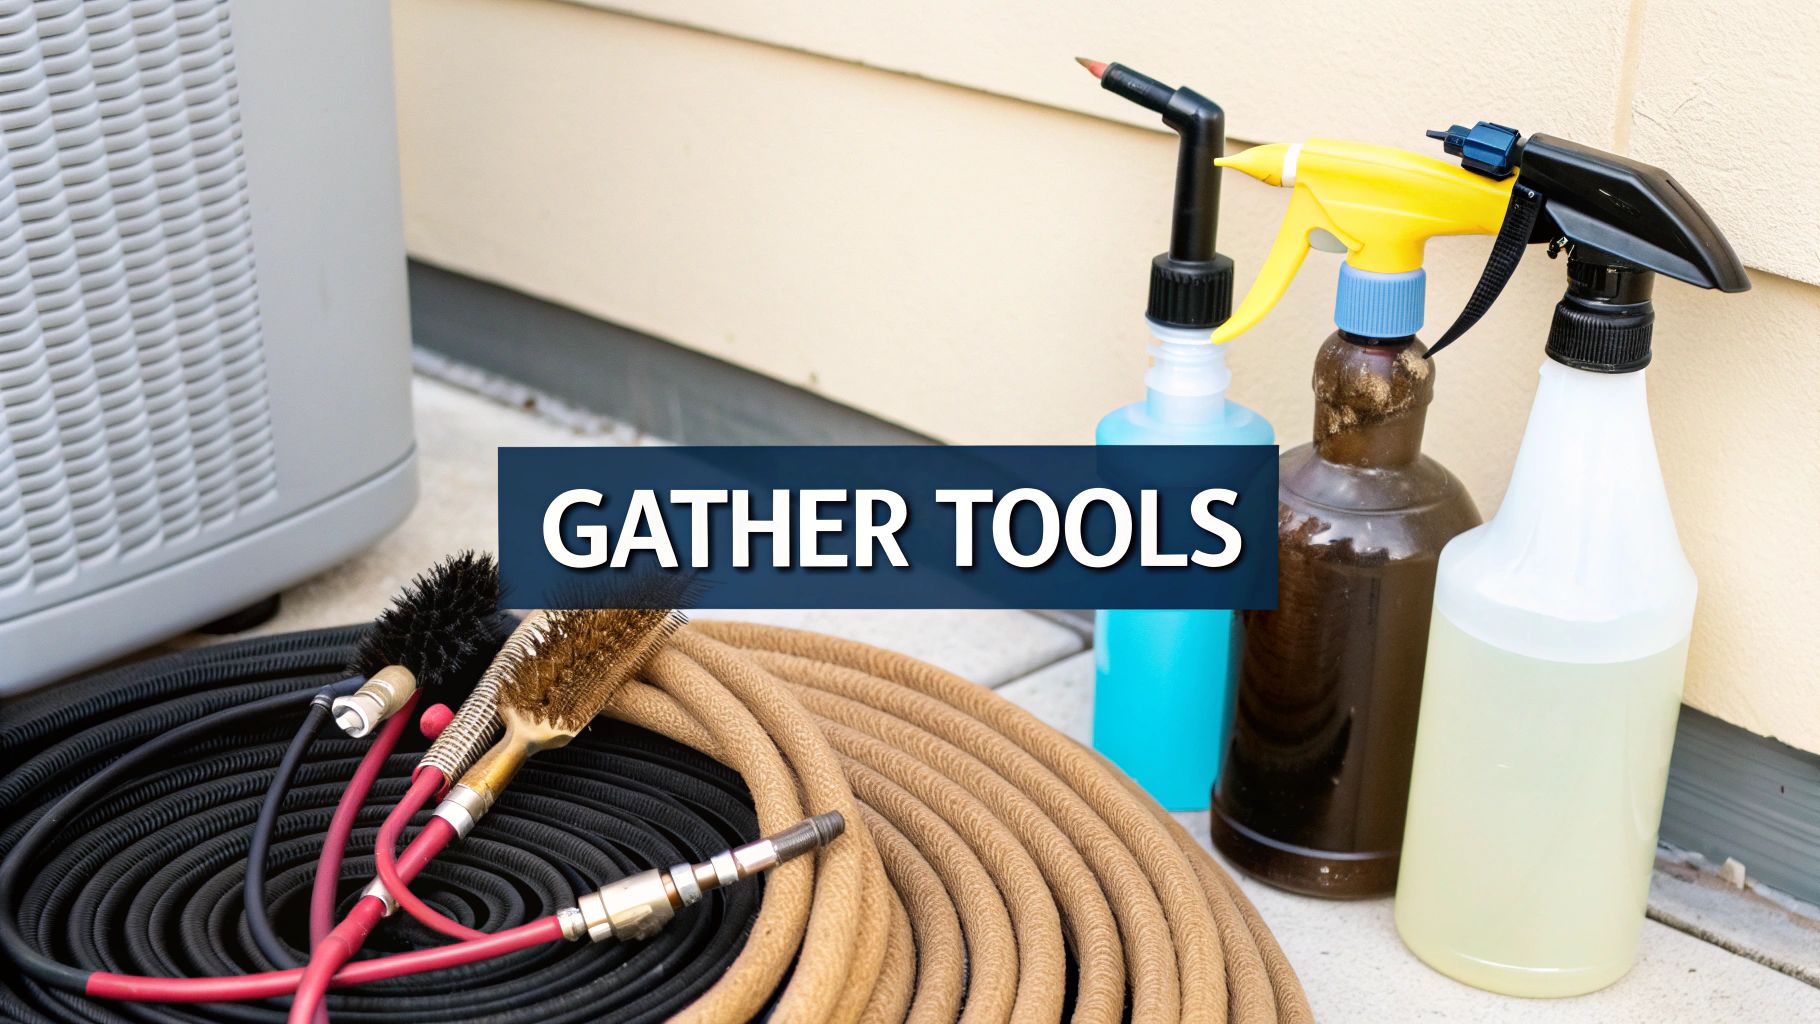
You don't need a professional-grade setup. Most of what you'll use is probably lying around your house already. Getting everything within arm's reach is half the battle won.
Your Essential Tool and Supply Checklist
Before you dive in, let’s get your gear in order. Here’s a straightforward list of what you’ll need to do a thorough and safe cleaning job.
Safety Gear: Don't skip this. Grab a pair of protective gloves and some safety goggles. Those little aluminum fins on the coil are sharper than they look, and you definitely don't want any cleaner or grime splashing in your eyes.
Garden Hose with a Spray Nozzle: You’ll need a nozzle that gives you a gentle, fan-like spray. I can't stress this enough: Never use a pressure washer. The intense blast will bend the delicate fins flat, effectively ruining your unit.
Soft Bristle Brush: An old paintbrush or a dedicated soft brush is perfect for coaxing out stubborn gunk like cottonwood fluff or dirt that’s been caked on for a season.
Coil Fin Comb: This little tool is optional but highly recommended. It’s cheap and lets you gently straighten out any bent fins, which is a game-changer for restoring proper airflow.
Commercial Coil Cleaner: For coils that are really grimy or greasy, a dedicated foaming coil cleaner is your best friend. If you’re just dealing with light dust and grass clippings, a simple water rinse might be all you need.
Beyond the cleaner itself, what you use to wipe things down matters, too. For a really detailed job, it's worth picking up some quality microfiber towels to get everything spotless.
Creating a Safe Work Environment
With your tools ready, it's time to prep the area around your outdoor condenser unit. This is where safety becomes the absolute top priority.
Before you touch anything on that unit, you have to cut the power completely. This is the one step you absolutely cannot skip.
Make sure the unit is fully de-energized by taking these two critical actions:
First, head inside and turn off the thermostat. Just switch it to the "Off" position.
Next, go back outside and shut off the power at the source. Look for a small metal box on the side of your house near the condenser unit, that's the electrical disconnect. Open it up and either pull out the handle or flip the breaker to "Off."
Once the power is confirmed off, give yourself some room to work. Trim back any bushes, weeds, or low-hanging branches to create at least a two-foot clearance around the entire unit. Then, using your gloved hands or a brush, sweep away all the big stuff, such as leaves, twigs, and grass clippings, from the outside of the unit. Getting this out of the way first makes the actual cleaning much faster and safer.
A Practical Walkthrough of the Cleaning Process
Alright, with your tools laid out and the area prepped, it’s time to get down to the actual cleaning. This part isn’t overly complicated, but you’ll want to move with a steady hand. The goal is to get a deep clean without accidentally damaging anything, especially those delicate aluminum fins.
Think of it this way: a gentle, thorough approach will always beat an aggressive, rushed one.
Removing the Outer Casing and Initial Debris
First things first, you need to get inside the unit. Most condenser units are protected by an outer grille or casing. You’ll usually find screws holding it in place at the corners or along the seams. Grab your screwdriver or nut driver, remove them, and, trust me on this, put them somewhere safe. A small magnetic tray or even just an old yogurt container will save you a headache later.
Once the screws are out, you can lift off the top panel. This panel typically holds the fan motor, so be really careful here. You don’t want to yank or strain the electrical wires. Just rest the panel gently on its side next to the unit, making sure there's no tension on the wiring.
Now that the coils are exposed, it's time to clear out the big stuff.
Clear by Hand: With your gloves on, start by pulling out any large clumps of leaves, cottonwood fluff, grass clippings, or anything else that’s obviously stuck between the fins.
Brush Away Surface Grime: Next, take your soft-bristle brush and gently sweep away the looser surface dirt. Always brush in the same direction as the fins (usually up and down) to avoid bending them.
Getting this initial debris out of the way makes the next steps much more effective. Otherwise, you’re just turning all that dry gunk into a muddy mess when you add water.
Applying Cleaner and Rinsing Correctly
This is where the real deep cleaning happens. Your approach will depend on whether you’re just using water or a dedicated foaming cleaner for a tougher job.
Here's the most critical rule for rinsing: Always spray from the inside of the unit out. This is non-negotiable. Spraying from the outside just pushes all the dirt and grime deeper into the unit, which is the exact opposite of what you want to do.
If your coils are just dealing with a light layer of dust, a simple water rinse might be all you need. Set your garden hose nozzle to a gentle, wide spray. Carefully rinse the fins from the inside, working your way from the top down. Keep going until you see the water running clear from the bottom.
For units with heavier buildup, a foaming coil cleaner is your best bet. Following the product's instructions, spray the cleaner liberally onto the outside of the fins until they're completely coated in foam. Let it sit and work its magic for about 5-10 minutes. You'll see the foam start to break down and lift the embedded grime.
After the cleaner has done its job, it’s time to rinse thoroughly, again, from the inside out. Be patient here. Make sure every bit of the foam and all the loosened dirt is completely washed out of the unit. Any chemical residue left behind can actually attract more dirt down the road.
If you spot any major damage to the fins while you're cleaning, or if the AC still isn't performing well afterward, it could point to a more serious issue. In that situation, it’s best to call in a professional. Our team is always ready to step in with expert AC repair to get things running safely and correctly.
Once you’re satisfied with the clean, let the unit air dry for about an hour before you put the casing back on and restore the power.
Common Mistakes and Pro Tips for a Better Clean
Just giving your coils a quick rinse is a good start, but if you're aiming for a truly professional-level clean, there are a few common slip-ups to avoid. I’ve seen countless DIYers make small mistakes that either risk damaging their system or just leave the job half-finished. Knowing what not to do is just as important as knowing how to spray a hose.
One of the biggest no-nos I see is underestimating the power of water. Reaching for a pressure washer might seem like a great way to blast away grime, but it’s a fast track to disaster for your condenser coils. That intense spray will instantly flatten the delicate aluminum fins, which chokes off airflow and can lead to major damage. Trust me, a standard garden hose with a gentle spray nozzle is all the muscle you need.
It's also worth thinking about the water you're using. While it's not absolutely essential, using filtered water can help prevent mineral deposits from building up on the fins over time. This is a principle that applies in other fields too, like professional solar panel cleaning, where mineral-free water delivers a better, longer-lasting result.
Straighten Fins for Maximum Airflow
While you’re cleaning, you'll probably spot some bent or crushed aluminum fins. It happens. Hail, stray rocks from the lawnmower, or even just accidentally bumping the unit can cause it. Don't just ignore them; bent fins are a real problem because they restrict airflow, forcing your system to work much harder than it needs to.
This is where a fin comb becomes your best friend. It’s a simple, inexpensive tool that lets you gently "comb" the fins back into their straight, upright position. You just carefully slide the comb over the damaged area, following the direction of the fins, and watch them straighten out. This one extra step can make a surprisingly big difference in your AC’s performance.
DIY Coil Cleaning Mistakes and How to Prevent Them
To help you avoid common pitfalls, here’s a quick-reference table outlining the mistakes I see most often and the correct way to handle the job. Getting these details right is what separates a quick rinse-down from a proper, effective cleaning that actually helps your system.
Common Mistake | Potential Damage | The Correct Approach |
|---|---|---|
Using a pressure washer | Flattened fins, blocked airflow, and potential coil puncture. | Use a standard garden hose with a gentle spray nozzle. |
Spraying water directly into the unit | Risk of damaging electrical components and the fan motor. | Turn off all power at the breaker first. Spray from the outside in. |
Forgetting to straighten bent fins | Reduced airflow, decreased efficiency, and higher energy bills. | Use a fin comb to gently straighten any bent or crushed fins. |
Not testing the unit afterward | Missing potential issues that occurred during cleaning. | Restore power and run the AC for a few minutes to ensure normal operation. |
Ignoring a tilted unit | Extra strain on the motor and internal parts, leading to premature failure. | Check if the concrete pad is level. If not, consider professional re-leveling. |
Following these best practices will help you protect your investment and ensure your AC runs efficiently all season long.
Final Checks and Level Ground
Another common oversight happens right at the very end. Homeowners get everything back together, but they forget to actually test the unit. Once you’ve switched the power back on at the breaker, go inside and turn on your AC. Let it run for at least a few minutes to make sure everything sounds and feels normal.
A truly professional finish goes beyond just the cleaning. It’s about setting the entire unit up for long-term success.
While you're there, take a second to check that the concrete pad your condenser sits on is still level. The ground can settle over time, causing the whole unit to tilt. A tilted unit puts unnecessary strain on internal components like the fan motor, which can lead to premature failure. If you notice a significant slant, you may need to have it professionally re-leveled.
Remember, a comprehensive approach to HVAC care means looking at the whole system. For instance, clean coils won't do you much good if your ducts are filthy. Our guide on professional air duct cleaning shows how a clean interior path is the perfect complement to a clean exterior unit.
Putting It All Together: Your Year-Round HVAC Maintenance Plan
Getting the hang of cleaning your condenser coils is a fantastic skill to have, but it’s really just one piece of the puzzle. To get truly reliable, year-round performance out of your HVAC system, you need to think bigger. It's less about a single, intense cleaning session and more about a simple, consistent routine that keeps the whole system happy.
Think of it this way: a clean coil is great, but if the rest of the system is struggling, you’re only solving part of the problem. By pairing your annual coil cleaning with a few other key tasks, you create a powerful defense against surprise breakdowns and those dreaded high energy bills.
Building a Simple Maintenance Schedule
When it comes to HVAC longevity, consistency is everything. I always tell homeowners to make condenser coil cleaning a yearly spring ritual. Doing it then gets your unit ready for the punishing heat of summer, ensuring it’s running at peak efficiency right when you need it most.
But don't stop at the coils. There are two other tasks that are absolutely non-negotiable for keeping your system in top shape:
Change Your Indoor Air Filters: This is the big one. A clogged filter is like forcing your system to breathe through a straw. It strains critical components and just pushes dust and allergens back into your home. Make a habit of checking your filter every month and swapping it out every 1-3 months, based on your home’s specific needs (pets, dust, etc.).
Keep the Outdoor Unit Clear: Your condenser needs room to breathe. Always maintain at least a two-foot clearance around the entire unit. That means trimming back shrubs, clearing away leaves in the fall, and making sure lawn clippings don't get blasted into the fins after you mow.
Sticking to these simple habits will drastically reduce wear and tear. It's the best way to avoid those emergency repair calls on the hottest day of the year. Plus, you’re not just helping your system; you're also directly improving the air your family breathes. For more on that, our guide to improving indoor air quality has some great tips for making your home a healthier, more comfortable space.
The Bigger Picture of Home Energy Systems
The basic ideas we’ve talked about, clean coils and clear airflow, don't just apply to standard air conditioners. They're fundamental principles for a wide range of home energy equipment. For instance, understanding heat pump technology is becoming more important as these systems grow in popularity, and just like a traditional AC, their performance lives and dies by proper maintenance.
The impact of neglect is well-documented, especially in demanding environments. Proactive maintenance isn't just about preventing failures; it's about preserving the efficiency you paid for when the system was installed.
This proactive mindset is just as critical in commercial settings. In fact, studies on commercial HVAC systems show that dirty condenser coils can slash efficiency by as much as 30%. That translates directly to higher operating costs and a shorter lifespan for very expensive equipment. The same principles hold true for your home's system, a little bit of consistent care delivers huge long-term savings.
Answering Your Top Coil Cleaning Questions
Even with the best instructions, you probably have a few more questions rattling around. That’s completely normal. Honestly, getting these last few details ironed out is what separates a confident DIY job from a nervous, uncertain one.
We get these questions all the time from homeowners, so let’s clear up any final confusion and get you feeling ready to go.
How Often Should I Clean My AC Coils?
For most homes, a good, thorough cleaning once a year is the sweet spot. I always recommend doing this in the spring, right before the summer heat really kicks in. This gets your AC ready for its marathon season, making sure it runs efficiently from day one.
But, and this is a big but, your local environment is a huge factor. You might need to clean your coils twice a year if your outdoor unit is:
Dealing with the fluffy onslaught from nearby cottonwood trees.
Located in a really dusty or windy spot.
Surrounded by trees that constantly drop leaves and other debris.
The best rule of thumb? Just use your eyes. If you glance at the fins and see a visible layer of gunk, it's time for a cleaning, no matter what the calendar says.
Can I Use a Pressure Washer on My Coils?
Please, don't do this. It’s one of the most common and damaging mistakes we see. A pressure washer is just way too aggressive for the delicate aluminum fins on your condenser. It will mash them flat, completely blocking airflow and crippling your AC’s ability to cool your home.
Using a pressure washer is a fast track to irreversible damage. You’re often looking at a costly professional repair or, in the worst cases, a full coil replacement. Just stick with a regular garden hose and a gentle spray nozzle; it's all you need to do the job safely and effectively.
Is a Special Coil Cleaner Really Necessary?
It really depends on what you're up against. If you’re just dealing with light dust, loose grass clippings, or a bit of pollen, a simple rinse with plain water is often more than enough to get the job done.
However, if you're looking at a thick, caked-on layer of grime, greasy stuff, or sticky residue from things like cottonwood, a dedicated foaming coil cleaner is your best friend. These cleaners are made specifically to dissolve that stubborn gunk without eating away at the fragile aluminum. Just make sure you grab a product that’s labeled for outdoor condenser coils.
When Is It Better to Call a Professional?
Knowing your limits is a sign of a smart homeowner. It’s definitely time to pick up the phone and call a pro if:
You're at all hesitant about the electrical safety steps, like shutting off power at the breaker box.
The coils are caked in a thick, greasy mess that won't budge.
You see significant damage to the fins that’s beyond what a simple fin comb can handle.
You've cleaned the coils, but the AC still isn't cooling right or is making strange noises.
A professional technician does more than just clean; they perform a full diagnostic check to see what’s really going on. This is especially true for more complex systems. For example, our team provides specialized heat pump maintenance that digs much deeper than a simple cleaning to ensure every single component is working as it should.
When you need professional, reliable HVAC service you can trust, Covenant Aire Solutions is here to help. From routine maintenance to emergency repairs, our certified technicians ensure your home stays comfortable year-round. Contact us today to schedule your service.