A Homeowner's Guide to Cleaning Furnace Coils
- Nov 1, 2025
- 14 min read
Updated: Nov 6, 2025
That thin blanket of dust on your furnace coils is more than just an eyesore, it’s a hidden thief stealing your money and comfort. When this simple maintenance task is neglected, it forces your entire HVAC system to work overtime, leading directly to higher energy bills and sluggish heating performance.
This guide will walk you through why cleaning furnace coils is one of the most impactful DIY jobs you can tackle for your home.

Why Cleaning Furnace Coils Is Not Optional
Think of that layer of grime as an insulating blanket wrapped around the very components designed for heat exchange. This unwanted insulation means your furnace has to run longer and harder to hit the temperature on your thermostat, which shows up right on your monthly utility bills.
Over time, this sustained strain can cause premature system failure, turning a simple cleaning job into a costly replacement. I’ve seen systems fail years before their time simply because this one maintenance step was overlooked.
This isn’t just a one-off problem; it's a massive issue. Globally, the demand for professional HVAC cleaning is a market valued at around USD 15 billion. This number is only expected to grow as more homeowners connect the dots between clean systems, energy savings, and healthier homes.
Dirty coils are a primary culprit in poor indoor air quality, too. They become a breeding ground for dust, mold, and other nasty contaminants that get blown all over your house.
The Real-World Consequences of Dirty Coils
Ignoring your furnace coils has tangible effects that go way beyond mechanical wear and tear. The consequences usually sneak up on you before they become major headaches.
Skyrocketing Energy Bills: A dirty coil can spike your furnace's energy use by up to 30%. Your system is fighting to compensate for the poor heat transfer, burning more energy for less warmth.
Poor Indoor Air Quality: That gunk on the coils becomes a petri dish for bacteria and mold. As air flows over these surfaces, those particles get distributed into the air you and your family breathe every single day.
Uneven Heating and Reduced Comfort: Clogged coils restrict airflow. This is why you might have one room that’s freezing while another is perfectly comfortable: the system just can't push enough warm air through the vents.
System Overheating and Shutdowns: In really bad cases, the choked airflow can cause the furnace to overheat and trigger a safety shutoff. This leads to that frustrating cycle of the system turning on and off constantly.
The most common sign I see of dirty coils is a furnace that seems to run all the time but never quite warms up the house. It's the first red flag that your system is fighting a losing battle against itself.
Beyond just cleaning your furnace coils, taking a few other simple steps to lower your electric bill can make your home even more efficient. A proactive approach to your home’s energy use really pays off.
For a more complete strategy, you should also check out our guide on how to reduce energy consumption in your home.
Assembling Your Coil Cleaning Toolkit
Going into this job unprepared is a recipe for a frustrating afternoon and, worse, potentially damaged equipment. Having the right tools on hand before you start cleaning your furnace coils makes all the difference. This isn’t about buying the most expensive gear; it’s about having the correct gear to get the job done right.
The good news? You don't need a professional-grade setup that costs a fortune. Most of what you'll need is affordable and easy to find, so you can tackle this safely and efficiently.
Core Cleaning Supplies
The absolute star of the show here is a no-rinse foaming evaporator coil cleaner. This stuff is specifically designed to cling to the delicate coil fins, dissolve all that built-up grime, and then drip away into the condensate pan. It does all the heavy lifting, breaking down gunk that plain water could never touch.
You’ll also need a soft-bristle brush. I can't stress this enough: the aluminum fins on your evaporator coil are incredibly delicate. You can bend or crush them with very little pressure. A soft brush is perfect for gently whisking away any loose surface debris like pet hair or dust bunnies before you apply the chemical cleaner.
My personal tip is to always test a small, inconspicuous area with your brush first. This ensures you're not applying too much pressure, which can easily damage the fins and restrict airflow later on.
Essential Safety and Support Tools
Safety is non-negotiable. Don't even think about opening an access panel until you have the right protective equipment.
Safety Gloves: A sturdy pair of gloves will protect your hands from the surprisingly sharp edges of the coil fins and from the chemicals in your cleaning solution.
Safety Glasses: These are a must. They'll shield your eyes from any accidental spray or dislodged debris, which happens more often than you'd think in those tight spaces.
Voltage Tester: This is your most important final check. After you shut off the power at the breaker, a voltage tester confirms there is absolutely no electricity flowing to the unit, preventing a serious shock hazard.
Before you get started, it's always a good idea to lay everything out. Having your toolkit organized and within reach prevents you from having to stop midway through the job to hunt for something.
Essential Toolkit for Cleaning Furnace Coils
Tool/Supply | Purpose and Key Considerations |
|---|---|
No-Rinse Foaming Coil Cleaner | This is the primary cleaning agent. It's formulated to expand, clean, and drain without needing to be rinsed off with water. |
Soft-Bristle Brush | Used for gently removing loose dust and debris before applying the foam. A paintbrush or a dedicated fin brush works well. |
Safety Gloves | Protects your hands from sharp metal fins and cleaning chemicals. Choose a pair that offers both protection and dexterity. |
Safety Glasses | Shields your eyes from accidental splashes of cleaner or flying debris. A non-negotiable safety item. |
Voltage Tester | Confirms that all electrical power to the furnace has been disconnected, preventing electric shock. Always test before you touch. |
Shop Vacuum | (Optional but recommended) Useful for cleaning out loose debris from the base of the unit before you start. |
Flashlight or Headlamp | The inside of a furnace unit is dark. Good lighting is crucial for seeing what you're doing and ensuring a thorough clean. |
Once you have these items ready, you're well-equipped for a successful cleaning.
Many homeowners find that the tools and techniques for this job are similar to other HVAC maintenance tasks. In fact, if you're comfortable with this project, you can find more helpful information in our homeowner's guide to cleaning AC unit components. While your coil cleaning toolkit is specific, it's also helpful for homeowners to consult a complete household cleaning supplies checklist to be prepared for general home upkeep.
Safely Getting to Your Furnace's Evaporator Coil
The idea of opening up your furnace can feel a little intimidating, especially if you've never done it before. But honestly, just finding and getting to the evaporator coil is often the biggest hurdle of the whole cleaning process. Once you know what you’re looking for, it’s a lot less scary than it seems.
Your furnace's evaporator coil is almost always tucked away in the same spot: inside a triangular, A-shaped metal case called the plenum. This case sits right on top of the main furnace unit and blower, and it's where all the critical heat exchange happens. All you need to do is remove a simple access panel to get to it.
This little flowchart gives you a quick visual of the main safety and cleaning steps.
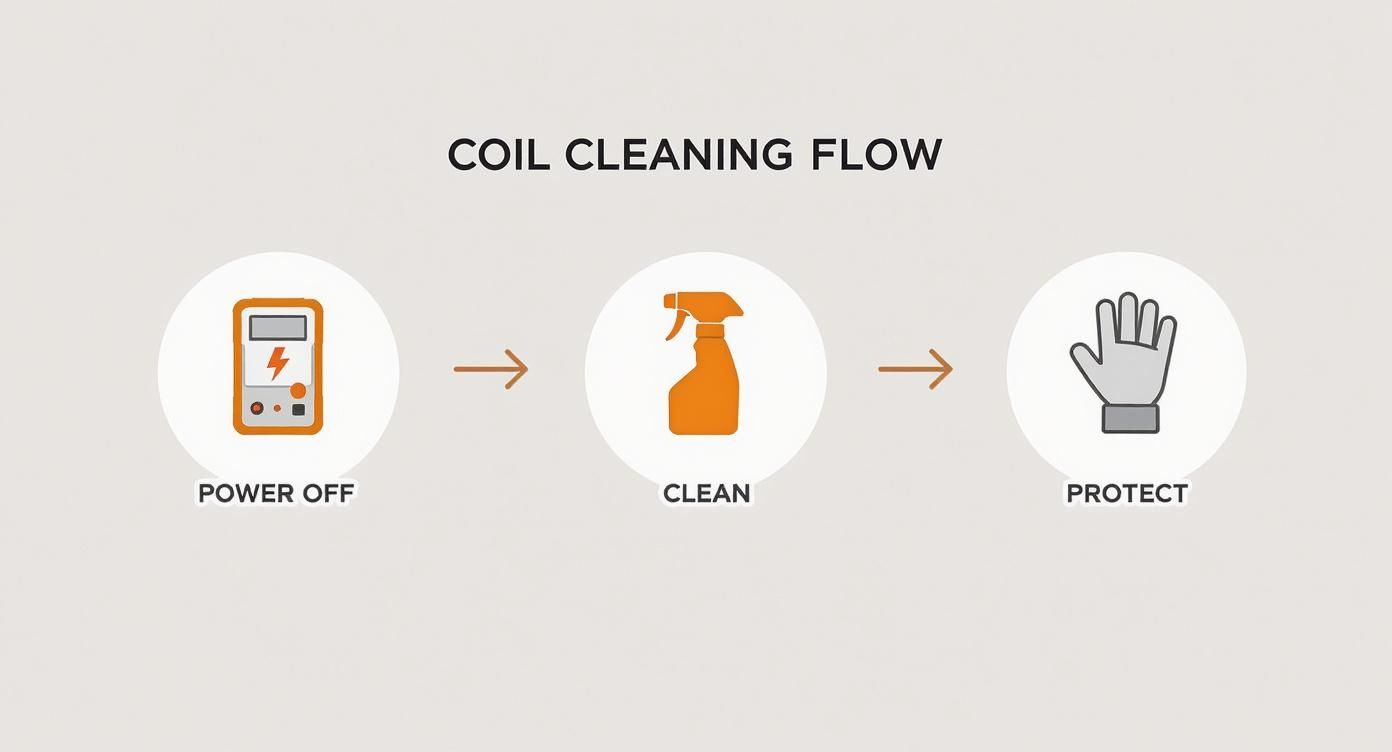
As you can see, keeping yourself safe and making sure the power is off are the absolute first things you have to do, long before any cleaning starts.
Finding and Removing the Access Panel
Before you even think about touching a screw, your number one priority is to cut all power to the furnace. Head over to your home's circuit breaker panel and flip the breakers labeled "Furnace" or "HVAC" to the off position. Even after you flip the switch, always double-check with a voltage tester on the furnace wiring to be 100% sure there's no live current.
With the power confirmed off, you can now find the access panel on the plenum. It's usually a rectangular metal plate held on by several hex-head screws. You'll likely need a 1/4” or 5/16” nut driver to get them off. Carefully unscrew them and put them somewhere you won't lose them, like a small magnetic tray or a cup.
Sometimes that panel can be a bit stubborn thanks to the factory seal. You might need to gently pry it loose with a flathead screwdriver, but go easy, you don't want to bend the metal. Once it's free, pull it straight off and set it aside.
With the panel gone, you'll have a clear view of the evaporator coil. Take a second to really look at it. You'll probably see a fine layer of dust, but if you have pets or smokers in the house, don't be surprised to find a thick, matted blanket of grime.
This quick inspection will tell you exactly what you're up against and really drive home why you're doing this in the first place. Keeping these components clean is a big deal across the entire HVAC industry. The market for commercial HVAC coil cleaning was recently valued at around USD 1.2 billion and is expected to hit USD 2.5 billion within a decade. That growth just highlights how critical clean coils are for efficiency, a benefit you're about to see for yourself. You can read more about the growth of the coil cleaning market.
Dealing with Different Furnace Setups
Of course, not every furnace is set up the same way. While the A-coil sitting above the blower is the most common layout you'll see in homes, your system might be arranged differently, particularly if it's installed in a tight spot.
Horizontal Units: If your furnace is in an attic or crawlspace, it might be lying on its side. In this case, the coil will still be "downstream" from the blower, so you’ll find the access panel on the end of the unit where the air blows out.
Downflow Furnaces: These are common in homes without basements and are designed to push air downward. Here, the coil assembly will be located underneath the main blower motor.
Working in a cramped utility closet or a tight attic requires some patience. A headlamp is a lifesaver in these situations because it keeps your hands free. Just take your time, understand how your particular system is laid out, and you'll be able to get access without any trouble. If you want to dive deeper into overall furnace care, we cover more in our guide to comprehensive gas furnace maintenance.
Applying Cleaner for a Thorough Coil Refresh
Now that you’ve got the evaporator coil exposed, it’s time for the most satisfying part of the job: applying the cleaner and watching it dissolve years of caked-on grime. All your careful prep work leads to this moment, where a deep clean can bring your furnace’s performance back to life. The key here is to be methodical and simply let the cleaning solution do its thing.
A common mistake I see is people rushing this stage, which almost always leads to a subpar result. The goal isn’t just to spritz the surface; you need to make sure the foam penetrates deep into the coil fins. That's where the most stubborn buildup likes to hide. A thorough application is what separates a quick rinse from a professional-level refresh.
The Correct Application Technique
For a no-rinse foaming cleaner, the most effective technique is to spray it against the normal direction of airflow. Think about how your furnace actually works: air gets pulled through the evaporator coil. By spraying from the opposite side, you’re pushing all that dirt, dust, and gunk back out the way it came in instead of driving it deeper into the system.
Start at the very top of the A-coil and work your way down with a steady, even motion. You want to completely saturate the fins until they’re covered in a thick blanket of foam. Don't be shy with the cleaner; a heavy coating ensures it can expand and break down every last bit of contamination.
From my experience, the biggest takeaway here is patience. Let the cleaner sit for at least 5-10 minutes. You’ll actually see the foam darken as it pulls the gunk out. Eventually, it will start to liquefy and drip down into the condensate pan below, which is exactly what it’s designed to do.
Loosening Debris and Straightening Fins
While the foam is working its magic, you can tackle any remaining surface-level issues. If you spot any matted pet hair or thick dust bunnies that the initial vacuuming missed, now’s the time to gently loosen them with your soft-bristle brush. Just use light, vertical strokes that follow the direction of the fins to avoid bending them.
Next up, give the fins a careful inspection for any bent areas. Damaged fins can seriously restrict airflow, so straightening them is a crucial step for getting that efficiency back.
Identify Bent Sections: Slowly scan the entire coil surface, looking for any fins that are flattened, bent, or smashed together.
Use a Fin Comb: This is a small, inexpensive tool with teeth spaced to match your coil. Gently insert the comb just above the bent section and pull it down slowly and carefully.
Work in Small Areas: Don't try to fix a huge area all at once. It’s better to work in small, manageable sections to avoid causing even more damage.
Fixing these small imperfections ensures air can flow freely, which is absolutely essential for proper heat exchange. This process is similar to what we do on professional calls, and if you’re curious about other expert tips, you might find our guide on cleaning air conditioning coils for better efficiency helpful.
The type of cleaner you choose matters, too. While most DIY jobs call for a gentle foaming cleaner, the professional market includes much more potent options. The acid coil cleaner market, for instance, is a massive industry valued globally at USD 1.56 billion and is projected to keep growing. These powerful cleaners are engineered to dissolve stubborn mineral deposits, ensuring maximum efficiency and extending the life of the equipment.
You've done the hard work, the foam has worked its magic, and those evaporator coils are looking worlds better. But don't spike the football just yet. Getting your furnace back together correctly and knowing what not to do are just as critical as the cleaning itself. This is where a simple DIY win can turn into a costly service call if you're not careful.
First things first, before you even think about putting panels back on, deal with the condensate drain line. This little pipe is the unsung hero that carries moisture away from your system. If it's clogged with gunk, you're just asking for water to back up and cause a world of hurt. A quick flush with a 50/50 mix of distilled vinegar and water usually does the trick to clear out any lingering sludge.
Putting It All Back Together
With the drain line clear, reassembly is pretty much the reverse of how you took it apart. It’s straightforward, but a little attention to detail goes a long way.
Seat the Access Panel: Carefully line up the metal access panel over the opening. You want to make sure it sits perfectly flush. This creates a tight seal, which is absolutely vital for preventing air leaks that tank your furnace's efficiency.
Replace Every Screw: Don't get lazy here. Reinstall every single screw you took out. A loose panel won't just vibrate and make annoying noises; it compromises the entire sealed system you're trying to create.
Power It Up: Head back to your breaker box. Find the circuits for the furnace and the AC, and flip them both back to the "On" position.
Now for the moment of truth. Go ahead and turn on your furnace. You should feel a noticeable difference in the airflow coming from your vents almost immediately. That stronger, steadier breeze is the surefire sign of a job well done.
Critical Mistakes That Can Wreck Your Coils
I can't tell you how many times I've seen well-meaning homeowners accidentally cause serious damage during a DIY cleaning. These simple, avoidable mistakes can lead to expensive repair calls that completely wipe out the money you were trying to save.
The absolute biggest mistake is using the wrong tools. I've seen it happen: someone grabs a garden hose or, even worse, a pressure washer. This will instantly flatten the delicate aluminum fins on your coils. Think of it like putting up a solid wall where air is supposed to flow. The damage is often permanent.
Another all-too-common error is reaching for the wrong cleaning chemicals. Just because it cleans your kitchen counter doesn't mean it belongs anywhere near your HVAC system.
Never, Ever Use Bleach: Bleach is extremely corrosive to the aluminum and copper that make up your coils. Over time, it will literally eat away at the metal, leading to refrigerant leaks and catastrophic system failure.
Steer Clear of Harsh Degreasers: Many all-purpose degreasers sound like a good idea, but they can leave behind an oily, sticky residue. That film becomes a magnet for even more dust and grime, making your coils get dirtier, faster than they did before.
Your best bet is to stick with a no-rinse foaming coil cleaner made specifically for HVAC systems. It's powerful enough to break down the grime but formulated to do so without causing corrosion. By reassembling your furnace with care and avoiding these common blunders, you can ensure your hard work cleaning furnace coils pays off with better comfort and efficiency for a long time to come.
Answering Your Furnace Coil Questions
Even with a good guide, it's totally normal to have a few questions swirling around before you start a project like this. Let's run through some of the most common things people ask, so you can feel confident tackling this job.
Getting these answers straight can also help you figure out if a simple cleaning is all you need, or if you might be looking at a deeper problem. What starts as a cleaning job can sometimes uncover signs of a bigger issue, and it's good to know the difference.
How Often Should I Clean My Furnace Coils?
For most homes, giving the furnace coils a good cleaning once a year is the sweet spot. A great time to do this is right before the heating season really gets going. This yearly tune-up is usually enough to keep everything running efficiently and stop any serious gunk from building up.
That said, some homes are just tougher on their HVAC systems. You might want to bump that schedule up to every six months if your house deals with:
Pets: We all love them, but pet dander and fur are like magnets for HVAC coils.
Dusty Environments: If you're near a construction site or live in a dry, dusty climate, more particles are constantly being sucked into your system.
Allergy Sufferers: For anyone with allergies, more frequent cleanings can make a huge difference in your home's air quality by getting rid of allergens stuck to the coils.
Here's a pro tip: The absolute best way to keep your coils cleaner for longer is to be diligent about changing your furnace filter. A fresh filter is your system's bouncer; it stops most of the debris at the door before it ever gets a chance to reach the coils.
Can I Use Soap and Water Instead of a Commercial Cleaner?
It’s tempting to grab some dish soap and water, it’s cheap and you already have it. But for this job, it’s really not the best move. While a homemade soap solution might handle a light layer of dust, it just doesn't have the muscle to cut through the sticky, greasy film that builds up on evaporator coils over time.
There's a reason the pros use commercial, no-rinse coil cleaners. They're specifically formulated to foam up and get into all the tiny spaces between the coil fins, dissolving that stubborn grime. They then drain away without leaving behind a soapy residue that just ends up attracting more dirt. Plus, they're certified safe for the aluminum and copper parts of your system, so you don't have to worry about accidentally causing corrosion.
When Is It Time to Call a Professional?
Knowing when to tap out and call for backup is just as important as knowing how to do the job yourself. Cleaning furnace coils is a very doable DIY project for many, but there are definitely times when it's smarter, and safer, to get a professional HVAC technician involved.
You should pick up the phone and hire a pro if:
The Coils Are Extremely Dirty: If the buildup is so thick you can't even see the metal fins anymore, it's going to take more than a spray can to fix. A pro has the equipment for a true deep clean.
You Suspect a Refrigerant Leak: See a layer of ice on the coils? That’s a classic sign of a refrigerant problem, not just dirt. Only a licensed technician is legally allowed to handle refrigerant.
The Coils Are Hard to Access: If your furnace is crammed into a tight closet or an awkward attic space, let a professional with the right tools and experience navigate it.
Sometimes, even after a thorough cleaning, your furnace just doesn't seem to be working right. This can be a clue that your system is getting old and might be on its last legs. If you want to learn more about the warning signs, our guide on when to replace your furnace has some really helpful insights.
If you've given it your best shot and your furnace still isn't performing, or if you’d just rather have an expert handle it from the start, Covenant Aire Solutions is ready to help. Our certified technicians can take care of everything from a deep coil cleaning to full system diagnostics. Contact us today to book a service and keep your home comfortable all year.