How to Clean Central Air Conditioner: Quick Guide
- Oct 29, 2025
- 13 min read
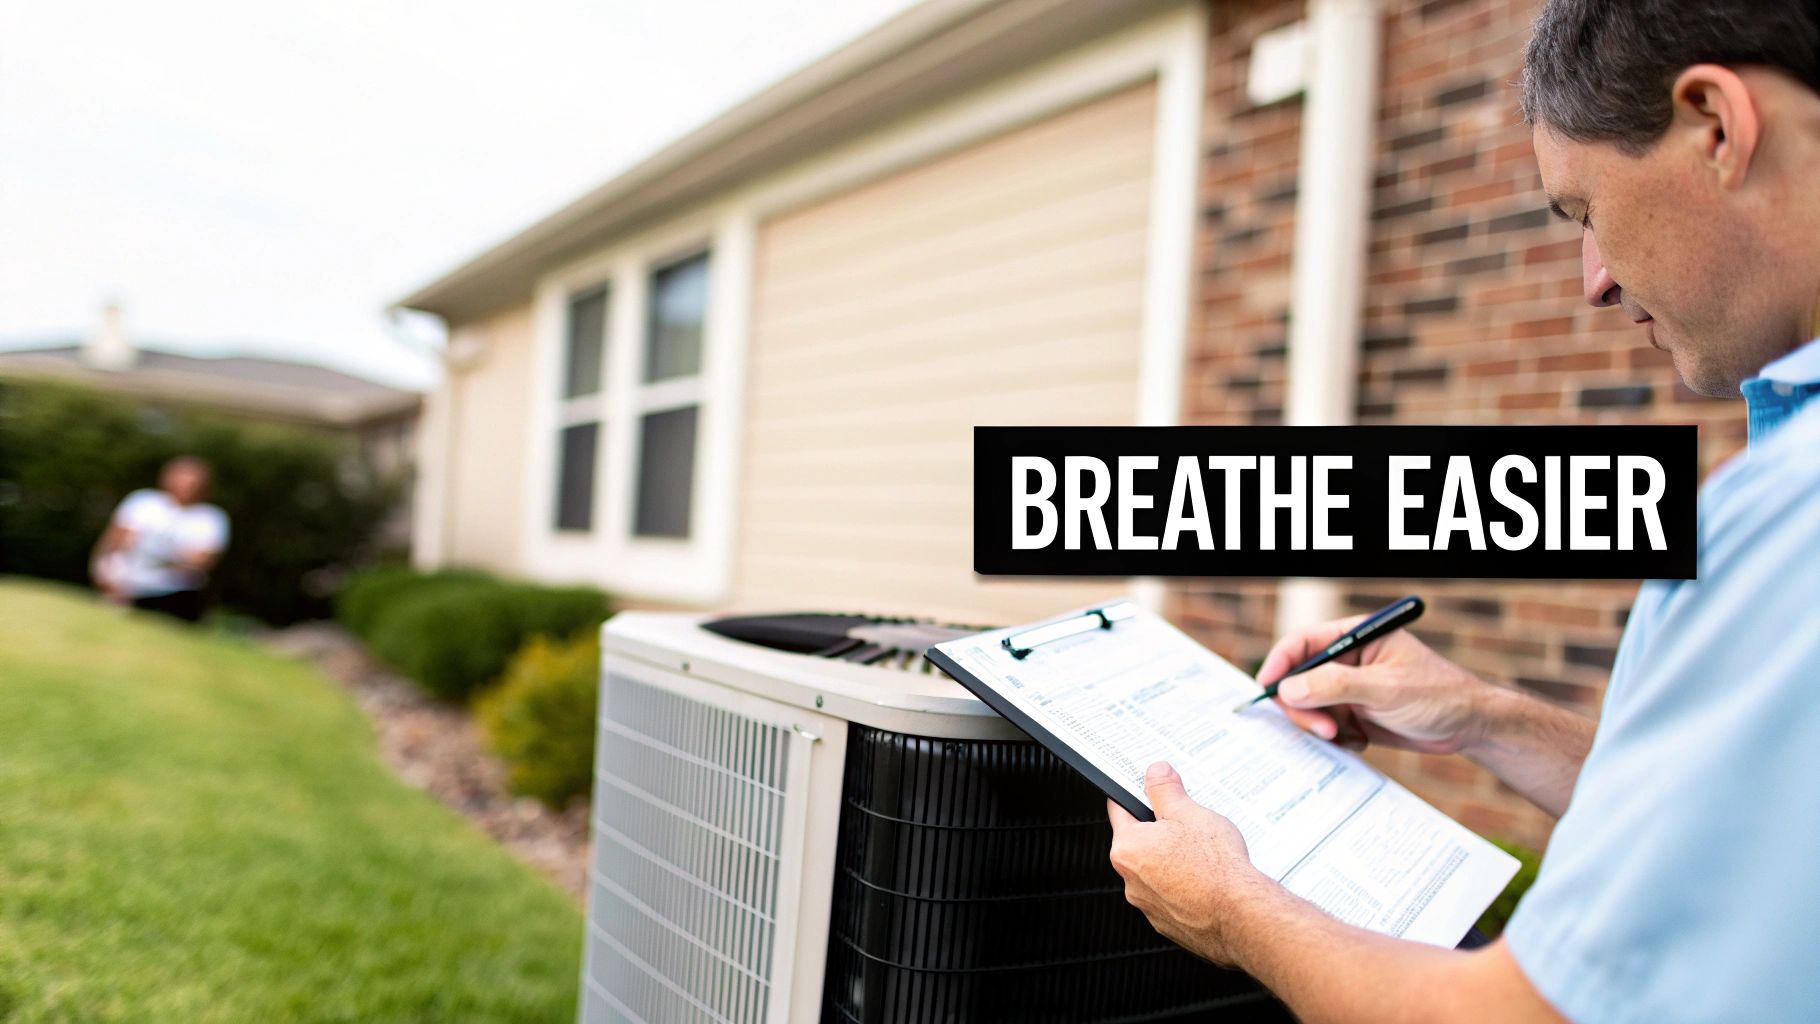
Cleaning your central air conditioner is one of those weekend projects that pays you back big time. In just a couple of hours, you can shut down the power, give the outdoor coils and fins a good cleaning, and check on the indoor filter and drain line. It’s a straightforward DIY job that boosts your AC's efficiency, cleans up your indoor air, and helps you sidestep those surprise repair bills.
Why Cleaning Your Central AC Is a Weekend Project You Can't Skip
Before you even think about grabbing a hose, let's talk about what's really at stake here. A dirty air conditioner isn't just an eyesore; it's actively draining your wallet and hurting your family's health. When your AC is caked in grime, it has to work much, much harder to cool your home, which translates directly to higher monthly energy bills.
Think about this common scenario: A homeowner notices their summer cooling costs are creeping up every year. After spending a little time cleaning the outdoor unit, they saw their energy use drop by over 15%. That's not a fluke. Clogged coils and dirty filters force the compressor to run longer and harder, burning through electricity just to keep you comfortable.
The Hidden Costs of a Dirty AC Unit
The financial hit goes beyond your utility bill. The U.S. Department of Energy has found that a neglected AC unit can lose up to 5% of its efficiency each year. This loss compounds over time, inflating your bills and putting a ton of extra strain on critical components, which inevitably leads to more frequent, and more expensive, breakdowns.
And it’s not just about the money. A dirty AC directly impacts your indoor air quality. Those damp, dark coils and filters become a perfect breeding ground for mold, mildew, and bacteria. Every time the system kicks on, it circulates those contaminants throughout your home, which can trigger allergies and create respiratory problems for everyone inside.
The connection is crystal clear: a cleaner AC unit means cleaner air, lower bills, and a more reliable cooling system. This weekend project is one of the best investments you can make for your home's comfort and your budget.
What to Expect in This Guide
This guide will walk you through exactly how to clean your central air conditioner, step by step. We'll cover everything from the most critical safety precaution, shutting down the power, to deep cleaning both the outdoor and indoor components. Just as important as cleaning your AC, understanding the broader benefits of regular deep cleaning for your home or office can really highlight the value of these maintenance tasks.
To keep your system running at its best all season long, it’s always a good idea to bring in a professional for an annual check-up. You can learn all about the top benefits of professional HVAC maintenance for Tucson homes in our other article.
The Critical First Step: Powering Down Your AC Correctly
Before you even think about picking up a tool or spraying a drop of cleaner, we have to talk about safety. This isn't just a suggestion; it's the most important part of the entire job. Working on a central air conditioner that still has power running to it is incredibly dangerous, so we're going to shut it down completely at two different points.
First, head outside to your condenser unit. Right next to it, usually mounted on the wall of your house, you’ll find a small, weather-proof box made of metal or plastic. This is the exterior disconnect box.
Inside, you'll find either a pull-out handle or a simple circuit breaker. If it’s a handle, just grab it and pull it straight out. If it’s a breaker, flip it decisively to the "Off" position.
Securing the Second Power Source
You're not done yet. Cutting the power outside is only half the battle. Now you need to go inside and find your home's main electrical panel, that gray metal box is probably in the garage, basement, or a utility closet.
Scan the rows of breakers for one labeled "AC," "Air Conditioner," or "Condenser." It will likely be a larger, double-pole breaker. Once you've found it, flip it firmly to the "Off" position.
Here’s a pro tip I always use: grab a small piece of brightly colored tape (painter's tape works great) and stick it over the switched-off breaker. This is a simple visual cue that prevents you, or anyone else in the house, from accidentally flipping it back on while you’re outside working.
I can't stress this enough: double-checking that both power sources are off is non-negotiable. An electrical shock from an AC unit can be severe. Taking a few extra minutes to be absolutely sure is time well spent.
Prepare Your Workspace
With the power safely disconnected, it's time to give your unit some breathing room. Overgrown bushes, tangled weeds, and piled-up leaves can literally choke your air conditioner, blocking airflow and forcing it to work much harder than it needs to.
Grab some gloves and start clearing everything away. You want to create at least a two-foot radius of clear space all the way around the condenser. This simple cleanup not only makes your job easier but also gives your AC an immediate performance boost. It's a fundamental part of any good maintenance routine, which you can read more about in this helpful 2025 air conditioner tune-up checklist.
Now, with the unit safe and accessible, you're ready to get to the actual cleaning.
Cleaning the Outdoor Condenser Unit and Coils
Alright, with the power safely off, it's time to get to the heart of the matter: cleaning the outdoor condenser unit. This is that big, fan-topped box that works so hard to dump heat out of your home. Over time, it becomes a magnet for leaves, grass clippings, dust, and all kinds of yard gunk. This debris essentially suffocates the unit, forcing it to work harder and drastically cutting its efficiency.
First up is the easy part, clearing out the big stuff. You'll need to carefully remove the screws holding the top fan grille in place. Gently set it aside, but be careful not to yank on the fan's wiring. Now, just reach inside and pull out any large clumps of leaves, twigs, and whatever else has collected at the bottom. A shop vacuum with a long hose attachment makes this job much quicker and more thorough.
This infographic lays out the simple but non-negotiable safety steps before you start any work.
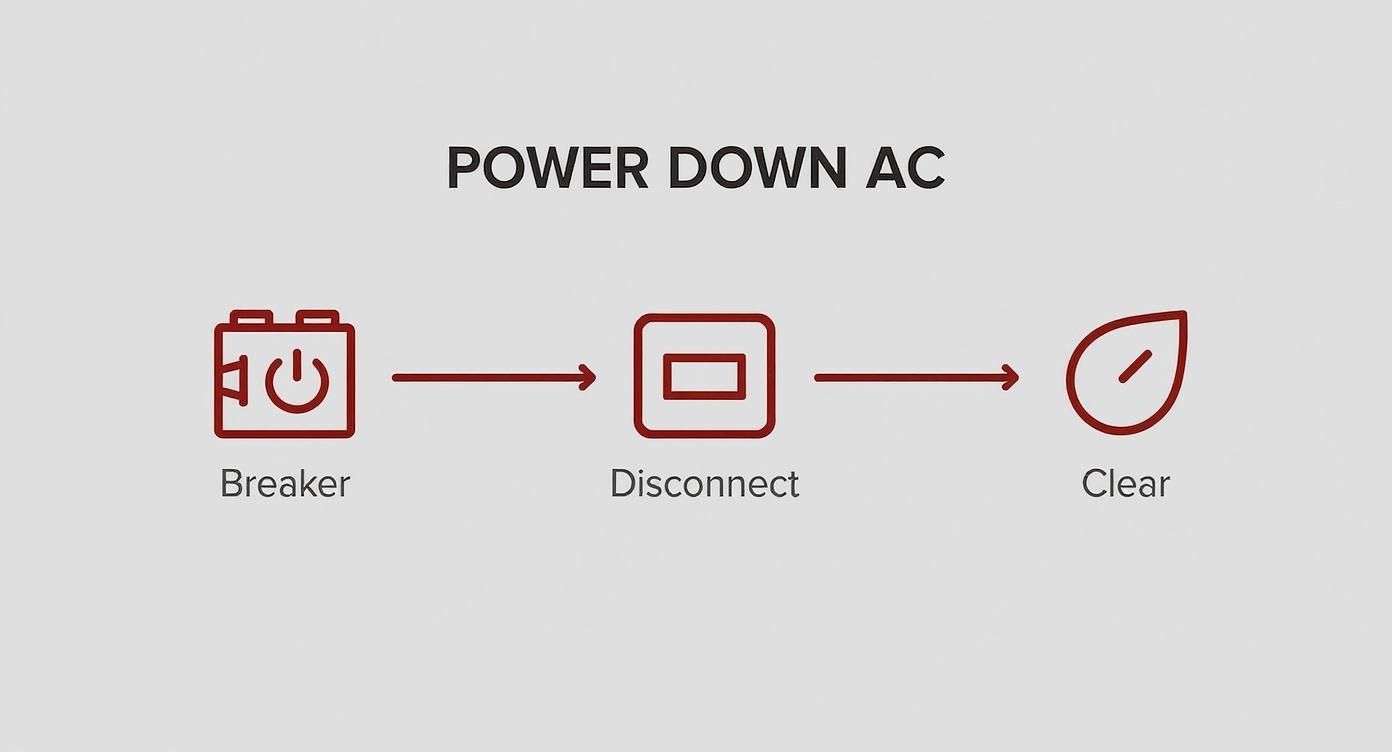
As the visual shows, it’s all about a layered safety approach. You want to cut the power at both the breaker and the disconnect switch before you even think about touching the unit.
Straightening Bent Condenser Fins
Now, take a close look at the thin metal fins that wrap around the unit. It's incredibly common for these delicate aluminum fins to get bent up by hail, rocks kicked up from a lawnmower, or even just shrubs growing too close. Bent fins are a real problem because they block airflow, making your AC work overtime.
This is where a fin comb becomes your best friend. It's a cheap little tool with teeth designed to slide right between the fins so you can gently straighten them.
Find the right fit: Most fin combs come with several heads to match the fin spacing on your specific unit.
Go easy: Use slow, steady pressure to pull the comb through the bent sections. Don't force it, or you could cause more damage.
It doesn't have to be perfect: Your goal is to open up the airflow, not make it look factory-new. A few minor dings are totally fine.
A few minutes spent straightening fins can make a surprising difference in cooling performance. It’s a small detail that directly impacts how well your system can breathe and release heat, which is its primary job.
The Main Event: Washing the Coils
This is the most important step for getting your AC's performance back. The condenser coils are those radiator-like parts hidden just behind the fins, and they have to be clean to work efficiently. You'll want to start with a can of no-rinse foaming coil cleaner, which you can find at any home improvement store.
Spray the cleaner generously all over the outside of the coils, getting them covered from top to bottom. You'll see the foam expand as it works its way deep into the fins to break down all that stubborn, caked-on grime. Let it sit for about 10 to 15 minutes, or whatever the can recommends.
Once the cleaner has done its thing, it's time for a rinse. Grab your garden hose and set the nozzle to a gentle spray, never a high-pressure jet, which can easily mangle the fins. Here’s the key: spray from the inside out. Reach your hose down through the top opening (where you removed the fan) and aim the water outwards through the fins. This pushes all the dirt and gunk away from the unit instead of driving it deeper inside. Keep at it until the water runs clear.
For a more detailed walkthrough, you can also check out our complete DIY guide on how to clean condenser coils.
Improving Air Quality with Indoor Unit Maintenance

While the outdoor condenser is the workhorse doing the heavy lifting, it's the indoor unit, the air handler, that directly impacts the air you breathe every day. If you neglect it, you're essentially breathing in a concentrated mix of everything it collects: dust, pet dander, allergens, and who knows what else.
Keeping this part of your system clean is every bit as important as cleaning the coils outside. In fact, for your family's health, it might be even more critical.
Choosing the Right Air Filter
The single most important job you have for your indoor unit is keeping up with the air filter. Think of it as the gatekeeper for your home's air. When it gets clogged, it doesn't just make your whole system work harder; it lets the quality of your air plummet.
But not all filters are the same. Their performance is measured on the MERV scale (Minimum Efficiency Reporting Value), which usually goes from 1 to 16. The higher the MERV number, the smaller the particles it can trap.
MERV 1-4: These are your most basic, bare-bones filters. They’ll catch large dust bunnies and some pollen, but that’s about it.
MERV 5-8: This is the sweet spot for most homes. These filters do a great job of trapping things like mold spores and pet dander without choking your system's airflow.
MERV 9-12: If you have serious allergies or just want top-tier filtration, these are fantastic. They grab incredibly fine particles, but be warned: they can restrict airflow, so you need to make sure your system is strong enough to handle them.
If you have pets, deal with allergies, or just want to cut down on dust, picking the right filter makes all the difference. You can learn more about finding the best air filters for dust to find a perfect match. And while you're at it, boosting your home's air quality doesn't stop at the filter, simple swaps like choosing non-toxic air fresheners can also make a big difference.
Clearing the Condensate Drain Line
As your AC works its magic, it pulls a ton of moisture out of the air. That water, called condensate, has to go somewhere, and it's supposed to flow neatly outside through a PVC drain line. But over time, that line becomes a prime spot for algae, mold, and nasty sludge to build up and cause a clog.
A clogged drain line isn't just a minor issue; it's a disaster waiting to happen. The water backs up into the drain pan, and before you know it, it's overflowing and causing thousands of dollars in water damage to your ceilings, walls, or floors. It’s a common homeowner headache, but it’s completely avoidable.
Clearing your condensate drain line is one of the most effective preventative tasks you can perform. A few minutes of work can save you from a thousand-dollar water damage repair bill down the road.
First, find the access point for the drain line near your indoor unit. It's usually a T-shaped PVC pipe with a cap on it. Once you find it, remove the cap and slowly pour about a cup of distilled white vinegar down into the line. The vinegar is acidic enough to dissolve the gunk and kill off any mold starting to grow.
Let that sit for about 30 minutes. Then, head outside to where the pipe drains and use a wet/dry vac. Create a good seal around the end of the pipe with your hand or a rag and let the vacuum run for a minute or two. You’ll be shocked (and a little grossed out) by what comes out. Doing this twice a year will keep the water flowing where it should: outside.
Sometimes, what seems like a major AC failure is just a symptom of a simple clog or dirty part. Before you panic and call for a repair, a quick check of these common issues can often get your system back up and running.
Troubleshooting Common AC Issues with Simple Cleaning Fixes
Here’s a quick guide to connect common AC problems with the cleaning task that might just solve it, saving you time and money.
Symptom | Likely Cleaning-Related Cause | Your DIY Cleaning Solution |
|---|---|---|
AC isn't cooling well | Dirty, clogged air filter | Replace the air filter. This is the #1 cause of poor cooling. |
Musty or moldy smell | Clogged condensate drain line | Pour vinegar down the drain line and vacuum it out from the exterior. |
Water leaking indoors | Blocked condensate drain | Clear the drain line immediately to prevent water damage. |
System runs constantly | Severely clogged filter restricting airflow | Replace the filter. The system is working overtime to pull air through. |
Unit shuts off unexpectedly | Overflow switch tripped by a full drain pan | Clear the condensate drain line; the switch is a safety feature. |
Remembering these simple connections can empower you to handle minor issues yourself. A little preventative cleaning goes a long way in keeping your AC, and your home, in great shape.
Final Steps and Smart Preventative Maintenance
Alright, with all the cleaning done, you're on the home stretch. Now it's time to safely bring your air conditioner back to life and set up a simple routine to keep it that way all year long. This final part is what makes all your hard work pay off with better efficiency and fewer surprise breakdowns.
Restoring power is the exact reverse of how you shut everything down.
First, head back to your main electrical panel and flip the AC breaker to the "On" position. Once that's done, go outside to the exterior disconnect box and slide the handle back in or flip the switch to "On". Following this specific order prevents a sudden power surge that could fry your unit's sensitive components.
The Moment of Truth: Testing Your Work
With the power back on, head inside and set your thermostat to cool. You should hear the indoor air handler kick on first, and then a minute or two later, the outdoor condenser should hum to life.
Listen carefully. You don't want to hear any loud clanking, grinding, or screeching, those are all bad signs.
Next, walk around and hold your hand up to a few vents. You should feel cool air blowing out steadily. It might take a few minutes for the air to get truly cold as the system gets going, but you'll know pretty quickly if everything is working as it should.
The goal is a quiet, steady hum from the outdoor unit and a consistent flow of cold air from your indoor vents. Anything less warrants shutting the system back down and re-checking your work or calling a professional.
Creating a Simple Year-Round Maintenance Schedule
Knowing how to clean your central air conditioner is one thing; staying on top of it is another. A simple, consistent schedule makes all the difference and stops small issues before they become expensive headaches.
Here’s a practical timeline to follow:
Monthly: Check your air filter. Seriously, this is the most important one. Hold it up to a light, if you can't see through it, swap it for a new one. This single task is huge for maintaining good airflow and indoor air quality.
Seasonally (Spring & Fall): Take a walk outside and trim back any bushes, weeds, or tree branches that are within two feet of your outdoor unit. While you're there, clear away any leaves, grass clippings, or debris that have collected around the base.
Annually: Do the full deep clean we just walked through in this guide. For a more complete approach, our HVAC preventative maintenance checklist offers even more great tips.
This kind of regular attention is key, especially when you think about how much we rely on these systems. The global HVAC market was valued at around $233.55 billion in 2023 and is only expected to climb. That number alone shows just how essential climate control has become in modern life. You can discover more insights about the booming HVAC market on workyard.com.
Answering Your Top AC Cleaning Questions
Before you roll up your sleeves and dive in, it’s completely normal to have a few questions. Getting the details right on how often to clean your central air conditioner, what products to use, and when to just call a pro is the key to doing this job safely and effectively.
How Often Should I Clean My Central Air Conditioner?
As a good starting point, you should plan on giving the outdoor condenser coils a deep clean at least once a year. The best time to do this is in the spring, right before you really need it to start cranking out cold air for the summer.
But honestly, your local environment is the biggest factor.
Got a lot of trees? If your condenser unit is a magnet for cottonwood, seeds, or leaves, you’ll probably need to clean it twice a year to keep it breathing freely.
Live in a dusty area or near construction? Dust and debris can clog things up fast. In that case, it’s a good idea to give it a quick visual check every couple of months.
Don't forget the indoor air filters, that’s a completely different schedule. Those need to be checked and likely replaced much more often, usually every 1 to 3 months.
What Cleaning Products Are Safe to Use on My AC Coils?
This is a big one. Using the wrong cleaner can cause serious, expensive damage to the delicate aluminum fins on the condenser coils. Stay away from harsh chemicals or acidic cleaners that aren't specifically made for HVAC systems.
Your best and safest bet is a commercially available foaming coil cleaner. You can grab a can at any big home improvement store. These products are engineered to cling to the coils, dissolve all the built-up gunk without eating away at the metal, and then rinse off cleanly with water.
You can use a simple mix of mild soap and water if you're in a bind, but a real coil cleaner does a much more thorough job. Whatever you do, never use a pressure washer. The high-pressure spray will bend those fins flat in seconds, completely blocking airflow and wrecking your unit's efficiency.
When Should I Call a Professional Instead of Doing It Myself?
While this guide covers the essential cleaning maintenance anyone can do, there are absolutely times when you need to put the hose down and call a certified HVAC technician. A professional tune-up can diagnose and fix problems that a simple cleaning just can't touch.
Get an expert on the phone if you notice any of these red flags:
Loud, unusual noises: Any grinding, screeching, or banging is a clear sign of a mechanical problem that needs immediate attention.
Electrical problems: If the unit keeps tripping the circuit breaker, there's a serious electrical issue that needs a professional diagnosis.
It’s still not cooling: If you've given the unit a thorough cleaning and it's still blowing weak or warm air, you could be dealing with a refrigerant leak or a failing compressor.
DIY cleaning is a fantastic way to keep your system running efficiently and improve your home’s air quality, but it's no substitute for professional help when serious issues pop up.
A clean AC is a happy AC, but sometimes a deeper issue needs an expert eye. For reliable diagnostics, repairs, and professional tune-ups in the Tucson area, trust the certified technicians at Covenant Aire Solutions. Schedule your service today and ensure your system is ready for the heat.