How to Winterize Air Conditioner for Peak Performance
- Jan 10
- 14 min read
When the summer heat finally breaks, it’s tempting to just switch off the AC and forget about it until spring. But what if I told you that a few simple steps now can save you a world of headaches, and money, down the road? Properly winterizing your air conditioner means shutting down the power at the breaker, giving the outdoor unit a good cleaning, and slipping on a breathable, waterproof cover.
This quick chore protects your system during its off-season and guarantees it’s ready to go the moment you need it again.
Why Winterizing Your AC in Arizona Is a Smart Move
Let's be honest, when you hear "winterize," you're probably picturing snowdrifts and frozen pipes, not our mild Tucson winters. It's a common assumption here: if there's no snow, there's no reason to prep your air conditioner for its time off. But in Arizona, learning how to winterize an air conditioner is less about ice and all about smart, preventative care.
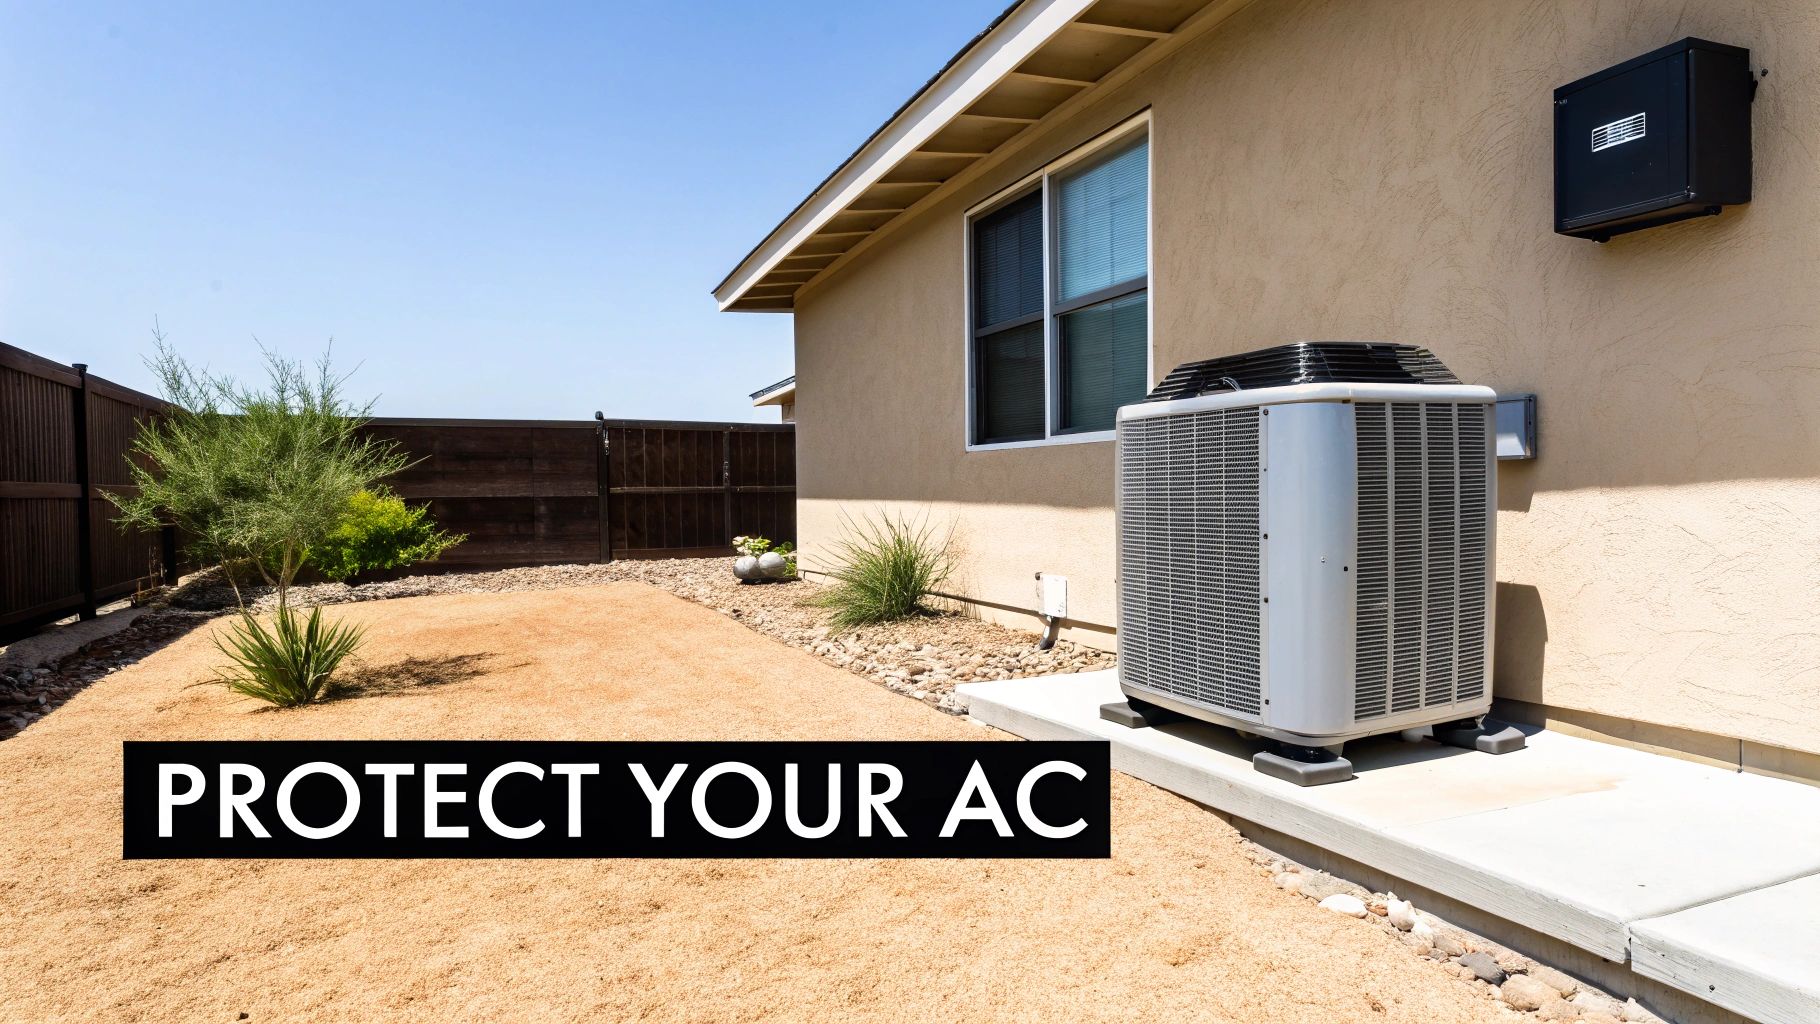
Think of it as putting your most valuable appliance into hibernation. The whole point is to shield your investment from the unique challenges our desert climate throws at it. Dust storms, relentless UV rays, monsoon moisture, and even curious critters can all pose a real threat to your outdoor unit.
Protecting Against Desert Elements
Getting your AC ready for its dormant months is really about protecting its delicate internal parts from the environment. A little effort now prevents a lot of wear and tear.
Here’s what you’re really fighting off:
Windblown Debris: Fine sand and dust are notorious for clogging condenser coils. This chokes the system, slashing its efficiency and forcing it to work way harder when you fire it back up.
UV Ray Damage: That Arizona sun is no joke. Constant exposure degrades plastic parts and wears away the protective coatings on the unit’s metal casing, leading to premature aging and corrosion.
Pest Infestations: To a mouse or a family of insects, a quiet, sheltered AC unit looks like a five-star hotel. They can chew through critical wiring and build nests that completely block airflow.
Protecting your AC is a direct investment in its future performance. A clean, protected unit will start up more reliably and operate more efficiently, saving you from the headache of a surprise breakdown on the first hot day of spring.
A Smart Financial Decision
Beyond just keeping it clean, this simple task has a serious financial upside. Ignoring your unit during the off-season can lead to expensive repairs that were completely avoidable. In the U.S., where over 90% of new homes in Sun Belt states have central air, replacing an outdoor condenser can set you back $4,000–$8,000.
Compare that to a professional winterization service, which might only run you $80–$150. Local techs I've talked to say that windborne debris in places like Tucson can foul up coils by an extra 20–30% compared to other regions. That makes this end-of-season task absolutely critical for your system’s health.
When planning to winterize your AC, it’s also a good time to think about your overall property maintenance. For some great regional advice, check out these local Arizona considerations for homeowners. And remember, protecting your unit is just one piece of the puzzle; see how it fits into the bigger picture of home efficiency in our guide on 7 pro HVAC energy-saving tips for Arizona homes in 2025.
Your Go-To Toolkit and Safety Checklist
Before you roll up your sleeves and get to work winterizing your AC, the most important thing you can do is gather your gear and run through a quick safety check. The great news? You probably already have everything you need lying around. This isn't a job that calls for specialized equipment, just a few household basics.
Taking a few minutes now to get organized will make the whole process smoother and, more importantly, safer. You're dealing with electrical components and a pretty valuable piece of your home's equipment, so a little prep goes a long way.
Assembling Your DIY Winterization Kit
You don’t need to raid the local hardware store for this task. A quick trip to the garage or shed should do it. Here’s what you’ll want to grab:
Garden Hose with a gentle spray nozzle: This is your best tool for rinsing away the fine dust, pollen, and leaves that have caked onto the condenser coils all summer.
Coil Cleaner (optional but recommended): If you're dealing with tougher grime that the hose can't handle, a can of foaming coil cleaner from any home improvement store will make the job much easier.
Basic Hand Tools: Keep a screwdriver or a nut driver handy. You might need one to remove the fan grille on top for better cleaning access.
Work Gloves: Protect your hands from dirt and the surprisingly sharp metal fins on the condenser unit.
A Breathable, Waterproof AC Cover: This is your unit’s winter coat. It’s the primary shield against snow, ice, and debris during the off-season.
Getting those coils clean is a huge part of the process, as it has a direct impact on how efficiently your system runs next summer. For a more detailed walkthrough, check out our guide on how to clean condenser coils; it’s an easy DIY job that pays off.
Safety isn't just a suggestion; it's a non-negotiable part of any DIY home maintenance project. Always, always double-check that the power is completely disconnected before you begin any work on your air conditioner.
The Essential Safety-First Checklist
Before you start any hands-on work, let's make sure everything is safe. The last thing you want is an electrical shock or accidental damage to your system. Getting your tools and supplies ready is important, but making sure you're safe is the top priority.
Use this quick reference to confirm you have the right gear and have taken every safety precaution before you begin.
AC Winterization Safety and Tool Checklist | ||
|---|---|---|
Item or Action | Purpose and Importance | Checklist |
Shut Off Power at Thermostat | Prevents the system from trying to turn on while you're working. | ☐ |
Shut Off Power at Breaker Box | The main power cutoff for the entire AC circuit. | ☐ |
Use Exterior Disconnect Switch | Provides a final, visible confirmation that power is cut right at the unit. | ☐ |
Work Gloves | Protects hands from sharp metal fins and grime. | ☐ |
Garden Hose & Nozzle | For rinsing debris from condenser coils without damaging them. | ☐ |
AC Cover (Breathable) | Shields the unit from winter weather, preventing moisture buildup and rust. | ☐ |
Coil Cleaner (Optional) | Helps break down stubborn dirt for a more thorough cleaning. | ☐ |
Once you've ticked these boxes, you're ready to start the hands-on work with peace of mind.
How To Safely Power Down Your AC Unit
Your well-being is priority one. Before you even think about touching your outdoor unit, you need to run through this 3-step power-down sequence. This triple-check process ensures there is absolutely no electricity flowing to the condenser.
First, head to your thermostat. Switch the system mode to "Off." This simple step stops the thermostat from sending a signal to the air conditioner, telling it to kick on while you’re outside working on it.
Next, find your home’s main electrical panel (breaker box). Locate the breaker that controls your air conditioner, it should be clearly labeled. Flip that breaker to the "Off" position. This cuts the power at the source.
Finally, go outside to the exterior disconnect switch. This is a small metal box usually mounted on the wall near your condenser unit. Open it up. Inside, you’ll either find a pull-out block or a switch. Pull the block out completely (some people flip it upside down and re-insert it) or flip the switch to "Off." This gives you a final, visible guarantee that the unit is dead and safe to work on.
Winterizing Your Outdoor AC Unit: A Practical Guide
Alright, with your tools gathered and safety top of mind, we're ready to get hands-on with your outdoor AC unit. This workhorse, your condenser, has been battling the Arizona heat all summer. Giving it a proper shutdown isn't just a chore, it's how you ensure it's ready to jump back into action when you need it most.
The whole process is pretty simple. It boils down to three key tasks: killing the power, cleaning off all the summer grime, and protecting it the right way for the next few months. This isn't just routine maintenance; it's about preserving the heart of your cooling system. Let's walk through it together.
This simple flowchart lays out the safety sequence you need to follow every single time before you touch that unit.
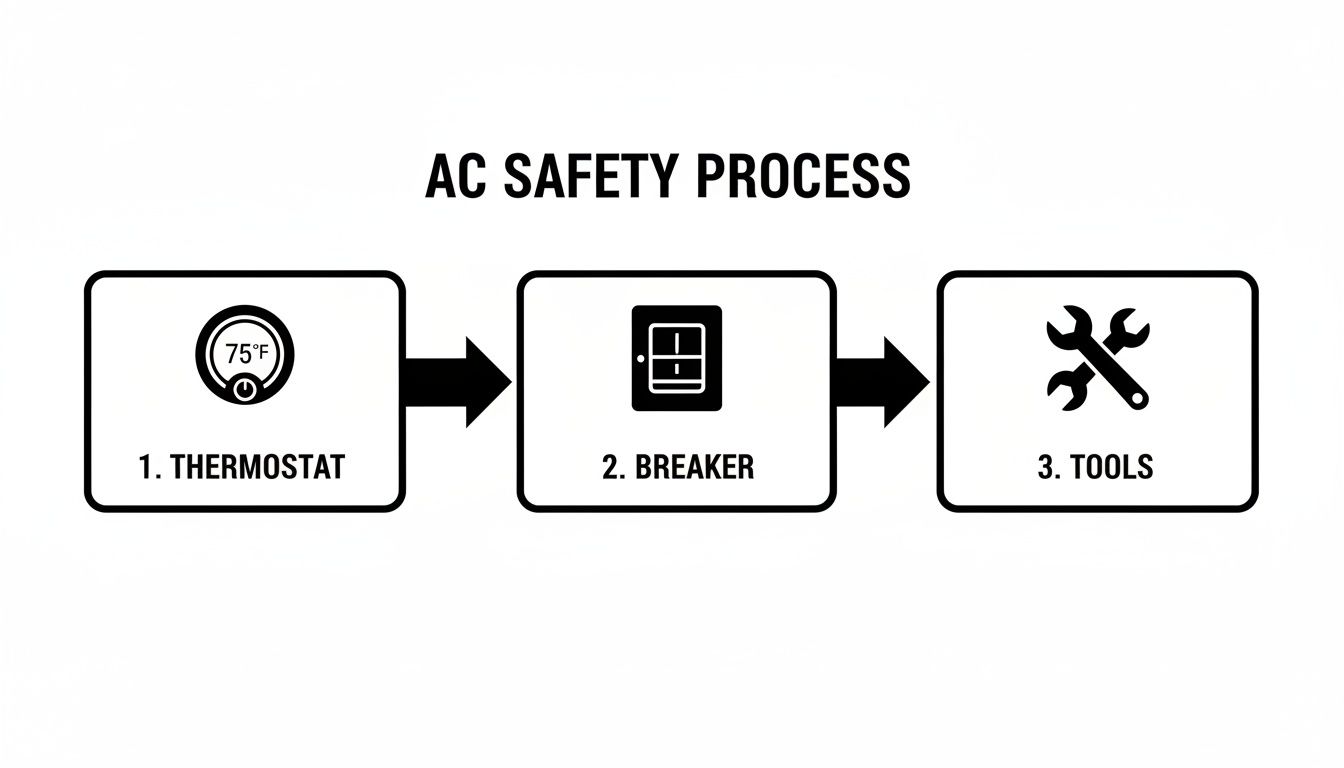
This visual is a great reminder that true safety is a three-step shutdown, starting inside your home and ending right at the unit itself.
Properly Powering Down The System
The absolute first thing you must do is cut off all power to the condenser. We hit on this in the safety section, but it's worth repeating: turn the thermostat to "Off," flip the AC's breaker in your electrical panel, and pull the disconnect or flip the switch in the exterior box.
Do all three. This isn't optional. This triple-check process guarantees there’s zero electrical current reaching the unit. It protects you from a nasty shock and ensures the system can't kick on unexpectedly while your hands are in there.
Cleaning Coils and Removing Debris
With the power confirmed off, it's time to give your unit a good cleaning. All season long, your condenser has been a giant air filter, sucking in dust, leaves, grass clippings, and, this being Arizona, a ton of fine sand. All that gunk gets packed into the delicate metal fins of the condenser coils.
Clogged coils are a huge energy hog. They basically wrap your AC in a thick blanket, forcing it to work overtime to release heat. This drives your energy bills sky-high and puts a ton of strain on the compressor, which is the most expensive part to replace.
A Step-by-Step Cleaning Guide for Arizona Units
Clear the Area: First, get rid of any big debris. Pull away fallen leaves, twigs, and overgrown grass from the base and top of the unit. You want at least a two-foot clearance all the way around the condenser for good airflow.
Rinse Gently: Grab your garden hose with a spray nozzle. The trick is to spray from the inside out if your model lets you remove the top grille. If not, spray from the outside at a downward angle. This pushes all the dirt and dust out the same way it came in.
Handle Sand with Care: That fine Arizona sand requires a soft touch. Never use a high-pressure washer; it will bend those fragile aluminum fins in an instant. All you need is a steady, gentle stream of water. If the grime is really caked on, a commercial coil cleaner can work wonders to dissolve it before you rinse.
Think gentle but thorough. Bent fins are just as bad for airflow as dirty ones. Treat the coils with care, and your system’s efficiency will thank you for it.
Once you’re done, let the unit air dry completely. On a sunny day here, that’ll take an hour or two. This is a critical step before you even think about putting a cover on. If you want to get a better sense of how this outdoor unit functions, our detailed guide can help you understand what is a condenser unit? It really helps you appreciate why keeping it clean matters so much.
Covering Your Unit The Right Way
After your condenser is clean and bone-dry, it's time for the last step: covering it up for its winter nap. This is where a lot of homeowners make a critical mistake that actually does more harm than good.
The first instinct is often to wrap the unit up tight in a plastic tarp, thinking a waterproof seal is best. That’s probably the worst thing you can do. Airtight plastic traps moisture inside from condensation and humidity. Over the winter, that trapped moisture creates a perfect breeding ground for rust, corrosion, and mold.
Choose a Breathable Cover
Instead of suffocating it with plastic, use a purpose-built AC cover made from a breathable, waterproof material. These are specifically designed to keep debris, rain, and harsh UV rays out while still letting air circulate and moisture escape.
You have a couple of great options:
Custom-Fit Breathable Covers: You can find these online or at most home improvement stores. They’re made for specific AC models and offer the most complete protection.
"Top-Only" Covers: In a mild winter climate like ours, simply protecting the top of the unit from falling debris is often enough. A simple piece of plywood held down with a couple of bungee cords works perfectly to keep leaves and dirt from getting into the fan motor area.
By taking these few practical steps, you’re doing more than just maintenance. You're actively extending the life of your air conditioner and making sure it runs at peak efficiency the moment you need it again.
The Real Benefits of Protecting Your HVAC Investment
Now that you’ve walked through the steps of winterizing your air conditioner, let's connect the "how" to the "why." This simple off-season task is genuinely one of the smartest things you can do for your home. It’s about more than just keeping the unit clean; it's a strategic move to protect what is easily one of the most expensive and critical appliances you own.
Think of your AC's outdoor condenser coils like the radiator in your car. When that gets clogged with bugs and road grime, the engine can’t cool itself properly and you risk overheating. It's the exact same idea with your air conditioner, clean coils are non-negotiable for the system to efficiently get rid of heat.
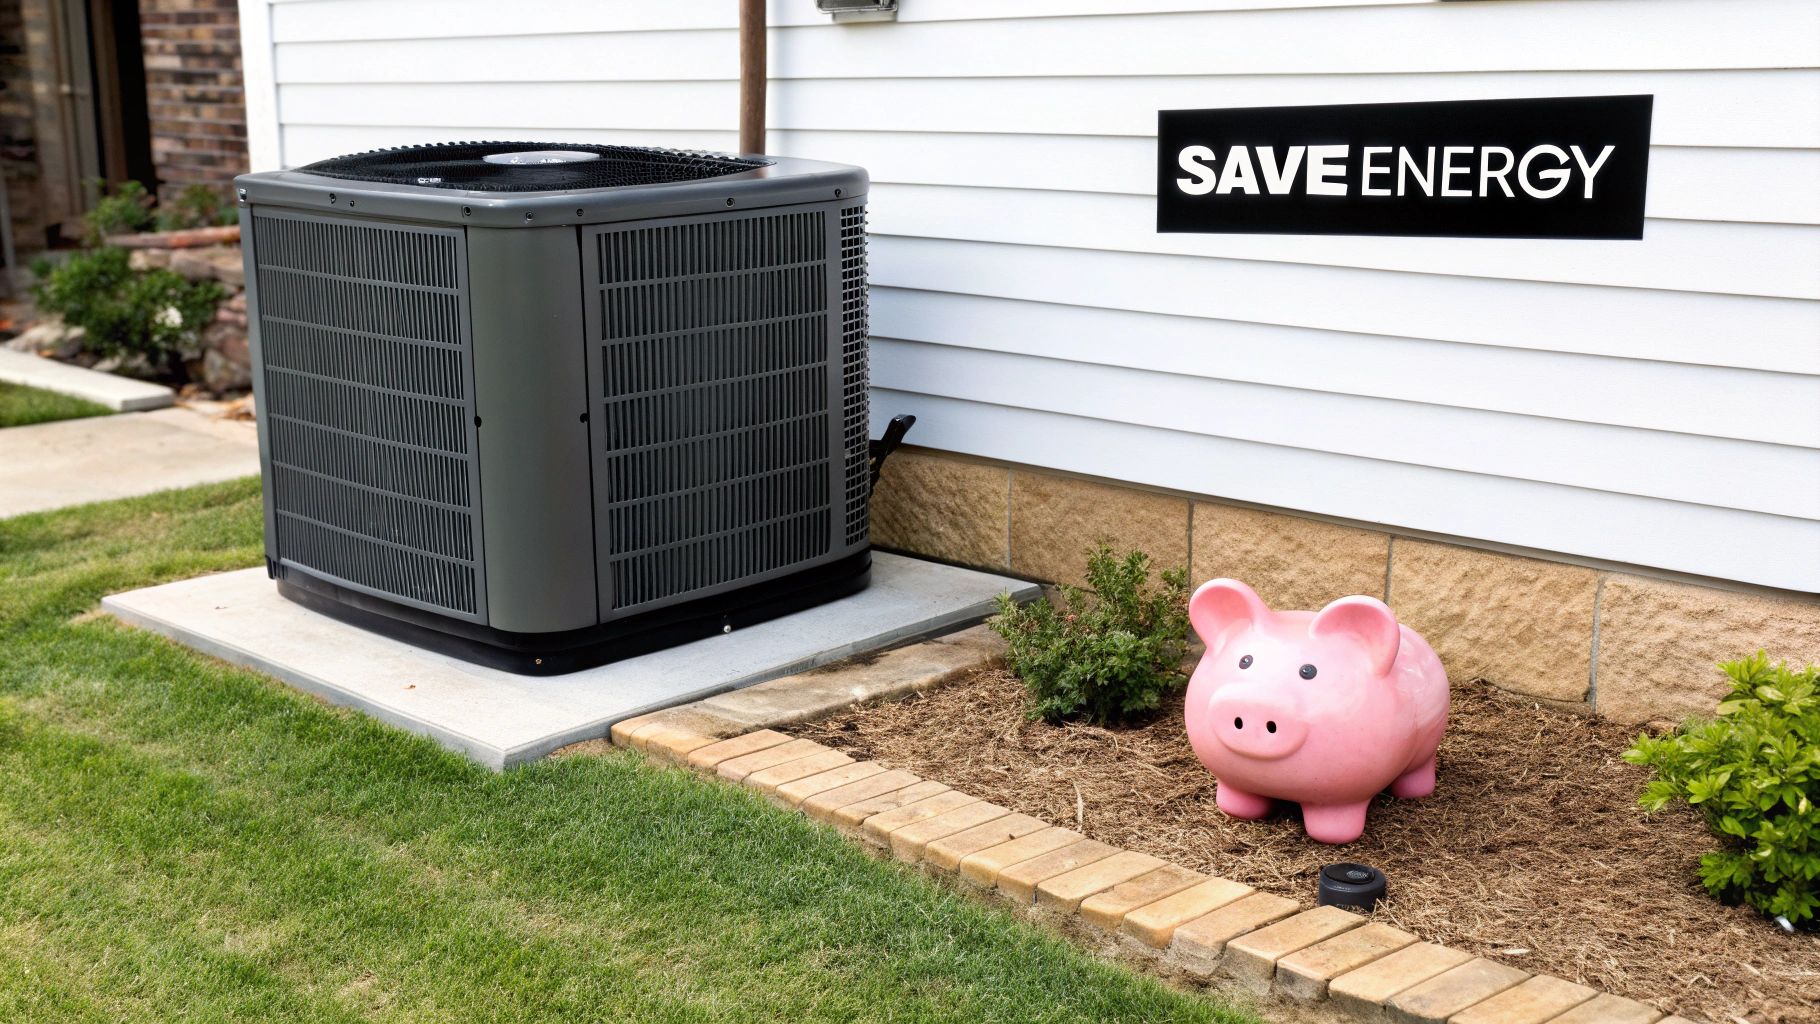
Boosting Energy Efficiency
A clean, well-maintained unit is an efficient unit. Period. When dust, sand, and leaves cake onto the condenser fins, they form an insulating blanket, forcing the entire system to work much harder to cool your home.
This extra effort translates directly into higher energy bills. By taking the time to clean the coils before shutting the unit down, you're setting it up to start next season at peak performance. It will use less electricity to give you the same level of cooling, helping preserve its original SEER (Seasonal Energy Efficiency Ratio) rating and keeping your utility bills from skyrocketing when the Arizona heat returns.
Neglected outdoor units with dirty coils and blocked intakes can suffer efficiency losses of 5–15%. For Arizona homeowners, where cooling can account for 40–60% of summer electricity use, proper winterization can shave noticeable dollars off peak-season utility bills.
Extending Your System's Lifespan
Preventing unnecessary strain is the absolute key to a long and healthy life for your AC system. Every single time your air conditioner has to fight through a layer of grime, it puts extra stress on the compressor, the fan motor, and other critical components.
That accumulated wear and tear can shorten your unit's operational lifespan in a hurry, pushing you toward a costly replacement far sooner than you planned. A few key benefits of avoiding this include:
Reduced Compressor Strain: The compressor is the heart of your AC. Keeping it from overworking is the number one way to extend its life.
Corrosion Prevention: Using a breathable cover stops moisture from getting trapped inside, which prevents rust and corrosion from eating away at the unit's casing and internal parts.
Fewer Repair Calls: By preventing common issues like pests chewing on wiring or a motor burning out from debris, you avoid the most frequent (and expensive) service calls we see.
Ultimately, winterizing your AC is a fundamental part of safeguarding your HVAC investment and contributing to your home's overall efficiency. You can learn more about creating a truly efficient home environment by exploring the different parts of an Airtight Comfort System.
Think of it this way: winterization is a small deposit into your HVAC's long-term health fund.
Knowing When to Call a Professional Technician
While most of the steps for winterizing an AC unit are well within a homeowner's reach, there are definitely times when it’s smarter and safer to put down the tools and call in a certified technician. Knowing your own limits is just as critical as knowing the right steps to take.
Some problems simply demand a trained eye and specialized equipment to diagnose and fix correctly. Think of it as a partnership for your HVAC system's health. Catching something early and getting an expert involved can stop a minor hiccup from turning into a catastrophic, and expensive, failure.
Clear Signs You Need a Pro
Certain red flags should immediately tell you it’s time to pick up the phone. Trying to tackle these issues on your own can easily lead to more damage or, even worse, personal injury.
Keep an eye out for these tell-tale signs before you power down the unit for the season:
Damaged or Frayed Wiring: If you spot any exposed, chewed, or cracked wires near the unit or inside the disconnect box, stop what you're doing. This is a serious electrical hazard, not a DIY project.
Strange Noises: Any grinding, clanking, or screeching sounds during the unit's last few runs are basically a cry for help. These noises often point to failing bearings or a motor that's on its last legs.
Signs of a Refrigerant Leak: Look for an oily residue on the copper lines or coils. Refrigerant is a controlled substance and can only be handled by a licensed professional. It's not something to mess with.
A professional's expertise goes beyond simple repairs. An experienced technician can perform diagnostic tests that identify underlying issues, ensuring your system isn't just patched up but truly healthy for the next cooling season.
The Value of Preventive Maintenance Plans
Instead of waiting for trouble to show up, many homeowners prefer a more proactive approach with a preventive maintenance plan. These service agreements are designed to keep your system in peak condition all year, and they include professional winterization.
Industry surveys show that homeowners enrolled in these plans experience 30–50% fewer emergency breakdowns. Why? Because a technician catches things like deteriorating line insulation or a damaged fan guard before winter weather can make them much worse. For us here in Tucson and Southern Arizona, where winter lows can dip into the 30s, a pro from a company like Covenant Aire Solutions will focus on a thorough inspection of the cooling system and ensure heat pumps are clear of any debris that could cause issues. For more on this, check out some of the latest HVAC market trends on researchnester.com.
A good maintenance plan usually includes a fall visit where a technician will perform a comprehensive system check-up, clean internal components you can't easily access, and handle the entire winterization process for you. It ensures nothing gets missed and offers some serious peace of mind.
If you're wondering about the ideal frequency for these check-ups, our guide on how often you should service your air conditioner breaks it all down. It’s really the easiest way to protect your investment.
Your Top AC Winterization Questions, Answered
Even with a checklist in hand, it’s completely normal to have a few questions pop up when you’re getting your AC ready for its winter nap. Let’s tackle some of the most common things homeowners ask, so you can feel confident you’re doing this right.
Getting these details sorted out is the key to protecting your system and giving you total peace of mind until the first heatwave hits next year.
Do I Really Need a Full AC Cover in a Mild Climate?
This is a fantastic question, and the answer for a place like Arizona is a hard no. In fact, wrapping your unit in a full, non-breathable plastic cover is one of the worst things you can do.
Why? It traps moisture from condensation right up against the metal. All winter long, that trapped dampness can lead to rust, corrosion, and even mold growth inside your unit.
A much smarter choice is a purpose-built breathable cover that just shields the top. Even a simple, sturdy piece of plywood laid over the fan grille works perfectly. Here, our main goal isn't to block snow, it's to stop falling leaves, dust, and windblown sand from gumming up the fan motor and coils. A simple top cover gets the job done without creating a moisture trap.
What Actually Happens If I Just Skip It This Year?
In a climate like ours, the biggest risk isn't from a deep freeze. It's the slow, steady damage from built-up grime and unwelcome pests.
If you skip cleaning the outdoor unit, it’s going to start next spring with a thick layer of dirt on its coils. That forces it to work much harder right from day one, which means your energy bills will be higher immediately. Think of that layer of dirt as an efficiency killer.
Piles of leaves and debris are also an open invitation for rodents and insects looking for a winter home. It’s not uncommon for them to chew through sensitive wiring, leading to some surprisingly expensive electrical repairs. And if you forget to shut down the power, the unit’s electronics are left vulnerable to winter power surges.
Should you run into trouble when you fire it up again in the spring, our guide on how to troubleshoot common AC problems is a good place to start.
Skipping winterization is like putting a car away for the season without washing off the road grime. The damage is gradual, but it’s guaranteed. You’re essentially setting yourself up for higher energy costs and a bigger risk of a breakdown on the first truly hot day of the year.
Is This Process Different for a Heat Pump?
Yes, and this is a critically important distinction. A standard air conditioner only cools your home, so it can be completely shut down for the winter.
A heat pump, on the other hand, is a two-in-one system. It works in reverse during the colder months to provide heat.
You should never cover a heat pump or cut its power during the winter; doing so would shut down your home’s heating system entirely. For a heat pump, "off-season" care just means keeping the unit clear of leaves or debris that could block airflow, which is just as important for its heating cycle as it is for cooling. If you’re not 100% sure which system you have, check the user manual or give a professional a call.
When in doubt, nothing beats a professional tune-up to ensure your system is perfectly prepped for its winter rest. The expert technicians at Covenant Aire Solutions can handle the entire winterization process for you and catch potential issues before they become major headaches. Contact us today at https://www.covenantairesolutions.com to schedule your fall maintenance visit and protect your HVAC investment.