HVAC Not Cooling? Your Practical Troubleshooting Guide
- Aug 25, 2025
- 17 min read
That sinking feeling when you realize your AC is blowing warm air on a sweltering Arizona day is all too familiar. Before you start dreading a massive repair bill, take a breath. More often than not, an HVAC not cooling is the result of a simple oversight, not a catastrophic system failure.
Think of yourself as a detective for a moment. We're not jumping to complicated conclusions; we're just ruling out the most obvious suspects first. These initial checks are easy, don't require any special tools, and can often get your cool air flowing again in under 30 minutes.
Before you get into the weeds of diagnostics, a quick once-over of the basics can save you a lot of time and hassle. Here’s a simple checklist to run through.
Quick Diagnostic Checklist for HVAC Cooling Issues
Symptom | Potential Cause | Easy DIY Check |
|---|---|---|
AC won't turn on at all | Power issue or incorrect thermostat setting | Check thermostat batteries & settings; inspect the circuit breaker. |
Air blowing, but it's not cold | Wrong thermostat mode or outdoor unit isn't running | Ensure thermostat is set to "Cool"; check the breaker for the outdoor unit. |
System runs, but home isn't cooling | Restricted airflow | Check for a dirty air filter; ensure all air vents are open and unblocked. |
Some rooms are cool, others are not | Blocked vents or poor airflow balance | Walk through the house and check every single air vent for obstructions. |
This checklist covers the most common culprits that don't require a professional's touch. If these quick checks don't solve the problem, then you can move on to more detailed troubleshooting.
Start With the Thermostat
Your thermostat is the brain of the entire operation, so it's the most logical place to begin. It’s amazing how often settings get bumped or changed in a busy house, leading someone to think the whole system is broken.
Confirm the Mode: First things first, make sure the thermostat is actually set to "Cool". It could have been accidentally switched to "Heat" during a surprisingly chilly desert night or just to "Fan Only," which just circulates room-temperature air.
Check the Temperature: Is the set temperature at least 5 degrees lower than the current room temperature? If you have it set to 78°F but the room is already a comfortable 75°F, the system is doing exactly what it's told: nothing.
Inspect the Batteries: Many digital thermostats run on batteries. If the screen is blank or you see a low-battery icon flashing, a fresh set of batteries might be the only fix you need.
Honestly, a quick thermostat adjustment is the best-case scenario. Always start here.
Inspect the Circuit Breaker
Your HVAC system isn't just one machine; it’s two. You have an indoor unit and an outdoor unit, and they frequently run on separate circuit breakers. A random power surge or an overloaded circuit can easily trip one of them, halting the cooling process.
Head over to your home's main electrical panel. You’re looking for breakers labeled "HVAC," "Air Conditioner," "Condenser," or something similar. If you see a switch that’s in the middle position or flipped to "Off," that's your smoking gun. To reset it, you need to push the switch firmly all the way to "Off" first, and then flip it back to "On."
Important Tip: If that breaker trips again right away, or keeps tripping, stop what you're doing. This isn't a fluke; it's a sign of a more serious electrical problem. Don't keep resetting it. This is when you pick up the phone and call a professional.
Ensure Air Vents Are Open and Unobstructed
For your home to cool down, the cold air actually has to be able to get out of the vents. It sounds obvious, but blocked airflow is a common problem that makes your system work way harder than it needs to.
Do a quick walk-through of your house and check every single supply vent (the ones blowing air out). Make sure the little levers have the louvers open and that nothing is blocking them. It's incredibly easy for a piece of furniture, a thick rug, or a kid's toy to end up covering a vent, completely killing the airflow to that room.
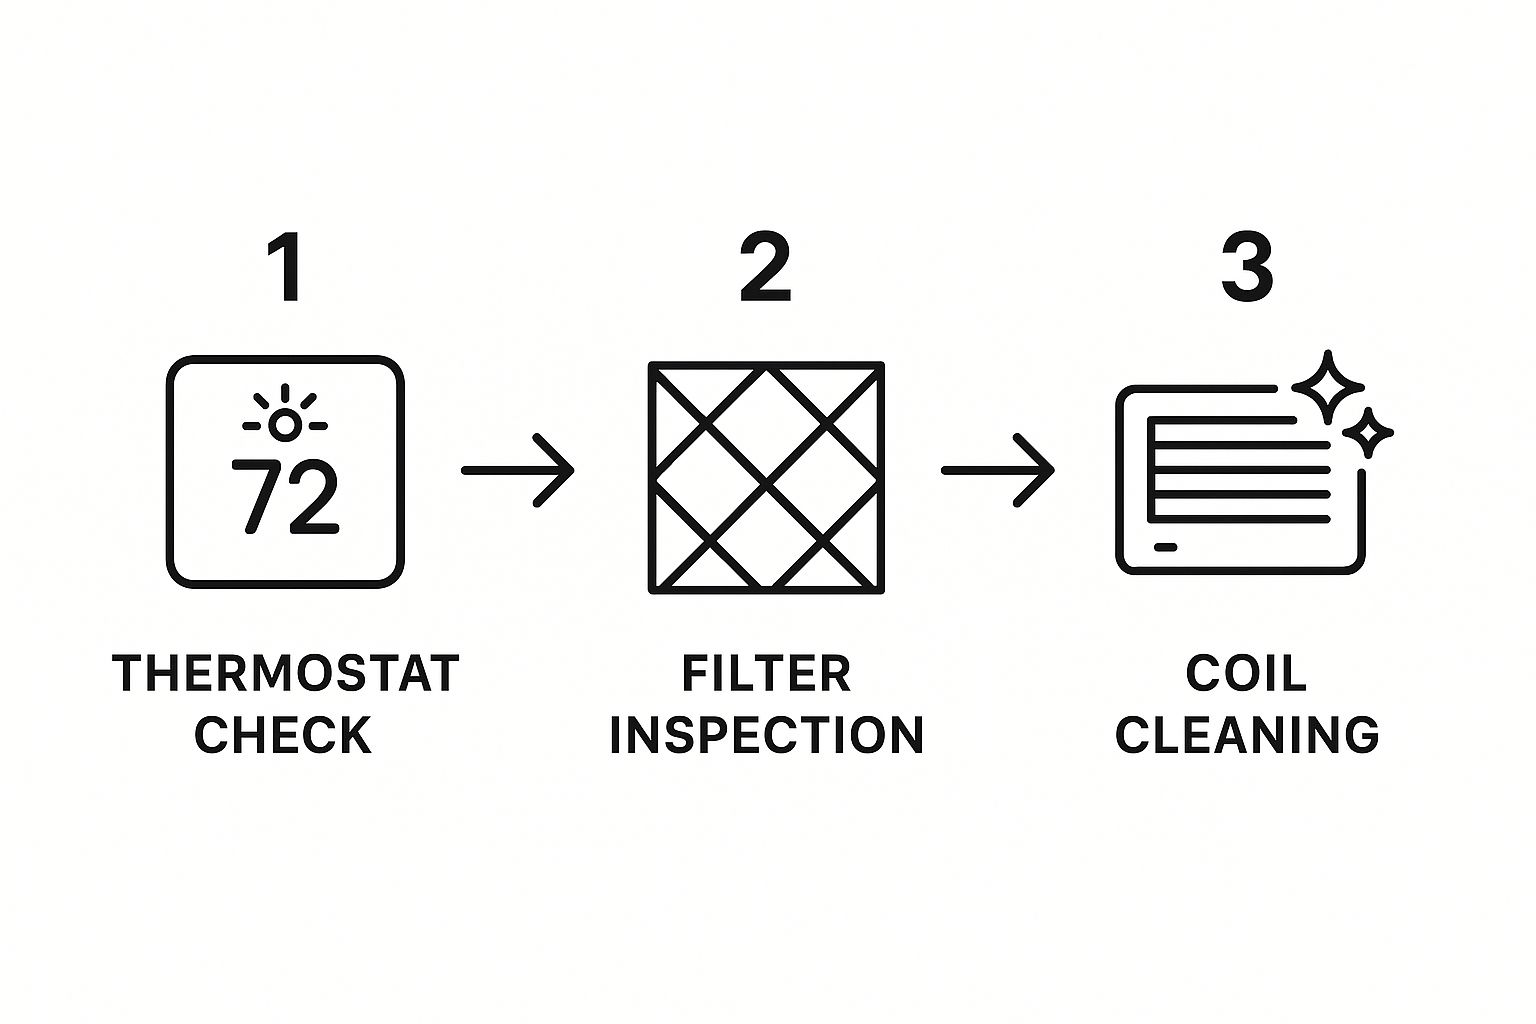
This simple infographic gives you a great visual of how to approach troubleshooting, starting with the easy stuff like the thermostat and working your way to filters and coils.
Essential HVAC Cleaning and Maintenance Fixes
If the basic checks didn't get your cool air flowing again, it's time to roll up your sleeves for some simple but incredibly effective maintenance. When an HVAC is not cooling, the culprit is often something surprisingly basic: restricted airflow. Dirt, dust, and debris are the arch-enemies of your air conditioner.
Luckily, cleaning the two most common problem areas, the air filter and the outdoor condenser unit, is something most homeowners can handle. This isn't about complicated mechanical repairs; it's about helping your system breathe again.
Taming the Clogged Air Filter
Think of your air filter as the lungs of your HVAC system. It’s on the front lines, trapping dust, pollen, and pet dander to keep it out of the air you breathe and away from the delicate internal components of your unit.
But when that filter gets clogged, it’s like trying to breathe through a thick blanket. Your system can't pull in enough air, which torpedoes its ability to cool your home. A really bad clog can even cause the evaporator coil to freeze up or the system to overheat and shut down completely.
Locating and Replacing Your Filter
Finding the filter is usually pretty easy. Check for a slot in the indoor air handler unit (often found in a closet, attic, or basement) or inside a large return air vent on a wall or ceiling.
Kill the Power: First thing's first, turn off your HVAC system at the thermostat. You don't want it sucking in unfiltered air while you're working.
Pull the Old Filter: Slide the old filter out. You'll see an arrow printed on the cardboard frame showing the correct airflow direction; take note of which way it's pointing.
Check the Size: The filter's dimensions are always printed right on the frame (e.g., 16x25x1). You have to get an exact match for the replacement.
Slide in the New One: Insert the new filter, making sure its airflow arrow points in the same direction as the old one (usually toward the furnace or air handler).
While some systems have reusable filters you can wash, most homes use disposable pleated ones. These should be replaced every 1-3 months, sometimes more often if you have pets or serious allergies.
A clean filter is your first line of defense when your HVAC is not cooling. It's a simple, cheap task that pays off big time in performance and system longevity. Ignoring it is one of the most common, and costly, mistakes we see homeowners make.
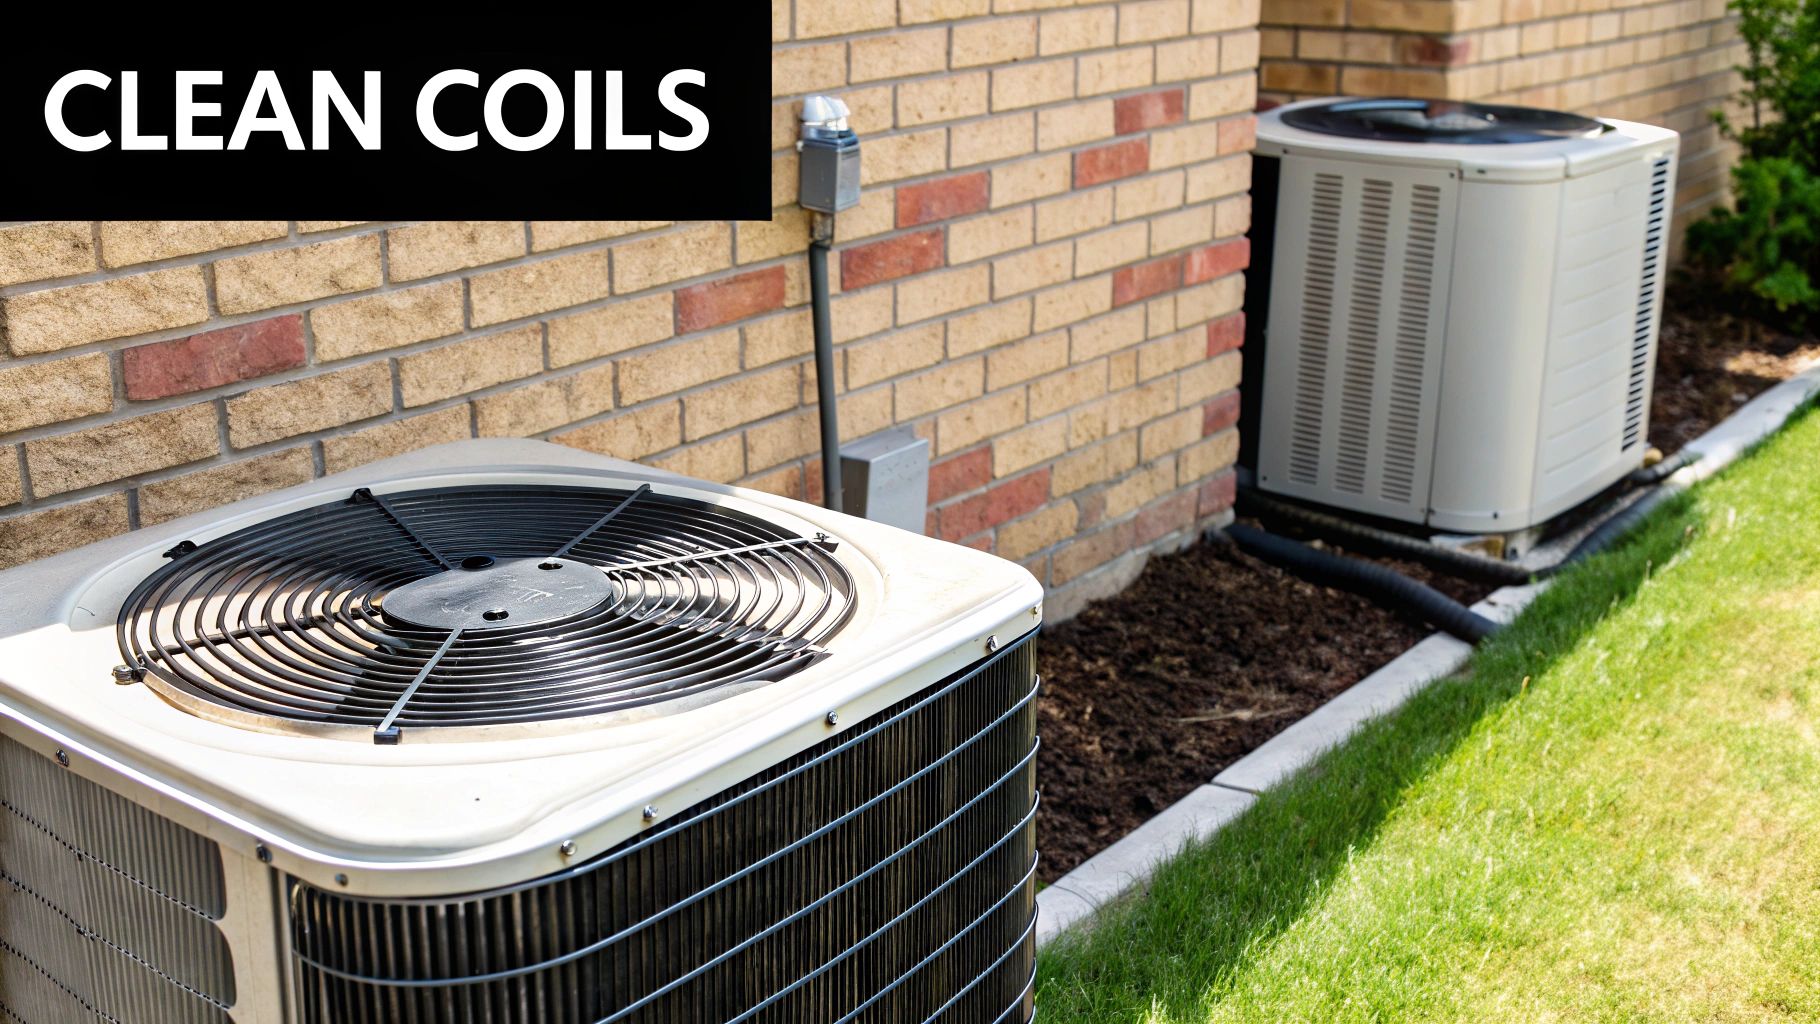
Clearing the Outdoor Condenser Unit
The big metal box outside, your condenser unit, has a critical job: releasing all the heat it pulled from inside your house. It does this with a huge fan that draws air across a set of metal fins.
When those fins get caked with grass clippings, leaves, dirt, or cottonwood fluff, the heat has nowhere to go. It gets trapped. Your AC simply can't get rid of the heat, so it can't cool your home, no matter how hard it tries.
Steps for Safe Condenser Cleaning
Safety is non-negotiable here. You’re working around electricity and sharp metal fins.
Shut Off All Power: Find the electrical disconnect box, which is usually a gray box mounted on the wall near the condenser. Pull the handle or flip the switch to OFF. To be extra safe, I always recommend flipping the corresponding breaker in your main electrical panel, too.
Clear Debris by Hand: Start by pulling away any large debris like leaves, twigs, and weeds. You want to maintain at least two feet of clear space all the way around the unit.
Gently Clean the Fins: Grab a garden hose with a gentle spray nozzle. Spray from the top down, and if you can, try to spray from the inside out to push the gunk away from the unit. Never use a high-pressure washer, it will bend those delicate aluminum fins in a heartbeat, creating a much bigger problem.
Keeping up with simple cleaning and maintenance is the secret to not only ensuring your system cools properly but also to significantly reduce your aircon running costs. For a more detailed guide on this, check out our walkthrough on how to clean condenser coils: https://www.covenantairesolutions.com/post/how-to-clean-condenser-coils-easy-diy-guide
The value of this kind of proactive care can't be overstated. In fact, preventive maintenance substantially mitigates these problems. Documented research from 2022 shows a 70-75% reduction in system breakdowns and a 35-45% decrease in downtime duration when proper preventive measures are implemented. This approach yields an extraordinary 545% return on investment by extending equipment lifespan. You can explore more about these HVAC maintenance statistics to understand the full financial impact.
Digging a Little Deeper: More Advanced HVAC Problems

So, you’ve cleaned the filter and hosed down the condenser coils, but your AC is still on the fritz. Don't throw in the towel just yet. There are a couple of other common culprits you can often spot yourself before you have to make that call to a pro.
We're talking about a frozen evaporator coil and a clogged condensate drain. Both are classic reasons for an HVAC not cooling, and they leave behind some pretty distinct clues. Nailing down one of these issues gives you a huge advantage when explaining the problem to a technician, or you might even find it's a simple fix you can handle.
Is Your Evaporator Coil a Block of Ice?
The evaporator coil is tucked away inside your indoor unit. Its job is to get ice-cold and pull the heat right out of your home’s air. But when something disrupts the system, usually poor airflow from that dirty filter we talked about, it gets too cold. Before you know it, a thick layer of ice forms, completely choking off the airflow.
The signs can be tricky. You might feel weak, lukewarm air trickling from your vents, or notice the system is running constantly but the house just isn't getting any cooler.
Here’s how to check it out for yourself:
Shut the whole system down. Go to your thermostat and switch it to the "Off" position. You need both the fan and the compressor to be completely off. This is a critical safety step and lets the ice start melting.
Find your indoor air handler. It’s usually hiding in a utility closet, the attic, or the basement.
Open the access panel. You'll likely need a screwdriver or a nut driver for this. Carefully remove the panel that covers the A-shaped evaporator coil.
Look for the ice. If you see a solid block of ice or even just a heavy coating of frost on the coils, you've found your problem.
If you do find ice, the immediate solution is patience. You have to let it thaw out completely. This isn't a quick process; it can take several hours, sometimes up to a full 24 hours. Whatever you do, don't try to run the AC with a frozen coil. You'll only make it worse and risk killing your compressor. A few towels placed under the unit will help manage the water as it melts.
A frozen coil is a symptom, not the root cause. Nine times out of ten, it’s caused by restricted airflow from a dirty filter. However, it can also point to low refrigerant, and that’s a job that requires a licensed professional. Once the coil is thawed, pop in a fresh filter and see if the problem comes back.
Checking for a Clogged Condensate Drain Line
As your AC works its magic, it pulls a lot of humidity out of the air. This moisture drips off the evaporator coil into a drain pan and flows outside through a small pipe: the condensate drain line.
Over time, this drain line can get gummed up with algae, sludge, and other gunk. When it clogs, the water has nowhere to go. It backs up, overflows the drain pan, and triggers a safety device called a float switch, which shuts down your entire system to prevent water damage.
Signs of a Clogged Condensate Line
The clues for this one are usually pretty clear:
Your AC suddenly quits and refuses to turn back on. That’s the float switch doing its job.
You discover a puddle of water on the floor around your indoor unit. This is a dead giveaway that the drain pan has overflowed.
You smell a musty, mildewy odor coming from near the indoor unit. That’s from stagnant water sitting in the drain line.
To investigate, find the drain line itself. It's almost always a white PVC pipe sticking out of the side of your indoor unit. Follow it to where it exits your house, which is often near the outdoor condenser. On a hot, humid day when your AC should be running hard, you should see a steady drip of water coming out of this pipe. If you don't, that's another strong sign you've got a clog.
While some DIY-savvy homeowners can clear a minor clog with a wet/dry vac, you have to be careful not to damage the pipe or the float switch. For a deeper dive into fixes, check out our https://www.covenantairesolutions.com/post/top-ac-troubleshooting-tips-to-fix-your-air-conditioner-fast.
It's also worth remembering that many cooling problems start on day one. A shocking number of performance issues are baked in from the beginning. In fact, the U.S. Department of Energy estimates that over 65% of residential HVAC systems suffer from improper installation, leading to poor performance right out of the gate.
Recognizing When It’s More Than a Simple Fix
So, you've worked through the simple DIY fixes, and you're still sweating. If your HVAC isn't cooling after you've checked the basics, it’s time to shift your thinking. We may be dealing with a much bigger problem inside the system itself.
While plenty of cooling issues boil down to airflow blockages, sometimes a critical component gives up the ghost. Knowing how to spot the signs of a major failure is crucial.
This isn't about fixing it yourself, it's about understanding what's happening. That knowledge helps you have a productive, informed conversation with a technician, so you can follow their diagnosis and understand your options. Let's dig into two of the biggest culprits: refrigerant leaks and compressor failure.
What a Refrigerant Leak Looks and Sounds Like
Refrigerant is the absolute lifeblood of your air conditioner. It’s the magic stuff that pulls heat from your indoor air and dumps it outside. Your AC is a sealed, closed-loop system, which means it should never run low on refrigerant. If it's low, you have a leak. Period.
A leak is a serious problem. It doesn't just stop your AC from cooling; it can cause a cascade of expensive damage if you let it go.
Clues That Point to a Leak
You can’t fix a leak on your own, but you can definitely play detective and find the evidence.
Weak, Warm Air: This is the most obvious red flag. The system is running, the fan is blowing, but the air coming out of the vents is lukewarm at best.
Ice on the Coils: Remember the frozen evaporator coil? Low refrigerant is a classic cause of this, even when your filter is spotless.
Hissing or Bubbling Sounds: A sharp, distinct hissing noise coming from either the indoor or outdoor unit is a dead giveaway for escaping refrigerant gas.
Oily Gunk: Refrigerant circulates with a special lubricant oil. If you see a greasy, oily residue on the copper lines connecting your units, that’s a sure sign of a leak.
Handling refrigerant is not a DIY job. It's actually illegal for anyone without an EPA certification to work with it due to safety risks and environmental impact. If you suspect a leak, your one and only move is to call a licensed pro to find and fix it.
Diagnosing a Failing Compressor
If refrigerant is the blood, the compressor is the heart of your cooling system. This powerful motor, housed inside the big outdoor condenser unit, is responsible for pumping that refrigerant through the entire loop. When the compressor starts to fail, your AC is on life support.
A dying compressor is one of the most expensive repairs you can face. In many cases, it makes more financial sense to replace the entire system. Knowing the warning signs can help you prepare for that tough conversation with your technician.
Symptoms of a Compressor in Distress
A compressor rarely just dies without warning. It usually complains loudly first.
Loud, Alarming Noises: Your unit always makes noise, but listen for anything new and ugly. A harsh grinding, a deep rumbling, or a loud clanking noise when the AC kicks on are all very bad signs.
The Breaker Keeps Tripping: Is the circuit breaker for your outdoor unit constantly tripping? This often happens when a failing compressor tries to draw way too much power just to get started. If your AC keeps shutting off unexpectedly, this could be the root cause. You can learn more about why your AC keeps shutting off in our guide.
Cooling Power Fades Over Time: A struggling compressor just can't move refrigerant effectively. You'll notice a gradual, steady decline in your AC's cooling ability.
The Outdoor Unit Shakes Violently: Does your condenser unit shudder or vibrate like crazy when it starts up? This is often called a "hard start," and it’s a classic sign that the compressor motor is on its last legs.
These major failures show just how complex modern HVAC systems are. When an HVAC system isn’t cooling, the list of potential causes is massive. In fact, one body of research has identified 257 distinct fault types, from sensor errors to actuator faults and major component failures like these. You can discover more insights about these HVAC operational findings on pmc.ncbi.nlm.nih.gov. Recognizing these serious symptoms tells you when it’s time to put down the tools and call in an expert.
When to Stop and Call an HVAC Professional
While tackling a few DIY fixes can feel empowering, knowing when to put the tools down is just as important. Pushing forward when a major component has failed isn't just frustrating, it can be downright dangerous and often leads to a much more expensive repair bill.
Recognizing the red flags that signal a deeper problem is the key to protecting both your safety and your wallet. An HVAC not cooling can quickly escalate from a simple inconvenience to a hazardous situation if you don't know when to step back and call in an expert.
Ignoring these warning signs can easily turn a manageable repair into a complete system replacement. Let's walk through the specific scenarios where a professional touch isn't just recommended, it's absolutely necessary.
Electrical Issues Demand an Expert
Any problem that even hints at an electrical fault is a hard stop for DIY work. Your HVAC system runs on powerful electrical currents, and messing with them without the right training and specialized tools is incredibly risky.
You need to call a certified technician immediately if you notice any of these signs:
Frequent Breaker Trips: If you reset a breaker only to have it trip again a few minutes later, you’re likely dealing with an electrical short or an overloaded circuit. Continuously flipping it back on is a serious fire hazard.
Burning Smells: A distinct, acrid burning odor coming from your vents or the unit itself points to overheating wires or a failing motor. Don't hesitate, shut the system down at the breaker right away.
Dimming Lights: Do your lights flicker or dim every time the air conditioner kicks on? This could mean the compressor is drawing too much current and straining your home's entire electrical system.
These aren't minor glitches; they are serious safety warnings that require a professional.
Refrigerant Leaks Are Not a DIY Job
As we've touched on, refrigerant is a controlled chemical that requires an EPA license to handle. But beyond the legal requirements, working with refrigerant is complex and can be harmful if you don't know what you're doing.
A professional has the right tools, like electronic leak detectors, to pinpoint the exact source of a leak. They can then safely repair the breach, use a vacuum pump to remove contaminants like air and moisture from the lines, and recharge the system to the manufacturer's precise specifications. An improper charge can absolutely destroy your compressor, so precision is everything here.
Never, ever attempt to "top off" your system with one of those refrigerant kits you can buy online. It's illegal, dangerous, and almost guarantees you will cause more damage. A system that's low on refrigerant has a leak, period. Fixing that leak is the only real solution.
Major Mechanical Failures
Loud, unusual noises are your HVAC system's way of screaming for help. Any grinding, clanking, or high-pitched screeching often points to a severe mechanical failure, like a shredded motor bearing or a dying compressor.
Trying to run the system with these issues can cause a catastrophic failure, spreading metal shavings throughout the refrigerant lines and contaminating the entire system. At that point, you're looking at a far more complicated and expensive fix.
If you find yourself weighing the high cost of a major repair against a new unit, it might be a good time to explore whether you should replace or repair your HVAC system. This can help you make a more informed financial decision.
DIY vs Professional HVAC Repair Tasks
It can be tough to know where to draw the line. This table breaks down which tasks are generally safe for a handy homeowner and which ones absolutely demand a pro.
Task | Recommended for DIY? | When to Call a Pro |
|---|---|---|
Changing Air Filters | Yes, highly recommended. | If you cannot locate or access the filter slot easily. |
Cleaning Outdoor Unit | Yes, with caution. | If the fins are heavily bent or the unit requires disassembly to clean. |
Resetting a Breaker | Yes, once. | If the breaker trips repeatedly, indicating an electrical fault. |
Diagnosing Refrigerant Leaks | No, never. | Immediately if you see oily residue, hear hissing, or suspect low levels. |
Clearing a Drain Line | Maybe, for simple clogs. | If the clog is severe or you suspect a float switch or pump has failed. |
Any Electrical Repair | Absolutely Not. | For any issue involving wiring, capacitors, contactors, or motors. |
When in doubt, the safest and most effective move is always to call a licensed and insured HVAC professional. It’s better to pay for an expert’s time than to risk your safety or the health of your expensive equipment.
Common HVAC Cooling Questions Answered
When your AC decides to take a vacation on the hottest day of the year, a million questions can race through your mind. An HVAC not cooling can feel like a major crisis, but breaking down the common issues is the first step toward getting things back on track. We've pulled together some of the most frequent questions we hear from homeowners to give you clear, straightforward answers.
This quick guide will help you play detective and figure out what might be going on with your system.
Why Is My AC Running but Not Cooling the House?
This is easily one of the most maddening situations. You can hear the system kick on, the fan is blowing, but the air coming out of the vents is lukewarm at best. If this sounds familiar, the problem usually traces back to one of three main culprits.
First, take a look at your air filter. If it's severely clogged, you've essentially put a chokehold on your system, starving it of the air it needs to cool. Next, head outside and inspect the condenser unit. If it’s caked in dirt, grass clippings, or other debris, it can't release the heat it's pulled from your home.
If both of those check out, you might be dealing with low refrigerant. This isn't a DIY top-off situation; it points to a leak that needs a professional to find and fix.
How Can I Tell if My HVAC Is Low on Refrigerant?
A system that's low on refrigerant will give you some pretty distinct clues. You'll probably notice the air from your vents is coolish, but definitely not cold. Your AC will also seem to run constantly, fighting a losing battle to reach the temperature you set on the thermostat.
Another dead giveaway is seeing ice or frost forming on the copper refrigerant lines or the indoor evaporator coil. You might even hear a faint hissing or bubbling sound coming from one of the units, which is the sound of refrigerant escaping.
Keep in mind: Refrigerant runs in a closed-loop system. If it's low, it means there's a leak somewhere. You should never attempt to add refrigerant yourself. It's a job that requires a licensed technician to handle safely and legally.
Can a Bad Thermostat Stop My AC From Cooling?
Absolutely. The thermostat is the brain of your entire operation. If it's on the fritz, it can easily stop your AC from turning on or cooling correctly.
Start with the simple stuff first. Check for dead batteries and pop in a new set if needed. Then, double-check that the thermostat is switched to "Cool" and that the target temperature is set several degrees below what the room temperature currently is.
If the screen is blank even with fresh batteries, or you have a hunch it's misreading the room's temperature, the thermostat itself might have failed. While some handy homeowners are comfortable replacing a basic thermostat, it's always smart to call a professional if you're not confident working with low-voltage wiring. Knowing how each part of your system works together is key to keeping it running smoothly. For more on that, you can check out our guide to HVAC system efficiency.
If you've walked through these questions and your home still feels like a sauna, it's time to bring in the experts. For reliable, professional service in the Tucson area, trust Covenant Aire Solutions to get your home comfortable again. Visit us online or call us for 24/7 emergency service.