
Replacing Plug End on a Cord: Safe Steps and Testing
Most cord failures aren't plug failures, so cutting off the end and attaching a new one isn't a sound starting point. A new plug fixes a damaged plug, not damaged insulation, broken conductors, or an appliance fault. Before replacing a plug end, find out what failed.
For Tucson homeowners, that means looking beyond the blades. Heat, outdoor storage, and repeated bending can leave a cord unsuitable for repair even when the damage looks concentrated at the plug.
Decide If the Plug End Is the Real Problem
Unplug the appliance before inspecting it. Look slowly from the appliance inlet to the wall blades, gently bending the cord while checking for stiffness, cracks, flattened areas, and discoloration. Don't sharply flex brittle insulation or handle exposed conductors.
The U.S. Consumer Product Safety Commission estimates approximately 46,000 home electrical-distribution-system fires annually. That figure covers electrical-distribution systems broadly, not just damaged plugs, but it explains why a cosmetic repair isn't enough.
A conductor can separate beneath insulation that still looks intact, especially where the cable enters the plug. UC San Diego's electrical-safety guidance identifies this stress point as a shock and fire hazard and recommends replacing damaged cords rather than taping them.
Plug-only repair or full cord replacement
The “Yes” entries below assume the rest of the cord and appliance pass inspection.
Condition found | Plug end alone? | What to do |
|---|---|---|
Jacket intact, plug housing cracked or split | Yes | Replace the plug end with one of the same rating |
Blades loose, bent or pitted, cord jacket sound | Yes | Replace the plug end; inspect the receptacle for damage |
Ground pin missing or broken on a three-wire cord | Yes | Replace with a grounding-type plug of the same rating |
Jacket cut, nicked or wrapped in tape | No | Replace the cord |
Jacket stiff, cracked or brittle near the plug | No | Replace the cord |
Heat discoloration, melted plastic or burning smell | No | Stop use, replace the cord and have the appliance checked |
Plug or cord warm during normal use | No | Stop use and check the receptacle with an electrician |
Breaker or GFCI trips whenever the item runs | No | Stop use and find the fault before any repair |
Cord too short to leave clean jacket after cutting back | No | Replace the cord |
Stop using an item that buzzes, arcs, smells burnt, or fits loosely in its receptacle. If nearby lights also fluctuate, investigate the broader symptoms described in this guide to lights constantly flickering, rather than assuming the appliance plug explains everything.
A plug-only repair makes sense only when every inspection result points to the plug. A loose appliance inlet, damaged jacket, or unexplained trip changes the job from plug replacement to fault diagnosis.
Matching the Plug to the Equipment and Cord
Common plug configurations by equipment type
Use this comparison to identify the equipment category, not as permission to change its original configuration.
Equipment | Matching note |
|---|---|
Lamps, fans and small kitchen appliances | Grounded versions use two flat blades plus a round ground; match blade shape exactly. Preserve the original polarized configuration on ungrounded equipment |
Electric clothes dryer | Modern grounding configurations use four prongs with separate neutral and ground |
Electric range | Modern grounding configurations use four prongs with separate neutral and ground; confirm the outlet matches before buying |
Matching means checking voltage, amperage, grounding configuration, and cord rating. Physical fit alone doesn't establish compatibility: a plug can fit an outlet while being unsuitable for the cord diameter, environment, or equipment load.
For grounded household equipment, a NEMA 5-15P is a common configuration for 120 V lamps and small appliances. Heavier 120 V equipment may specify a NEMA 5-20P, which has a sideways blade and mates with the appropriate T-slot receptacle. Some 240 V window or portable air-conditioning units use NEMA 6-15P or 6-20P configurations.
Electric dryers commonly use NEMA 14-30P, while electric ranges commonly use NEMA 14-50P. These are configuration identifiers, not interchangeable upgrade options; the equipment nameplate and manufacturer's instructions determine the correct assembly.
Selection rule: A higher-rated plug doesn't increase what the cord can safely carry. The lowest applicable component rating limits the assembly, and the appliance load must remain within it.
Read the jacket before buying
Find the cord's printed markings and photograph them along with the old plug and appliance nameplate. Check conductor size, usage designation, and the replacement plug's permitted cable-diameter range. A clamp that can't grip the jacket securely makes an otherwise suitable plug unusable.
OSHA's wiring-design requirements tie device selection to circuit voltage and current ratings and specify construction-cord rating markings approximately every foot. Household markings may be worn or difficult to read, so don't guess when the cord's suitability can't be established.
For patio or garage equipment exposed to weather, select a suitable outdoor-rated cord, with a designation such as SJTW where appropriate to the application. Outdoor suitability doesn't automatically establish resistance to every hot surface, chemical, or abrasion hazard. Tucson sun and hot storage conditions make jacket inspection especially important.
Buy a listed replacement attachment plug rated at least equivalently to the original and specifically compatible with the cord. Preserve any integral protective device, such as the safety assembly on certain air-conditioner cords; an ordinary replacement plug isn't a substitute.
A hardwired appliance, altered receptacle, or disconnect change is outside a plug-only repair.
How to Replace a Plug End Step by Step
Use this procedure only after confirming that the cord is sound and the manufacturer permits a field-replaceable attachment plug. If the appliance requires a complete factory cord assembly, replace that assembly instead.
The illustration summarizes the physical sequence; the isolation and testing requirements below still apply.
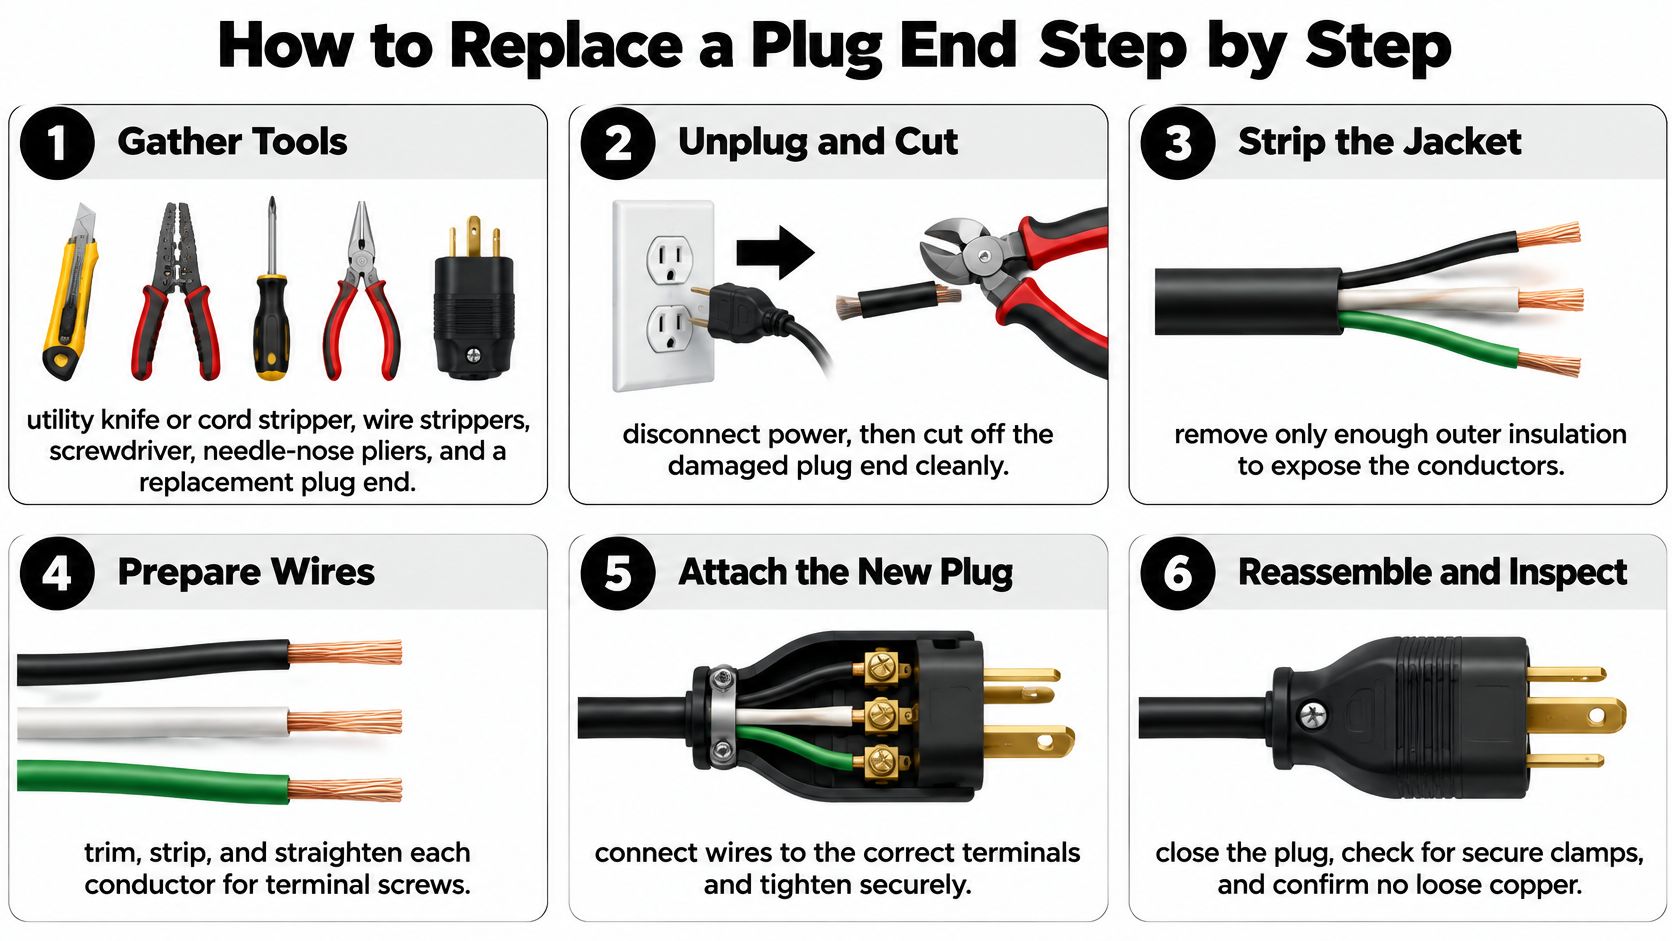
Prepare and terminate the cord
Gather tools that fit the job. Have a cord stripper or utility knife, wire strippers matched to conductor size, a correctly fitting screwdriver, needle-nose pliers, a non-contact voltage tester, and a multimeter. Add a torque screwdriver when the plug specifies terminal torque; an ill-fitting driver can damage screws before the connection is secure.
Disconnect every power source. Unplug the cord and keep its supply plug in sight so nobody can reconnect it. A non-contact tester is only a preliminary check, not proof of de-energization; where voltage verification is necessary, use an appropriate contact tester with a known-live check before and after testing.
Confirm the replacement before cutting. Compare its voltage, amperage, blade configuration, cable range, and environmental suitability with the original. Don't substitute a plain attachment plug for an assembly containing required leakage-current or other protective components.
Remove the failed plug cleanly. With the cord disconnected, make a square cut through sound cable immediately behind the failed plug assembly. If heat, crushing, or insulation damage extends into the cord, stop and replace the cord rather than shortening it until the evidence disappears.
Fit the cover before making connections. Slide on any housing, gland, or clamp parts that must pass over the free cable end. Skipping this wastes work because the finished terminations may have to come apart again.
Strip to the plug's dimensions. Remove only the jacket length specified by the manufacturer, without scoring the conductor insulation, then strip each wire to the marked strip length. Keep the strands together and use the terminal's intended capture method; excessive stripping leaves accessible copper and increases the chance of a short.
Use terminal markings, not position alone. Connect green or bare ground to the green grounding terminal, white neutral to silver, and black hot to brass on the applicable household configuration. For higher-voltage plugs, follow the marked current terminals and equipment diagram; never guess whether a conductor is hot or neutral, and never remove a grounding pin to fit an outlet.
Secure each conductor properly. Tighten to the manufacturer's torque specification where provided, then gently tug each wire to confirm retention. Capture every strand without trapping insulation under the electrical contact or leaving copper outside it.
Clamp and close the housing. Make the strain relief grip the outer jacket, not the individual insulated wires, then assemble the housing without pinching anything. Check blade alignment, housing closure, and cable retention before proceeding to tests.
OSHA's electrical-equipment use requirements require damaged equipment to remain out of service until necessary repairs and safety tests are completed. A closed housing alone doesn't establish a successful repair.
Check the work before testing
Swapped hot and neutral, over-stripped insulation, and reused heat-damaged cable are reasons to reopen or reject the repair. Don't energize an assembly while you're uncertain about a terminal identification.
This video provides an additional view of plug assembly, but the replacement manufacturer's instructions control the details.
How to Test the Repaired Cord Before Use
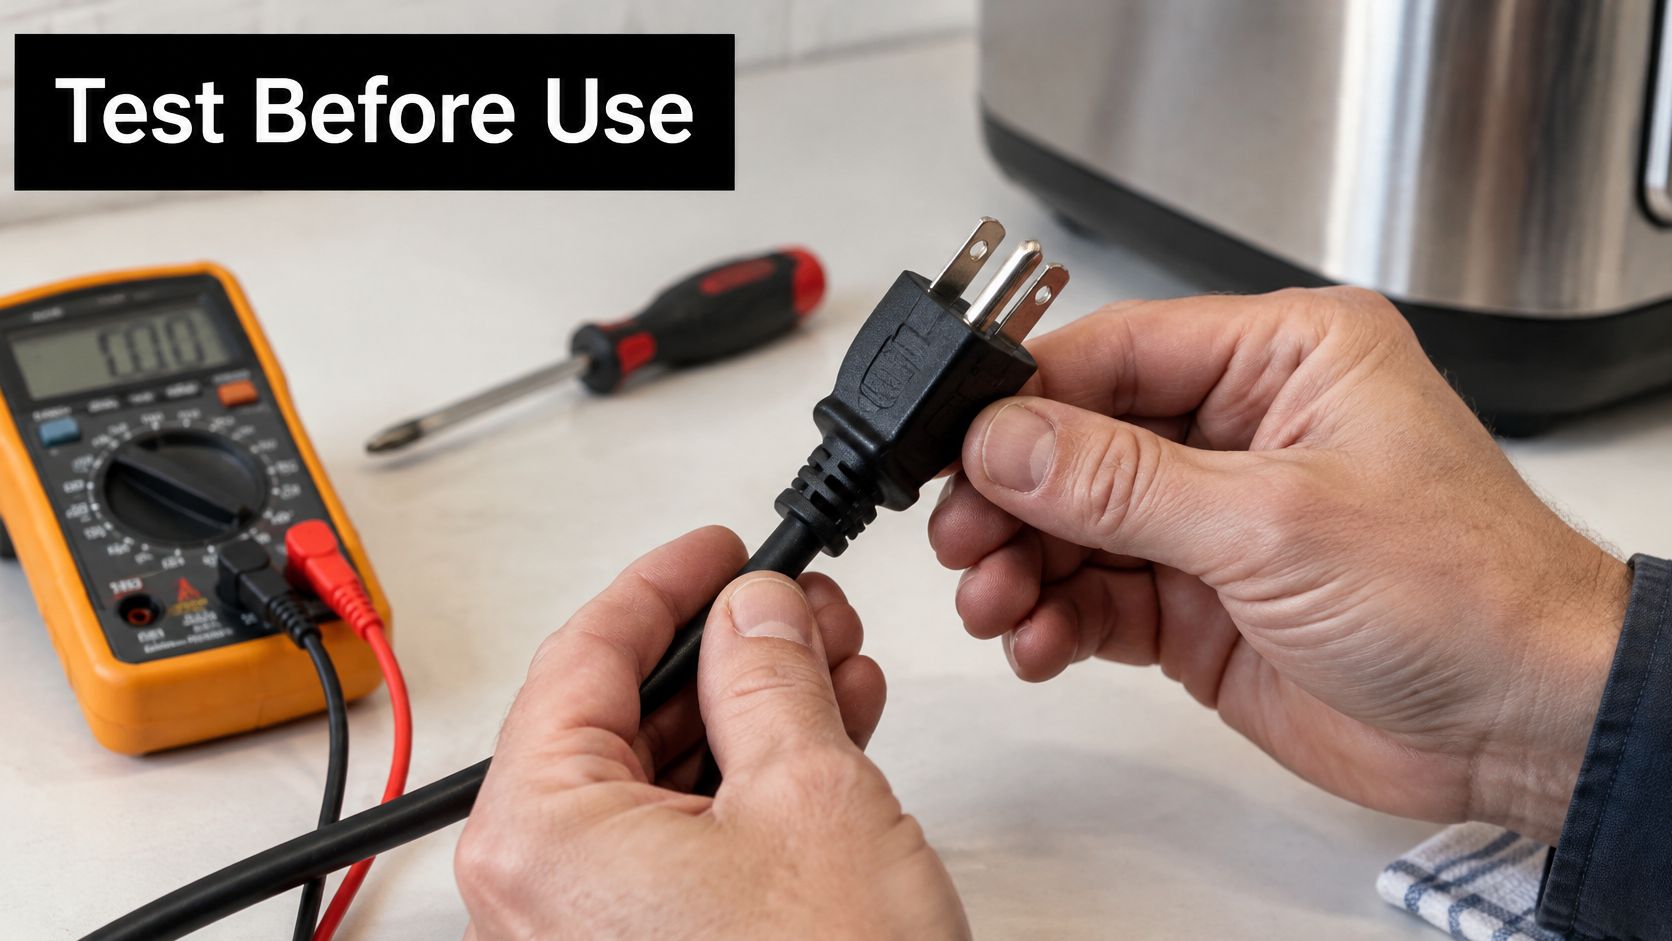
Testing is a pass-or-fail gate. Keep the appliance disconnected for resistance and continuity measurements; never put a multimeter in continuity mode on an energized circuit.
Start with the housing and blades, then verify the electrical paths. Use accessible cord-end terminals or the manufacturer's service procedure, rather than opening an appliance you aren't qualified to service.
A meter helps establish continuity, but a beep alone doesn't prove every aspect of electrical safety.
Post-repair pass or fail checks
Test | Passes when | If it fails |
|---|---|---|
Visual inspection | No cracks, exposed copper, loose blades or deformed pins | Discard the defective plug and rebuild with a new one |
Conductor continuity | Each conductor reads continuous from end to end | Check terminals, re-terminate and retest; replace a cord with an internal break |
Ground continuity | Ground pin reads near zero ohms to the appliance ground, accounting for meter-lead resistance | Do not use; re-terminate the ground and retest |
Polarity | Receptacle tester shows correct supply wiring, and separate cord tracing confirms correct plug terminations | Correct the identified fault, then retest |
Pull test | Plug stays put under a light tug at the strain relief | Re-clamp on the jacket or replace the plug |
A plug-in receptacle tester checks the outlet, not the internal wiring of an appliance plugged into it. Confirm the repaired cord's polarity by tracing each blade to its intended conductor termination while disconnected. Where applicable, a technician should also perform insulation-resistance or leakage-current testing suited to the equipment.
Only after passing the disconnected checks should the item run under its normal load, supervised. Watch for odor, buzzing, intermittent operation, or abnormal warmth; stop immediately if any appears, and don't handle suspect live parts.
When to retest
OSHA's construction grounding requirements call for testing under applicable assured equipment-grounding programs before first use, after repair, after suspected damage, and at intervals no longer than three months, with a six-month exception for qualifying fixed cords and receptacles. Those are workplace-program requirements, not a universal household testing schedule.
At home, retest after repair, crushing, pinching, or other suspected damage. Inspect and assess cords before reuse after damp storage or relocation, particularly when their exposure conditions have changed.
A failed or intermittent result means the item stays unplugged and labeled against use. Repeated testing doesn't turn an unexplained failure into a pass.
Local Code and Permit Rules for Tucson Homes
Replacing an attachment plug on a portable appliance is different from altering a building's electrical installation. The first is equipment maintenance; the second may involve permits, inspections, and electrical-contractor licensing.
For a Tucson address, confirm the jurisdiction before authorizing building-wiring work. A property may fall under city or Pima County requirements, and the applicable National Electrical Code edition and local amendments should be confirmed with that building department.
Keep the scope of work clear
Portable cord repair: A like-for-like plug-end replacement generally doesn't involve a building permit, but equipment instructions and property-management rules still apply.
Receptacle or circuit changes: Ask the building department about permit and inspection requirements before changing an outlet configuration, adding a circuit, or installing a new higher-voltage outlet.
Hardwired HVAC connections: Use an appropriately licensed contractor for disconnects and fixed wiring. Confirm that the provider holds the electrical authorization required for the proposed work.
Rental and commercial equipment: Obtain the owner's approval and keep a repair-and-test record rather than treating the repair as undocumented household maintenance.
Don't change a receptacle merely to accommodate a replacement plug you've already bought. Establish what the appliance requires and whether the existing circuit can supply it before anyone purchases parts.
A listed part isn't a factory recertification
A listed replacement plug is a component, not proof that the repaired appliance has undergone its original factory evaluation again. Its installation doesn't recreate factory testing or automatically establish the suitability of the finished assembly. Don't assume either that every field repair voids a listing or that every repair preserves it; follow the appliance manufacturer's service requirements.
For heat-producing appliances, use the intended wall connection rather than treating an extension cord as a permanent solution. A plug repair doesn't make an unsuitable supply arrangement acceptable.
Choose the service provider by the work involved: appliance service for an internal cord assembly, an electrician for branch-circuit faults, and qualified HVAC service for air-conditioning equipment. When scopes overlap, confirm who is responsible for the fixed electrical connection before booking.
When to Hand the Job to a Technician Instead
Leave the repair to a qualified technician or electrician when any of these conditions applies:
Concealed routing: The cord passes through a wall or ceiling, suggesting an installation problem beyond a damaged end.
Fixed or higher-voltage HVAC equipment: The appliance is hardwired or requires specialized cord protection and manufacturer-specific testing.
Suspect receptacle: The outlet is loose, scorched, or warm, so replacing the appliance plug won't resolve the supply-side fault.
Repeated protection trips: A breaker or GFCI opens whenever the equipment operates.
Missing test capability: You can't confidently verify conductor continuity, grounding, and polarity.
Property liability: The equipment serves a rental, workplace, or commercial space where documented acceptance matters.
Pay for diagnosis, not repeated substitutions
A repeatedly tripping air conditioner needs fault isolation, not another reset. This guide to an HVAC breaker that has tripped helps distinguish basic observations from situations that need professional attention.
If a hot plug or burning smell occurs near HVAC equipment, stop operation and isolate power at a safely accessible disconnect or breaker. Don't approach a smoking, arcing, or visibly damaged disconnect; keep clear and seek emergency help when there's an active fire hazard.
The same boundary applies to kitchen equipment. HomeProBadge's microwave repair guide provides appliance-specific troubleshooting context, but a microwave's internal high-voltage components aren't part of a homeowner plug-end repair, even after unplugging it.
A technician should establish the failure mechanism, perform the appropriate electrical checks, and document the parts replaced and acceptance results. That record is particularly useful for seasonal Tucson residents who may leave equipment unattended after returning home.
The cheapest acceptable repair is the one that removes the fault without leaving uncertainty inside the cable or appliance. If that means replacing the complete cord assembly, buying a new plug first only adds another step.
A new plug never fixes a damaged cord.
Covenant Aire Solutions offers HVAC diagnosis, repair, and replacement throughout Tucson and surrounding areas, with 24/7 emergency response for urgent equipment problems. If a damaged connection, burning odor, or repeated trip involves your heating or cooling equipment, visit Covenant Aire Solutions to arrange service and confirm the appropriate scope of electrical work.