
Ductwork Repair Services in Tucson: Costs, Signs and Fixes
A commercial duct sealing project across 145 retail locations cut average duct leakage from 32% to 12% and reduced store energy consumption and spending by an average of 5% within 12 months, according to the U.S. Department of Energy Better Buildings case summary for Family Dollar. That result reframes ductwork repair services in the right way. You're not paying to patch metal you can't see, you're paying to stop conditioned air from leaving before it reaches the rooms, and the only honest way to judge the job is to measure leakage before and after.
Ductwork Repair Services Explained
Typical duct systems lose 25% to 40% of the heating or cooling energy produced by a central furnace, heat pump, or air conditioner, and the U.S. Department of Energy duct loss explanation ties that waste to air leakage and heat transfer through duct surfaces. ENERGY STAR also estimates that roughly 20% to 30% of the air moving through a typical home's ducts is lost because of leaks, holes, or poor installation, which can reduce heating and cooling efficiency by as much as 20%, as described in the ENERGY STAR duct sealing flyer. Those two figures measure related losses in different ways, but they point to the same problem. A good system can still perform badly if the air never arrives.
Think of the furnace or air conditioner as the heart and the ducts as the home's circulatory network. A heart pumping hard through leaking vessels works longer, delivers less where it's needed, and leaves some rooms hot while others overcool. Ductwork repair services restore the parts of a forced-air system that move air, including supply and return ducts, plenums, register boots, registers, dampers, flexible duct runs, and duct insulation.
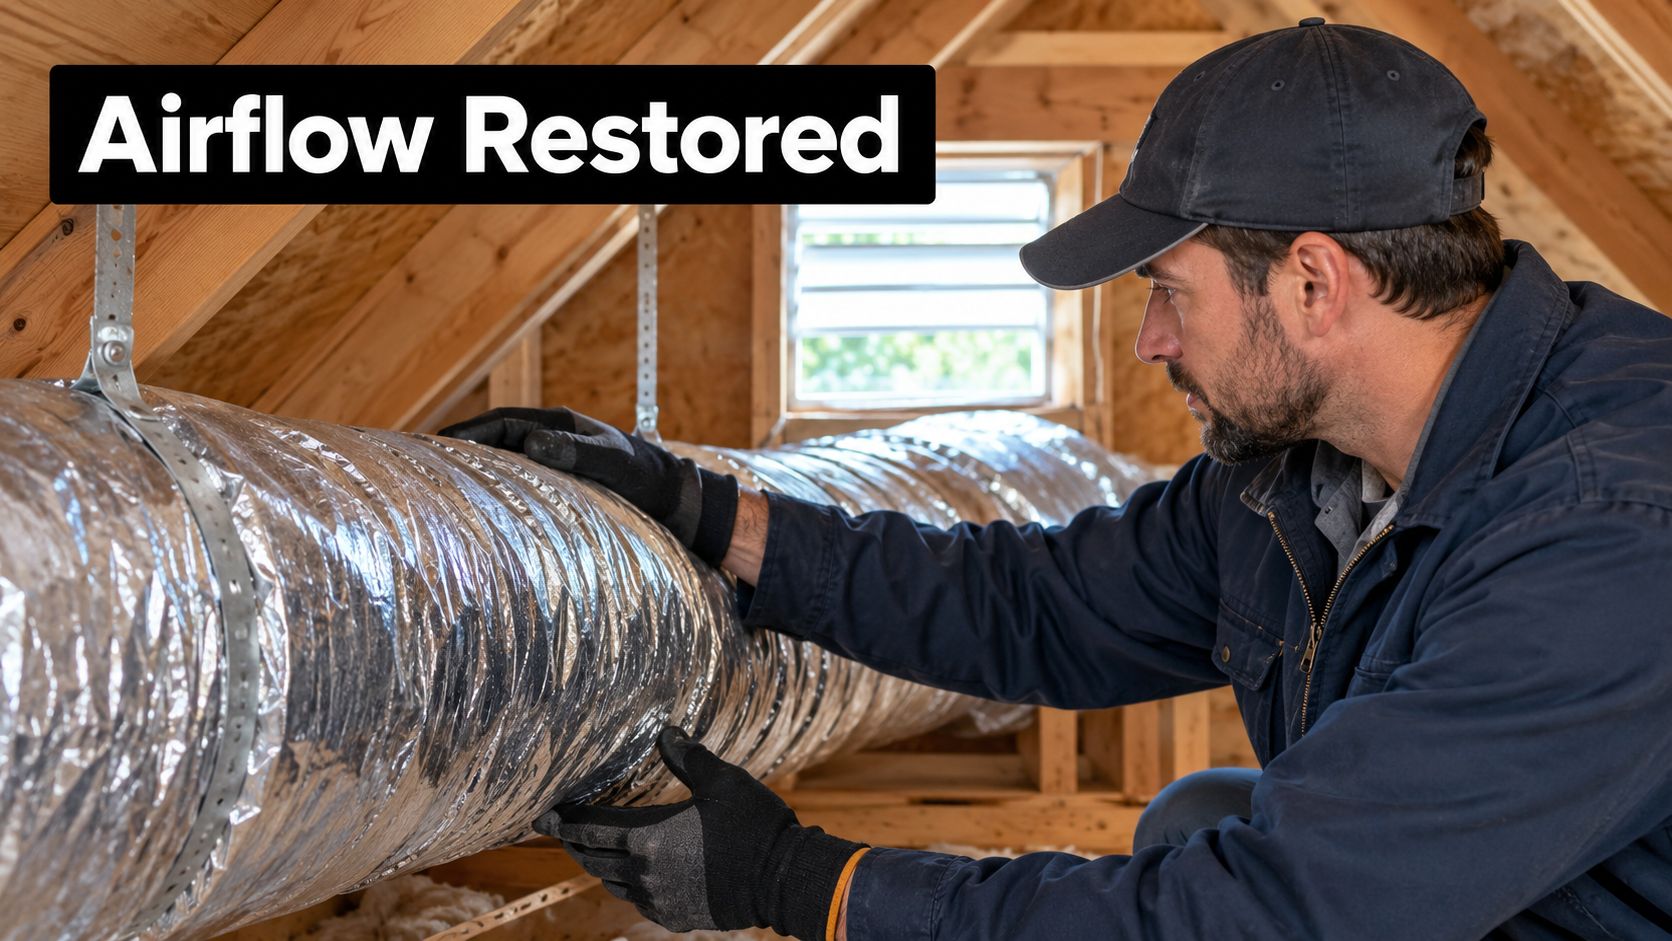
The two ways ducts waste energy
The first loss path is air escaping at cracks, seams, holes, and poorly connected sections. Supply leaks dump cooled air into an attic or crawlspace, and return leaks pull hot, dusty air back into the system for the equipment to condition again. The second path is heat passing through the duct wall itself, which matters most on thin, damaged, or missing insulation.
Location determines how severe either loss becomes. Ducts in a protected basement generally lose less, while ducts routed through a hot attic can lose more because the temperature difference between duct air and attic air stays large for hours. In Tucson, that attic penalty lands during long cooling runs, so a small leak in the wrong place costs more than the same leak inside conditioned space.
What the service covers and what it doesn't
Sealing and reconnecting: Closing joints and penetrations, refitting separated sections, and securing boots and collars.
Insulation repair: Replacing torn or missing wrap on attic and exposed runs.
Section repair: Replacing crushed, kinked, or damaged flexible duct and clearing blockages.
Moisture-related work: Cleaning affected ducts and addressing mold after the moisture source is fixed.
Ductwork repair services don't cover the furnace, heat pump, compressor, or controls that create heating and cooling. Those are separate equipment repairs, even when a technician finds both problems on the same visit. Treat a duct problem as a performance issue when you see uneven rooms, longer run times, and higher utility costs, not as cosmetic maintenance on hidden metal.
Common Ductwork Problems, Signs and Repair Costs
Use the table below as a lookup, not a diagnosis. Match what you observe, such as a room that never cools, a musty smell, a warm ceiling, or a bill that keeps climbing, to the closest problem row. Then check the usual repair method and the cost column before you approve anything, and confirm the match with professional ductwork sealing and leakage testing rather than symptom matching alone. The ranges shown are Covenant Aire Solutions' typical job figures for Tucson-area single-family homes, so read them as a starting point, not a universal price list.
Problem | Typical sign | Common repair method | Typical cost range |
|---|---|---|---|
Air leaks at joints and seams | Hot rooms, high bills, dust around registers | Mastic or approved foil tape sealing | $250 to $1,000 for whole-system sealing |
Disconnected duct sections | Weak airflow in one room, noise in the attic | Reconnect, clamp, and seal the joint | $150 to $500 |
Damaged or missing insulation | Sweating ducts, uneven room temperatures | Wrap or replace insulation on affected runs | $300 to $1,200 depending on run length |
Mold or moisture inside ducts | Musty odor, visible growth near registers | Clean ducts, fix the moisture source, seal the leak | $500 to $4,000 |
Blockages and crushed flexible duct | Rooms that never reach setpoint, low airflow | Remove debris or replace the flex run | $150 to $600 |
How to tell similar problems apart
Air leaks at joints and seams tend to affect several rooms at once. The equipment runs, air reaches most registers, but temperatures drift and dust builds up around register faces because return leaks can pull in attic or wall-cavity air. Sealing works when the joints are reachable and the duct material underneath is still sound. After sealing, a retest and a quick airflow check at the registers confirm the work held and that rooms still ventilate the way they should.
A disconnected section usually announces itself in one room. You'll feel weak or no airflow at that register while the rest of the house behaves normally, and you may hear air moving in the attic or ceiling where no register exists. That pattern points to a specific run.
The quote should name that run instead of pricing the whole system.
Damaged or missing insulation shows up differently. Airflow feels adequate, but supply air arrives warmer than it should on long attic runs, rooms swing between too warm and overcooled, and cold ducts in humid conditions can sweat. Rewrapping a short exposed section is a different job from reinsulating several long runs, which is why run length belongs on the quote.
Mold or moisture inside ducts produces a musty odor when the system starts and sometimes visible growth near registers or inside a boot. Cleaning without fixing the moisture source wastes money, because growth returns while wet insulation or a leaking joint stays in place. The repair sequence matters here: find the water, fix it, clean affected material, then seal.
Blockages and crushed flexible duct choke everything downstream of the damage. A run stepped on in the attic, kinked around a truss, or loaded with debris starves one or two rooms even though the air handler sounds normal. Straightening helps only if the inner liner isn't torn; a crushed or split flex run usually needs replacement.
Practical rule: One symptom can have more than one cause, so price the problem only after a test confirms which row in the table applies.
Those ranges reflect the jobs Covenant Aire Solutions prices most often, not a quote for your home. Tucson attic access, ceiling height, the number of runs, and whether a technician can reach a joint without opening drywall all move the final number. Ask for a written quote that itemizes each run, names the sealing or replacement material, and states whether a retest is included.
How a Ductwork Repair Visit Unfolds
A ductwork repair visit worth paying for starts with a quantified leakage test, because a visual walk-through only finds what the eye can reach. A technician can spot a crushed flex run by eye, but concealed joints, plenums, register boots, access panels, and flex connections hide leakage that only pressure reveals. The visit below follows the order that produces an auditable result, and duct pressure testing explained step by step covers the test setup in more detail.
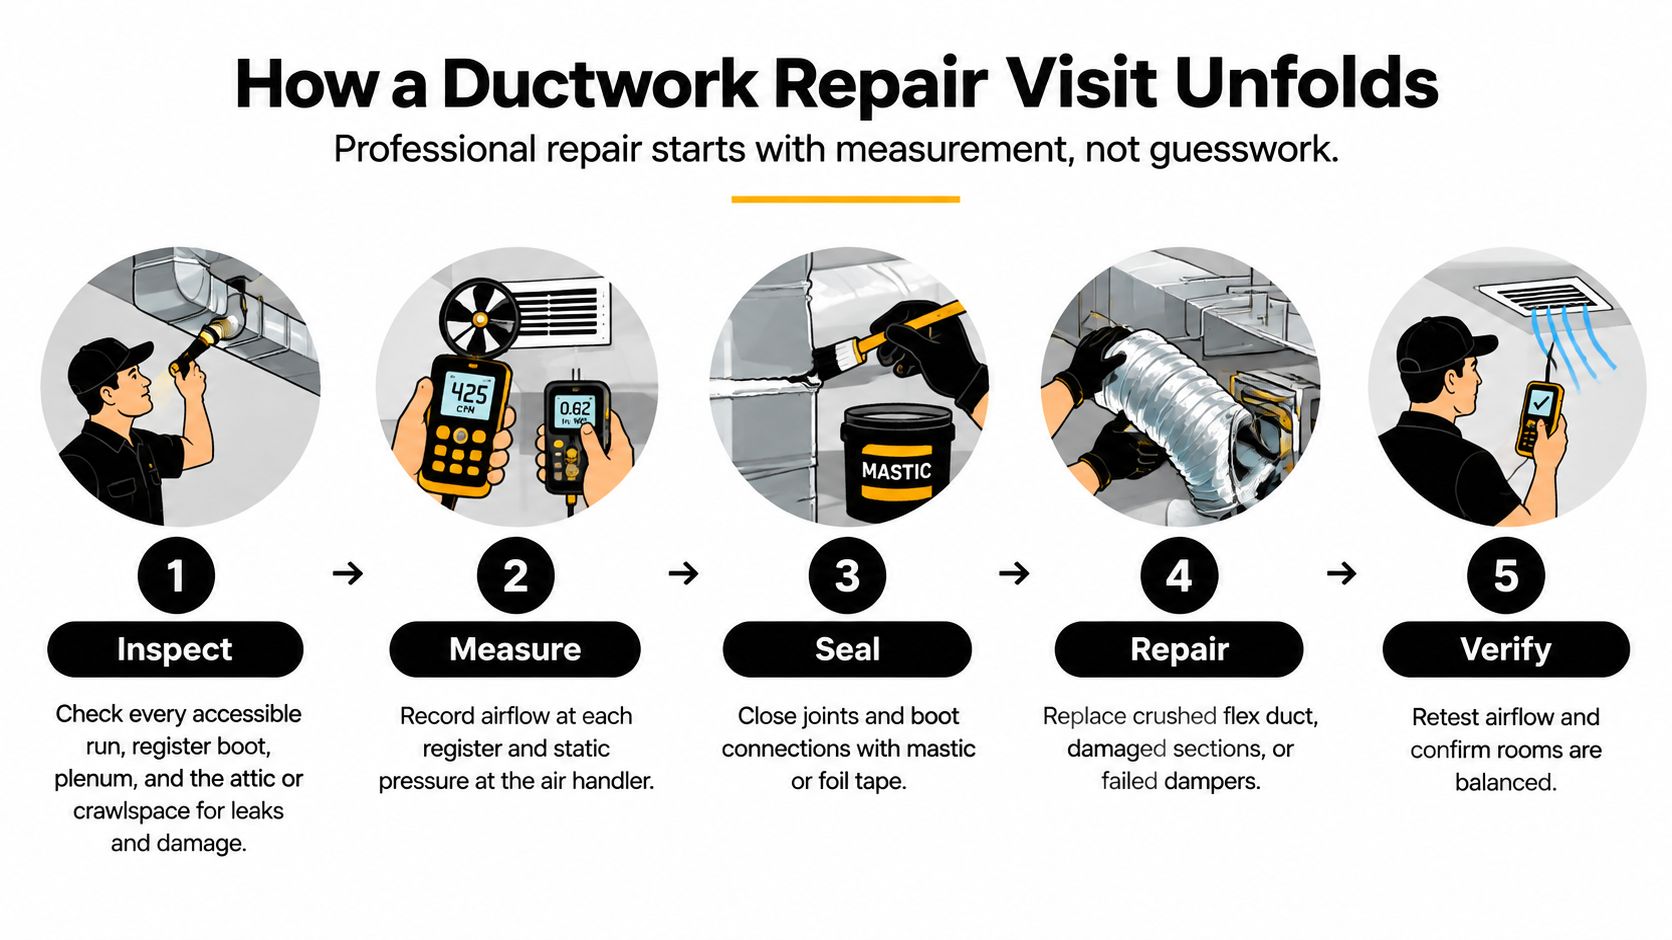
The seven steps from baseline to retest
Inspect every accessible run: The technician traces ductwork from plenum to register boot through the attic, crawlspace, and closets, looking for crushed flex, separated joints, sagging runs, and damaged insulation. Photos help because you'll approve work in spaces you may not enter yourself.
Isolate the system and test at 25 Pa: A calibrated duct tester pressurizes or depressurizes the system to 25 Pa, approximately 0.10 in. water column, while a manometer records leakage in CFM25, as described in the ASHRAE duct leakage testing guidance. That baseline number is the reference point for every repair decision that follows.
Compare the baseline to a target: ENERGY STAR reference criteria commonly target total leakage of no more than 6 CFM25 per 100 square feet of conditioned floor area, while some certified-home criteria permit up to 8 CFM25 per 100 square feet or 80 CFM depending on configuration, per the ENERGY STAR certified home inspection checklist criteria. Without a target, a leakage number is just a number.
Locate the leaks under pressure: With the system pressurized, the technician checks transverse joints, longitudinal seams, plenum connections, and flex collars, sometimes using smoke to make escaping air visible. This step separates a few repairable joints from leakage spread across the whole system.
Seal, reconnect, and replace damaged sections: Joints and penetrations get sealed with code-compatible mastic or approved tape, loose sections get reconnected and supported, and crushed flex gets replaced rather than patched. Mechanical fastening comes first, because sealant alone shouldn't hold a duct together.
Restore insulation on exposed runs: Torn or missing wrap is replaced so sealed ducts don't keep losing energy through their walls. Skipping this step leaves the second loss path untouched.
Retest at the same pressure: The technician repeats the 25 Pa test and records before-and-after CFM25. Comparing both numbers at identical pressure proves whether sealing worked and prevents unnecessary replacement of serviceable sections.
Commercial systems and sampling
ASHRAE guidance recommends that maximum system leakage stay within 5% of design airflow, tightening to 2% for supply and return sections that leak directly to or from outdoors and for certain exhaust sections, per the ASHRAE duct leakage benchmarks for design airflow. Facility managers should expect the report to state design airflow and whether affected ducts communicate with outdoors, since those two facts determine which limit applies.
For larger commercial systems, ASHRAE construction guidance uses staged sampling based on duct surface area. At least 25% of the system is tested first, another 25% is added if any tested section fails, and the entire system is tested if the second sample also fails, following the ASHRAE staged duct leakage sampling process. ANSI/ASHRAE Standard 215 offers another route for operating systems, measuring inlet and outlet airflows to calculate leakage, though the ANSI/ASHRAE Standard 215 scope summary notes it determines leakage without setting acceptance limits itself.
A good result looks like paperwork. You should leave with a written before-and-after report showing baseline CFM25, the target used, leak locations, repairs made by run, and the retest result. If a company can't produce that record, you have no way to know what you bought.
Deciding Between Repair and Replacement
Replacement is rarely the first answer when leaks are measurable and reachable. Most duct systems fail at connections, boots, and a handful of damaged runs, while the remaining sections still move air fine once sealed. The table below puts the repair case and the replacement case side by side, and the full ductwork replacement comparison walks through replacement scope when repair stops making sense.
Factor | Repair usually makes sense | Replacement usually makes sense |
|---|---|---|
Leak location | Leaks at accessible joints and connections | Leaks spread through many inaccessible runs |
Age and material | Sound metal and tape, flex still pliable | Brittle, cracked, or crushed flex throughout |
Retest after sealing | Post-seal CFM25 meets the target | Retest still fails after sealing accessible sections |
Access | Runs reachable from attic, crawlspace, or closet | Ducts buried in walls, slab, or inaccessible chases |
Contamination | Limited mold or debris with a fixed moisture source | Widespread contamination or repeated moisture problems |
Equipment condition | Furnace or air handler in good working order | Equipment near end of life, so replace the system and ducts together |
Quote comparison | Targeted repair costs a fraction of a full replacement quote | Repair quotes approach replacement cost with a short remaining life |
Why leak location changes the answer
An independent 2025 duct-leakage field study reported that 94% of participating residential systems exceeded the applicable leakage threshold, falling to 84% when a conditioned-space exemption was applied, according to the 2025 duct leakage field study summary. That gap between the two percentages is the important part. A leak inside the living space wastes less energy than the same leak dumping cooled air into a hot attic, because the escaped air still conditions the home.
This is why a generic percentage-saving claim shouldn't drive your decision. Two homes with identical total leakage can need opposite answers if one leaks at reachable attic joints and the other leaks throughout buried runs. Ask where the leakage sits before you ask what repair costs.
Two homes, two verdicts
Take a home with leaks concentrated at accessible plenum joints and register boots, sound insulation, and pliable flex. Sealing those points and retesting usually settles the question in one visit, and replacement money stays in your pocket. Now take a home with brittle, crushed flex across the attic, failed tape at most connections, and a retest that still misses target after targeted sealing. Continued spot repairs buy short-lived fixes on material that's already failing, so replacement becomes the honest recommendation.
Ductwork repair services earn their price when a retest proves the existing system can still perform. Without that proof, you're guessing with a larger invoice.
Apply one verdict rule to every quote you receive. Approve sealing only when the post-seal retest meets the target, and approve replacement only when the retest still fails after every accessible section has been sealed and documented.
Tucson Heat, Attics and Indoor Air Considerations
Tucson changes the duct repair math because so many homes route ducts through attics. Summer attic air runs far hotter than living space air, so a supply leak loses cooled air into that heat while a return leak pulls hot air in for the air conditioner to cool again. The system runs long hours each day, which multiplies a modest leak into a major seasonal cost, and understanding why HVAC ductwork sweats explains the moisture side of that attic exposure.
Three local stresses on ductwork
Attic heat: Repeated exposure makes flexible duct brittle over time and loosens older tape at joints, so connections that held for years can open gradually.
Wind-blown dust: Dust storms and windy days load filters faster and settle debris inside ducts, especially where return leaks bypass filtration entirely.
Monsoon humidity: Humid air meeting a cold, poorly insulated duct produces condensation, and sustained moisture on insulation or inside a boot can lead to mold.
Each stress points to a different repair priority. Brittle flex argues for section replacement, dust argues for sealing return leaks and checking filtration, and condensation argues for insulation repair before any cleaning. A Tucson quote that ignores which stress caused the damage treats symptoms in the wrong order.
The ventilation trade-off most quotes skip
Sealing ducts tightly without checking ventilation can create a second problem. A Tucson high-efficiency home evaluation warned that very tight houses can create indoor air quality problems unless adequate mechanical ventilation is provided, referencing ASHRAE 62.2 requirements in the Tucson high-efficiency home evaluation. Leakier homes get accidental fresh air through gaps, and sealing those gaps removes air exchange the house had relied on without anyone noticing.
More recent Lawrence Berkeley National Laboratory research published in 2025 examined mechanical ventilation and indoor air quality in newly constructed homes, showing that ventilation performance, equipment operation, and airflow should be evaluated alongside envelope and duct leakage. In practice, that means a tight home needs verified mechanical ventilation rather than assumed ventilation. If your home feels stuffy after sealing, or occupants have allergies, ask for a ventilation check, filtration evaluation, and carbon dioxide or pollutant monitoring as part of the follow-up.
The endpoint that matters: Controlled air distribution plus sufficient, verified fresh-air exchange beats the lowest possible leakage number every time.
Distinguish conditioned-space leaks from attic leaks when you prioritize work, because attic leaks carry the energy penalty while whole-house tightness carries the air quality question. Maximum sealing isn't automatically the healthiest outcome. The correct outcome is sealed distribution, adequate insulation, and confirmed fresh air, each measured rather than assumed.
Preventive Maintenance Checklist for Ducts
Most duct failures develop slowly enough to catch during routine checks. The checklist below groups simple tasks by timing so they become a habit rather than a reaction, and a full preventive maintenance schedule for HVAC systems places these duct checks alongside equipment service.
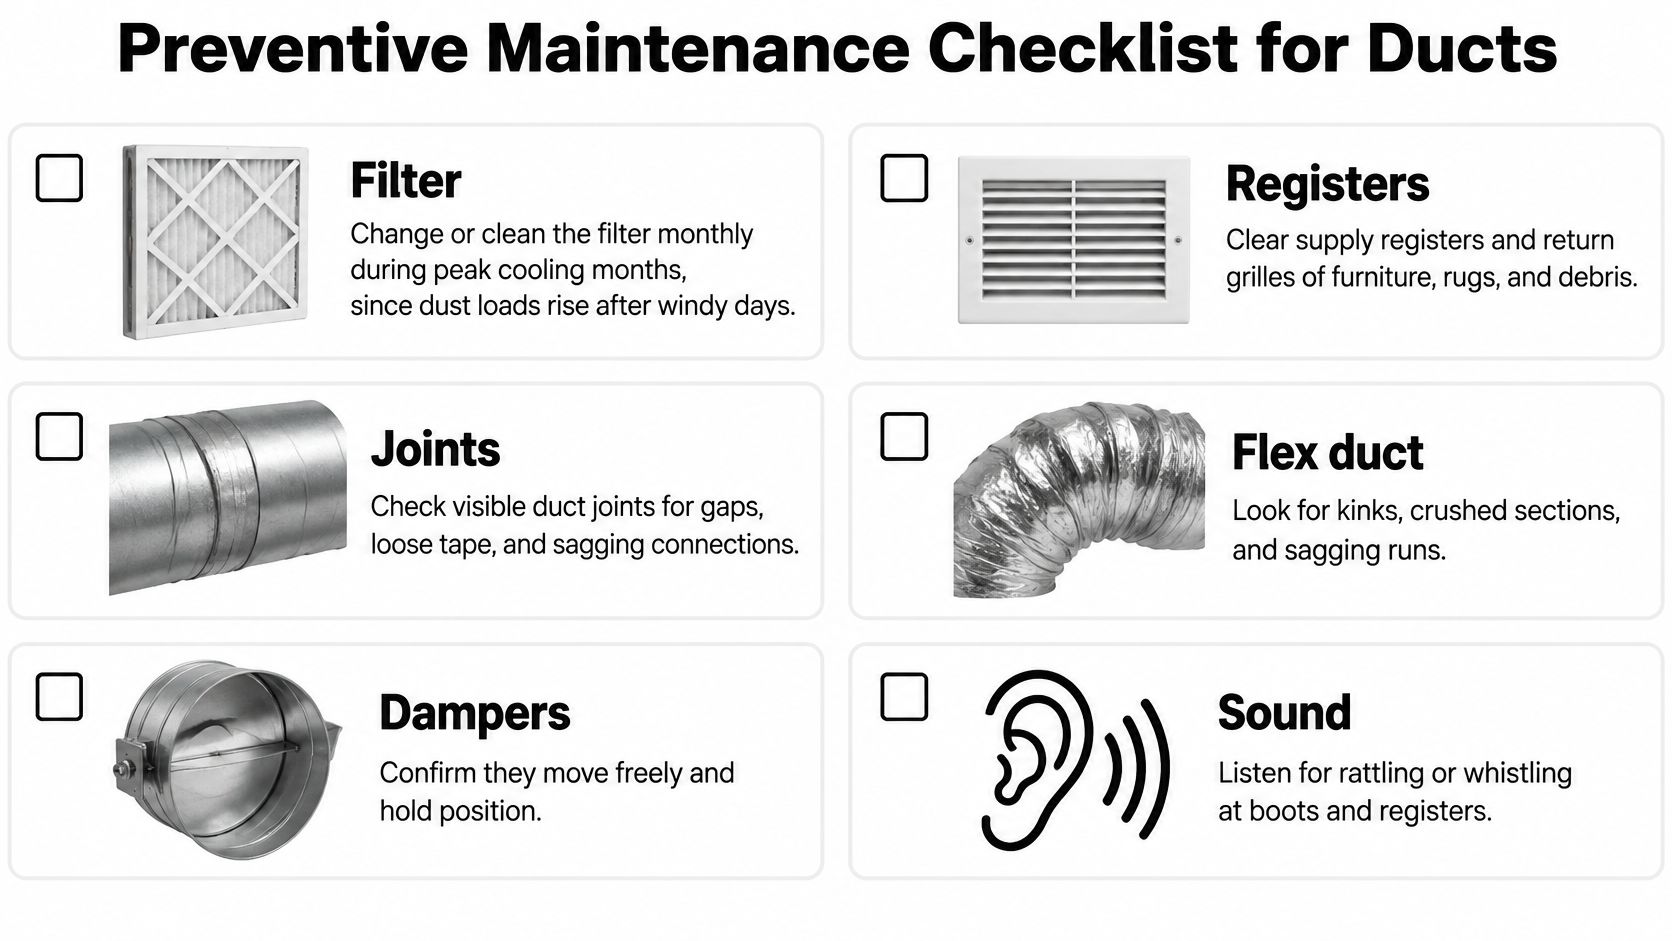
Monthly during peak cooling
Change or clean the filter. Dust loads rise after windy days, and a clogged filter raises system pressure while starving airflow. Clear registers and return grilles of furniture, rugs, and stored items so air can enter and leave rooms as designed.
Don't close multiple supply registers to push air elsewhere. Shutting vents raises pressure inside the duct system, which can worsen leakage at weak joints and strain the blower. Balance airflow with dampers or register adjustments instead, and keep most registers open.
Each spring before cooling season
Check accessible joints and tape: Look in the attic or crawlspace for gaps, peeling tape, and sagging connections before summer loads arrive.
Inspect flex duct: Look for kinked, crushed, sagging, or sun-faded sections after heat waves and monsoon storms.
Check insulation after rodent activity: Replace torn or displaced sections so sealed ducts don't sweat or lose heat.
Confirm panels and seams are sealed: Attic access panels and plenum seams are common leak points homeowners can spot.
Listen at registers: Whistling often signals air forcing through a gap, and rattling suggests a loose boot or connection.
The short video below shows what these checks look like in practice.
Schedule an annual or biannual inspection with a qualified technician who can run a leakage test, since your visual checks can't quantify what's hidden. If any check finds a new problem, test that section before assuming the whole system needs ductwork repair services.
Ductwork Repair Questions Answered
How much does ductwork repair cost
Run count moves the quote more than anything else. One house has three bad joints on a trunk line near the air handler. Another has a dozen flex runs that each need mastic at both ends plus re-strapping. Same measured leakage, very different labor. Getting the price broken out per run shows you where the hours go.
Can sealing alone fix a leaky system
Often, yes. If the reachable joints account for most of the measured leakage and the retest hits target, sealing is the whole job. The math changes when leftover leakage sits inside walls or under insulation, since reaching it can cost more than swapping that section.
How do I know the repair actually worked
Ask for before-and-after CFM25 readings at the same test pressure. The technician should also point to the specific joints, boots, or plenum seams that leaked. If the number barely moved, the problem sits somewhere nobody reached.
Do walls have to be opened for a leak test
No. The tester connects at the air handler or a register, the rest get sealed, and the system is pressurized. Drywall only matters if a confirmed leak sits in a run that can't be reached from the attic or crawlspace.
Can I seal ducts myself
On accessible joints, yes. Clean the surface and use mastic or foil tape made for ducts; cloth duct tape dries out and peels in attic heat. What you can't do at home is verify the result, since only a retest shows whether total leakage dropped.
Will sealing ducts cut my energy bill
It depends where the leaks were. Air escaping from ducts inside conditioned space mostly stays in the house. Air lost into a Tucson attic in July is gone. That is why the test comes first, and why a savings percentage quoted before anyone measured your system deserves skepticism.
Financing, Pricing and Booking a Duct Assessment
A fair duct repair quote is built from measurements, not from a symptom described at the door. It should itemize work by run, state the measured baseline leakage, name the materials for each repair, and include the retest that proves the result. If a quote skips the test and jumps straight to a total, you're being asked to fund a guess.
Covenant Aire Solutions offers transparent, upfront pricing with no hidden fees, flexible financing so a larger sealing or insulation job doesn't have to be paid in one step, and special rates for teachers, military personnel, and first responders. The company is family-owned, licensed, bonded, and insured, with 24/7 emergency response for urgent duct or cooling failures. Its preventive maintenance plans include biannual check-ups, priority service, and exclusive discounts, which suit homeowners who'd rather catch a failing joint during a scheduled visit than during a heat wave.
What to request before you approve work
Measured duct test results: Before-and-after CFM25 at the same test pressure, with the target stated.
Leak locations: Which joints, boots, plenums, or runs leak, and whether they sit inside or outside conditioned space.
Airflow and static pressure readings: Numbers that show whether rooms receive balanced air after repair.
Insulation condition: Which runs need wrap replaced and which are still serviceable.
Ventilation check: Confirmation that a tightly sealed home still gets adequate fresh air.
Written repair versus replacement calculation: Measured leakage, access costs, and expected remaining life compared side by side.
That checklist protects you from two opposite mistakes, automatic replacement quotes and unsupported savings promises. Ductwork repair services priced against measured results let you compare companies on evidence instead of sales language. Request the measured test before approving any work, then compare the written results against the targets in this guide before you sign.
If your Tucson home has rooms that won't cool, rising bills, or ducts you've never had tested, Covenant Aire Solutions can start with a measured duct assessment that shows baseline leakage, leak locations, and a written repair versus replacement comparison before you approve anything. You'll get upfront pricing, financing options if the job is larger, and a retest that documents what the repair achieved. Visit Covenant Aire Solutions to book your duct assessment and get numbers you can decide on with confidence.