
AC Repair & Maintenance: A Homeowner's Step-by-Step Guide
The thermostat says it's cooling, but the back bedroom is warm and the outdoor unit hasn't stopped running. You're wondering whether a filter will fix it or whether another repair bill is coming.
Good AC repair & maintenance starts by separating what you can safely check from what requires instruments and training. The goal isn't just cold air today. It's a system that moves heat efficiently, keeps refrigerant contained, and leaves you with documented proof that the work was done.
Seasonal AC Maintenance Schedule and Monthly Checklist
Task | How Often | Who Does It |
|---|---|---|
Inspect and replace air filter | Inspect monthly; replace when dirty, generally every 1-3 months | Homeowner |
Clear debris from outdoor condenser | Monthly during cooling season; keep clear space as specified in the equipment manual | Homeowner |
Check indoor condensate drain | Before cooling season, then monthly | Homeowner |
Check thermostat batteries and settings | Spring and fall | Homeowner |
Clean evaporator and condenser coils | Once a year | Technician |
Verify refrigerant charge and pressures | Once a year | Technician |
Check blower operation and airflow | Once a year | Technician |
Test capacitor, contactor and electrical connections | Once a year | Technician |
Full tune-up and performance check | Once a year before summer; mid-summer check for year-round use | Technician |
ENERGY STAR recommends inspecting filters monthly, especially during heavy use, and replacing them when dirty or at least every three months. Pets, renovation dust, and near-continuous operation can mean changing a filter sooner. Check the equipment manual for required clearance around the outdoor unit, including above the fan and near service panels.
In Tucson, schedule the main service visit in April or May, before temperatures pass 100 degrees Fahrenheit. If the system runs most of the year, arrange a mid-summer check as well. This is especially useful before you leave home for an extended period, when a developing drain or airflow problem may go unnoticed.
Your monthly walk-through
Set aside about fifteen minutes for accessible checks. Keep the routine to areas you can reach safely. Don't remove equipment panels or climb onto a roof.
Switch cooling off at the thermostat. Remove the filter and hold it toward a light. Replace it if visibly loaded, particularly when little light passes through, and note the size printed on its frame. This light check is only a rough indication. Follow the filter manufacturer's instructions.
Check return grilles and supply vents for pet hair, dust, or furniture blocking airflow. Keep registers open. Closing vents to push air into other rooms won't correct an undersized duct or an unbalanced system.
Clear outdoor debris. Remove loose leaves and grass around the condenser, following the clearance in the equipment manual. Before rinsing exposed fins, isolate power at the proper disconnect. Use gentle water pressure and keep water away from electrical compartments. Washing from inside the cabinet requires removing panels, so leave that work to a technician.
Look at the accessible drain pan and condensate outlet. Standing water, algae, or a damp ceiling calls for attention before water reaches insulation or drywall.
Restart the system and listen. A familiar steady hum differs from new grinding, squealing, repeated clicking, or rattling. Note when the sound occurs, such as at startup or shutdown.
Compare return and supply temperatures. The normal temperature difference depends on the system and operating conditions, so this comparison is only a rough screen. Humidity, airflow, and equipment staging affect the reading. Don't use it to diagnose refrigerant charge.
Log the date, filter size, readings, and anything unusual. A note on your phone is enough. These records help you describe changes and give a technician a useful starting point.
Choose the right filter
A denser filter isn't automatically better. Use a type the equipment and filter rack can accommodate without excessive resistance. This air filter replacement guide can help you set a practical replacement routine.
If you can't remember the last filter change or coil inspection, treat the schedule as overdue and establish a documented baseline. A proper annual visit should also leave you with measured findings, including airflow and refrigerant readings, rather than a simple claim that the system was checked.
Simple AC Fixes You Can Safely Try First
Homeowners can handle accessible filters, thermostat settings, loose debris, and some drain blockages. Refrigerant lines, live wiring, capacitors, and cabinet interiors aren't DIY territory. A capacitor can retain a dangerous charge even after power is disconnected.
Symptom | Likely Cause | Safe DIY Fix | Stop and Call If |
|---|---|---|---|
Weak airflow, rooms cool slowly | Clogged filter or closed registers | Replace filter and open vents | Airflow stays weak 24 hours after a clean filter |
Water pooling near indoor unit | Clogged condensate drain | Power off, then clear the accessible outlet with a wet-dry vacuum or use diluted white vinegar through an approved cleanout | Water returns within a day or the pan overflows |
Thermostat screen blank | Dead batteries or service switch off at air handler | Replace batteries and check the switch near the air handler | Screen stays blank after both checks |
Outdoor unit runs but barely cools | Leaves, grass, or cottonwood blocking condenser | Clear debris and gently rinse accessible fins at low pressure with equipment power isolated | Fins are bent or performance stays poor after cleaning |
Breaker trips once | Possible momentary surge or overload | Reset the breaker one time only, provided there's no burning smell, visible damage, water, or unusual heat | Breaker trips a second time |
The waiting periods in the table aren't permission to keep running malfunctioning equipment. Shut cooling off sooner if ice forms, water threatens the building, or the unit makes an electrical or mechanical distress sound.
Keep the fix within reach
For a drain blockage, seal the wet-dry vacuum hose around the outdoor drain outlet with a rag. Don't apply compressed air toward the indoor equipment, where it can separate a hidden joint. Use vinegar only if the equipment instructions permit it, and never mix it with bleach or another drain cleaner.
Check that the thermostat is set to cooling, not just fan operation. A running blower doesn't prove that the outdoor equipment has started.
Practical rule: A safe homeowner fix should not require opening an electrical compartment or loosening a refrigerant fitting.
Use this AC troubleshooting guide to organize the checks. If the problem persists, report what changed after each adjustment instead of guessing which component failed.
Warning Signs That Need a Licensed Technician
A burning smell, harsh electrical buzzing, or another breaker trip means stop running the system. If you see smoke or fire, leave the area and contact emergency services rather than approaching the equipment.
Refrigerant troubleshooting requires a technician who can inspect the circuit without releasing its contents.
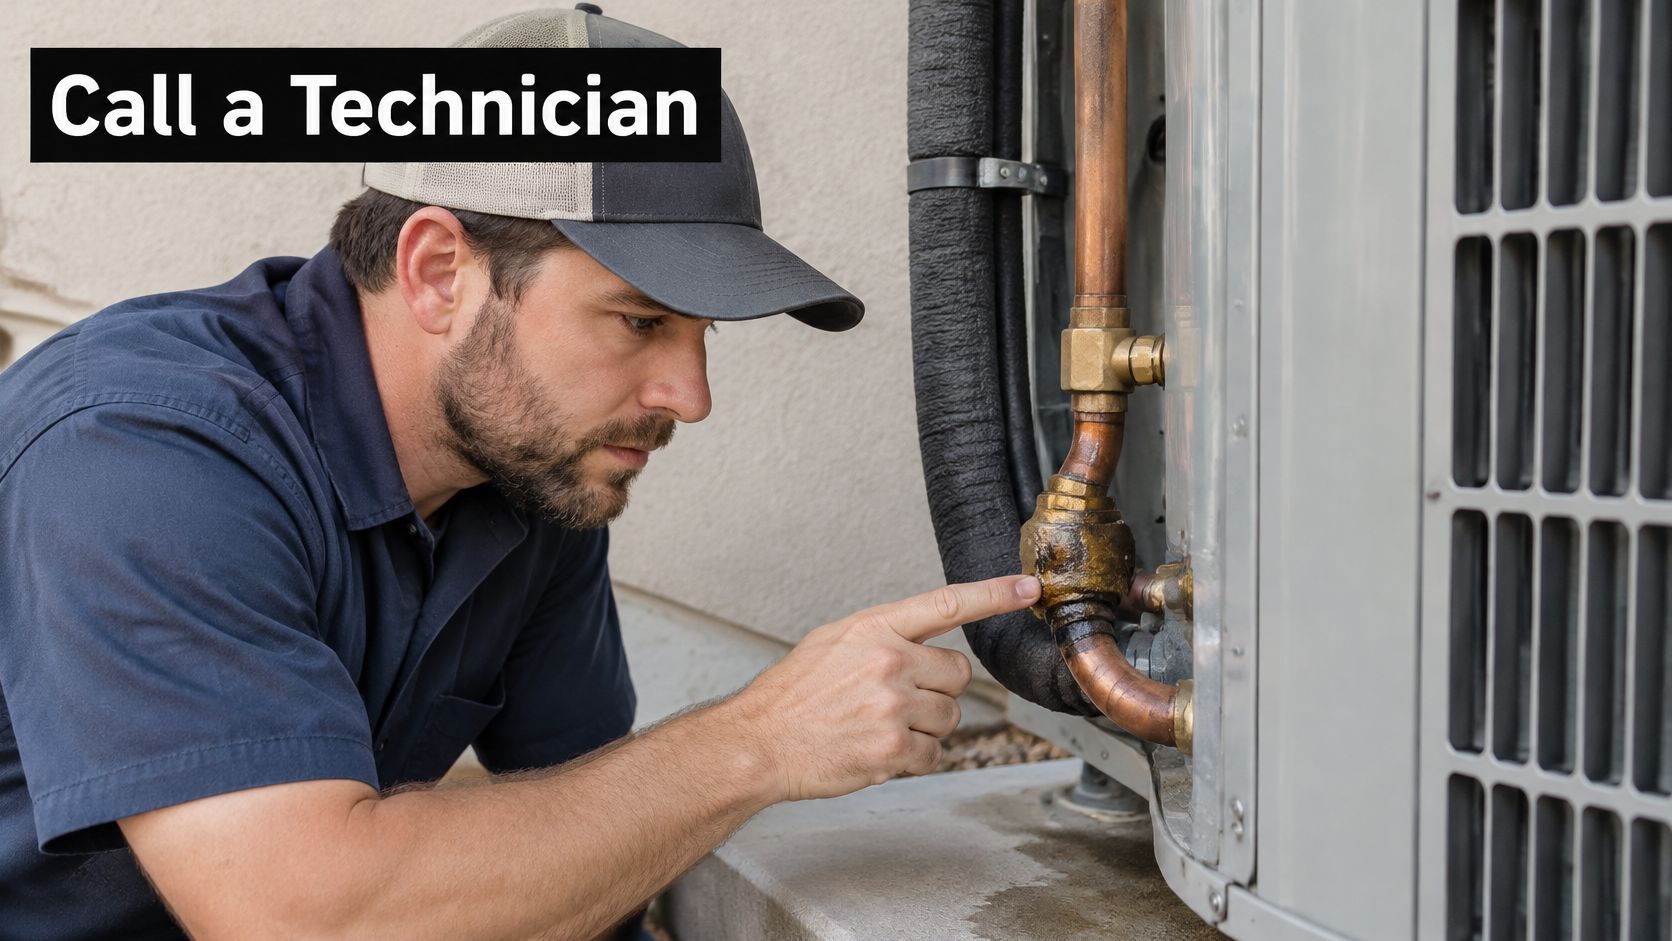
Signs that need prompt diagnosis
Hissing, bubbling, or oily joints: These can indicate refrigerant leakage, although sound alone doesn't establish the cause.
Frost or returning ice: Shut cooling off and let the equipment thaw naturally. Don't chip ice from tubing or coils.
Grinding, banging, or squealing: A failing motor, loose assembly, or compressor problem needs inspection before continued operation causes additional damage.
Warm supply air: If basic settings and airflow checks don't help, arrange service.
Unexpected electricity use: Compare actual consumption, not just the bill total, and consider weather and household changes before blaming the equipment.
A refill isn't a repair
Refrigerant doesn't get consumed like fuel. An unexplained shortage needs investigation, not a standing appointment for another refill.
An EPA technical presentation modeled a 16% annual leak rate with refrigerant, labor, and parts costs reaching $19,850 after one year and $443,152 over ten years. That example illustrates recurring leakage costs, not a residential repair estimate.
Under EPA's Section 608 refrigerant-management framework, refrigerant handling involves technician-certification, recovery, and venting requirements. Never open the circuit or attempt a DIY top-off; ask the technician to identify the AC refrigerant leak and explain the repair.
For a visual companion to the warning signs, watch:
Water stains also need the right trade. In a commercial building, moisture that appears after rain rather than cooling operation may require a roofer; America Roofing's commercial roof leak repair resource is relevant when tracing that source.
What a Professional AC Service Visit Should Include
A real tune-up follows a diagnostic order. Otherwise, a technician can mistake restricted airflow for a refrigerant problem or clean an outdoor coil while leaving the indoor heat-transfer surfaces clogged.
This process overview shows the main checks, but actual work should follow equipment condition and manufacturer requirements.
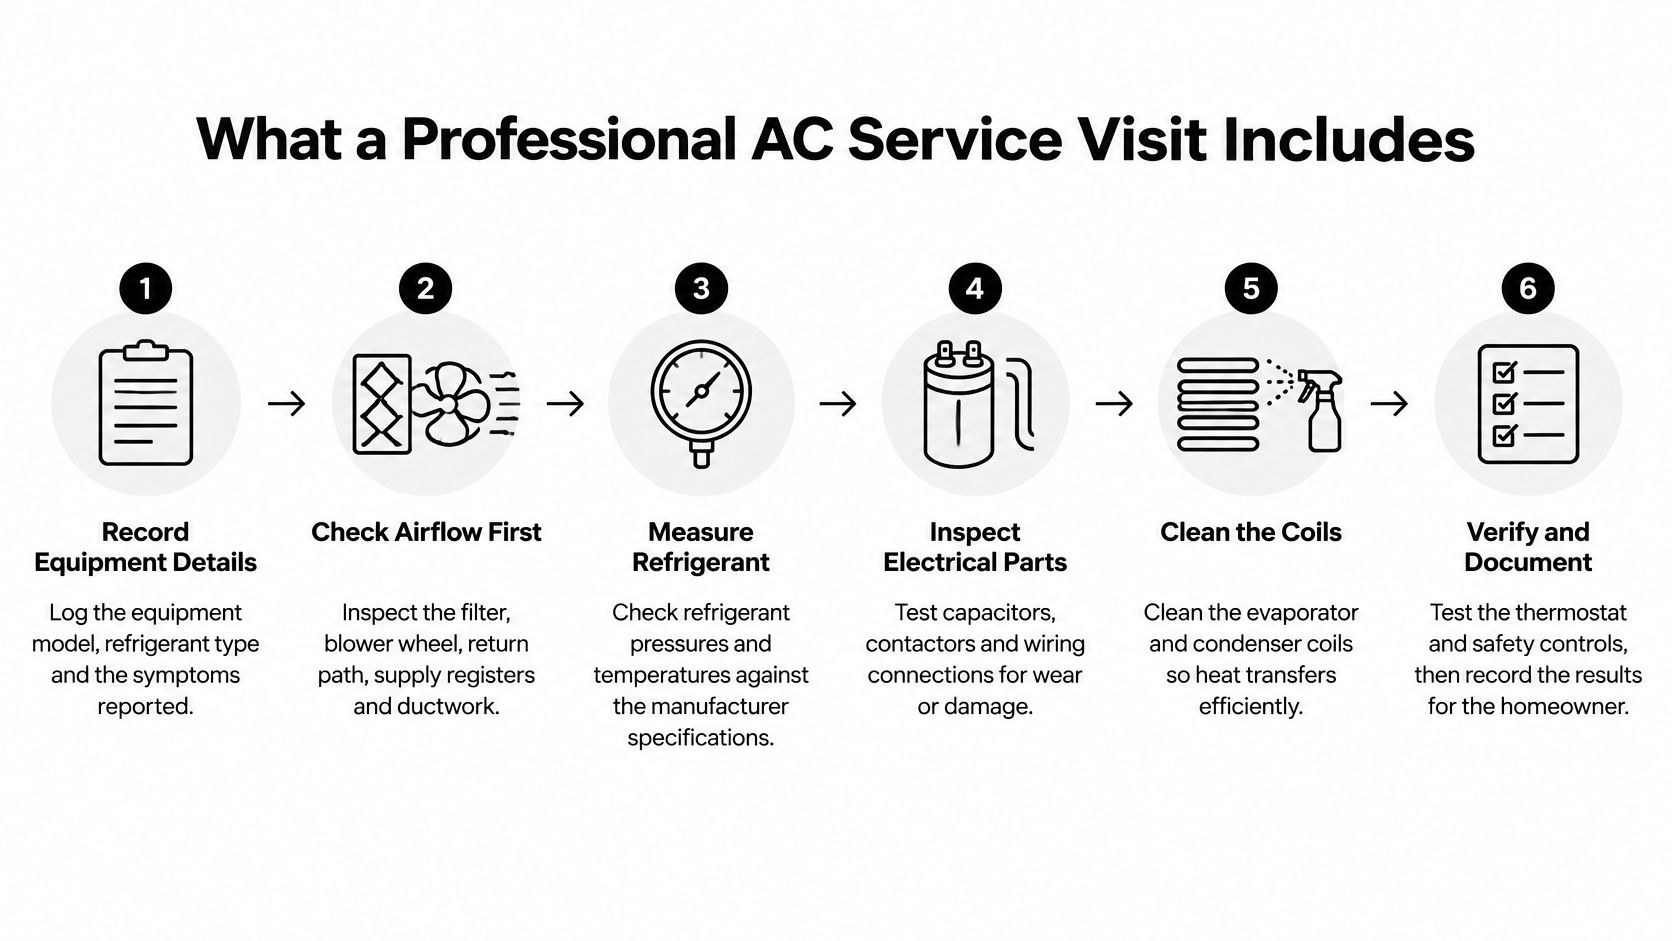
The working sequence
Record equipment identity and symptoms. Log the model, refrigerant type, thermostat settings, and your description of the problem. Ask the technician to distinguish routine maintenance from separately authorized repair work.
Inspect airflow first. That means the filter, blower wheel, return path, supply registers, and accessible duct connections. A clean filter doesn't rule out a dirty blower or collapsed return duct.
Inspect and clean both coils as needed. Use a coil-compatible cleaner and protect surrounding components. Bent fins may need a fin comb matched to the coil spacing, not a screwdriver dragged through the metal.
Measure supply and return temperatures, static pressure, motor amperage, and operating pressures where appropriate. Compare results with manufacturer data and actual indoor and outdoor conditions. A pressure reading by itself doesn't establish correct charge.
Investigate suspected leaks. Use an appropriate electronic detector, bubble solution, or other suitable method on accessible joints, service valves, tubing, and coils. Ask where the evidence points before approving refrigerant work.
If repair requires opening the circuit, recover refrigerant, repair or replace the failed component, pressure-test, evacuate, and weigh in the specified charge. EPA's GreenChill refrigeration-management guide describes leak repair and verification rather than repeated additions as the proper approach.
Verify operation under load. Check blower setup, capacitors, contactors, electrical connections, thermostat response, safety controls, and drainage. Any adjustment should have a reason tied to the equipment's requirements.
Finish with a written report. Include measured results, identified defects, work completed, and recommendations requiring a separate decision.
What you should receive
Ask for the refrigerant type, charge assessment, static-pressure findings, electrical readings, drain condition, and photos of defects. If the circuit was repaired, request the leak location, repair method, recovered and added refrigerant quantities, vacuum result, and final operating measurements.
A complete invoice describes what the technician verified, not merely what the technician touched.
A sound HVAC diagnostic process also separates confirmed faults from suspected ones. Refrigerant added without an explanation, or a tune-up with no recorded findings, leaves you unable to judge whether the original problem was resolved.
AC Repair and Maintenance Costs to Expect
Repair estimates vary with access, parts, and the work needed to correct the cause. Use this table to compare quotes, not as a set of fixed local prices. The 2025 U.S. News & World Report survey puts general HVAC repair costs at approximately $130–$2,000; that range covers different jobs and is not a price list for specific AC components.
Job | What to Request | What Moves the Price |
|---|---|---|
DIY filter replacement | Filter price and the correct size and pleat rating for your system | Filter size and pleat rating |
Professional maintenance tune-up | Itemized service price, tasks included, and any extra charges for coil access | Coil access, system size, and included checks |
Condensate drain clearing | Labor, blockage removal, and any access or disposal charges | Line length and access point |
Capacitor replacement | Diagnostic charge, tested failure, part, labor, and post-repair test | Capacitor rating and labor time |
Refrigerant leak repair and recharge | Leak diagnosis, repair labor and parts, refrigerant quantity and charge, and final test | Leak location and refrigerant type |
Compressor replacement | Diagnostic charge, compressor and other parts, labor, refrigerant work, and warranty coverage | Equipment age, size, and refrigerant |
General HVAC repair range | Compare the proposed work with the scope of the job; this broad range is not a component-specific quote | Scope of repair across HVAC jobs |
A leak at an accessible joint and a leak in an evaporator coil can both involve refrigerant, but the repair scope differs. Ask the contractor to identify the leak location and separate the repair from refrigerant charges so you can see what the estimate covers.
Read the scope before the total
Ask for labor, parts, refrigerant, diagnostic charges, and recovery or disposal work to appear as separate line items. Confirm whether the diagnostic fee is credited toward the repair, and whether the quoted price includes testing after the work.
For major repairs, compare written quotes for the same scope. A lower total may leave out difficult access or work needed to correct the cause of a failed component. Use this AC repair cost guide to prepare questions, then have the contractor price the actual fault and equipment.
Repair or replace
An age-times-repair-cost formula misses warranty coverage, duct condition, installation quality, and whether the repair will restore dependable operation. Weigh those factors alongside the estimate.
Repair is more reasonable when the fault is isolated, the rest of the system is sound, and parts are available. Consider replacement when expensive failures recur, the system cannot maintain comfort, or refrigerant and component availability could make future repairs difficult.
Budget check: Ask what will still be wrong after the proposed repair. Replacing a compressor will not correct restricted ducts or a neglected indoor coil.
Before choosing replacement equipment, have the contractor assess airflow and building needs. A larger unit does not replace diagnosis.
Deciding Whether a Maintenance Plan Is Worth It
A maintenance plan makes sense when cooling is critical, your equipment needs closer attention, or you'd benefit from priority scheduling during Tucson's long summer. Older equipment and repeated repairs strengthen the case, but only if the agreement includes useful work rather than a quick visual inspection.
ENERGY STAR recommends a yearly HVAC tune-up, including attention to refrigerant charge, blower operation, and the evaporator and condenser coils. Compare a plan's written scope against those tasks, its exclusions, and the price of buying service separately.

Buy verified performance, not just visits
A U.S. Department of Energy project reported estimates that more than 65% of residential HVAC systems were improperly installed and that these systems consumed approximately 20%–30% more energy than necessary. Maintenance should identify correctable performance problems, not imply that every homeowner will receive those savings.
When comparing local providers, including Covenant Aire Solutions in Tucson, ask whether biannual check-ups, priority service, coil cleaning, and written measurements are included. Get exclusions and upfront pricing in writing.
If inspection identifies a larger improvement opportunity, Axis Meter Solutions' discussion of HVAC upgrades that reduce electricity demand offers context for comparing maintenance with capital upgrades.
Check your filter tonight. Then book a pre-season inspection before the first 100-degree week, with a written performance report included.
Covenant Aire Solutions offers AC repair, preventive maintenance, and cooling-system replacement services for Tucson and surrounding communities. Visit Covenant Aire Solutions to arrange service and discuss the measurements, repairs, and maintenance your system needs.