AC Not Cooling Your Home? The Ultimate Troubleshooting Guide
- Jan 24
- 18 min read
That gut-punch feeling when you walk in the door and realize it's getting warmer inside, not cooler? We’ve all been there. Before you start imagining the worst-case scenario (and the bill that comes with it), take a deep breath. More often than not, the culprit is something surprisingly simple.
When your AC isn't cooling, the problem is often a simple fix like a dirty air filter, an incorrect thermostat setting, or a tripped circuit breaker. Seriously. Running through these basic checks first can often get your cool air back in minutes and save you the cost of a service call you didn't even need.
Think of it as basic triage for your AC. You don't need any special tools or technical know-how, just a few minutes to check the fundamentals. Let's walk through the most common offenders, starting with the easiest ones you can safely tackle yourself.
Check Your Thermostat Settings
I know, it sounds almost too obvious, but you’d be amazed how many service calls start and end right at the thermostat. Someone in the house might have bumped it, or a brief power flicker could have reset its programming.
Before you touch anything else, give your thermostat a quick once-over:
Is it actually set to "Cool"? It's easy for it to get switched to "Heat" or, more deceptively, "Fan Only." The "Fan Only" setting is a classic reason for an AC blowing air that isn't cold; the fan is running, but the cooling system isn't engaged.
Is the temperature set low enough? For the AC to kick on, the set temperature needs to be at least 3-5 degrees below whatever the current room temperature is.
Could the batteries be dead? If you have a digital thermostat that isn't hardwired, dead batteries mean it can't send the signal to your HVAC system to start cooling.
Inspect the Air Filter
A clogged air filter is probably the single most common cause of cooling problems I see. It essentially puts a chokehold on your entire system, starving it of the airflow it desperately needs to work. This not only tanks its cooling power but forces the whole system to work overtime, which can lead to the evaporator coils freezing into a solid block of ice.
A badly clogged filter can slash your system's efficiency by up to 15%. Just checking it monthly and swapping it out every 1-3 months is the best piece of DIY maintenance you can do.
This one simple step doesn't just help with cooling; it makes a huge difference in your home's air quality, too. If you want to learn more, check out these other quick fixes for a non-working air conditioner.
Look for a Tripped Circuit Breaker
Your air conditioner is a beast of an appliance, and it actually runs on two separate circuits: one for the indoor unit (the air handler) and another for the big outdoor unit (the condenser). A power surge from a storm or just an overworked system can sometimes cause one of these breakers to trip.
Head over to your home's main electrical panel (usually in the garage, a closet, or the basement) and find the breakers labeled "AC," "Air Conditioner," or "HVAC." If one is flipped to the "Off" position or is stuck in the middle, that's your problem. Flip it all the way off, then firmly back on.
If it trips again right away, do not reset it again. This is a clear sign of a more serious electrical issue that needs a professional eye.
This simple flowchart can help you visualize these first few steps.
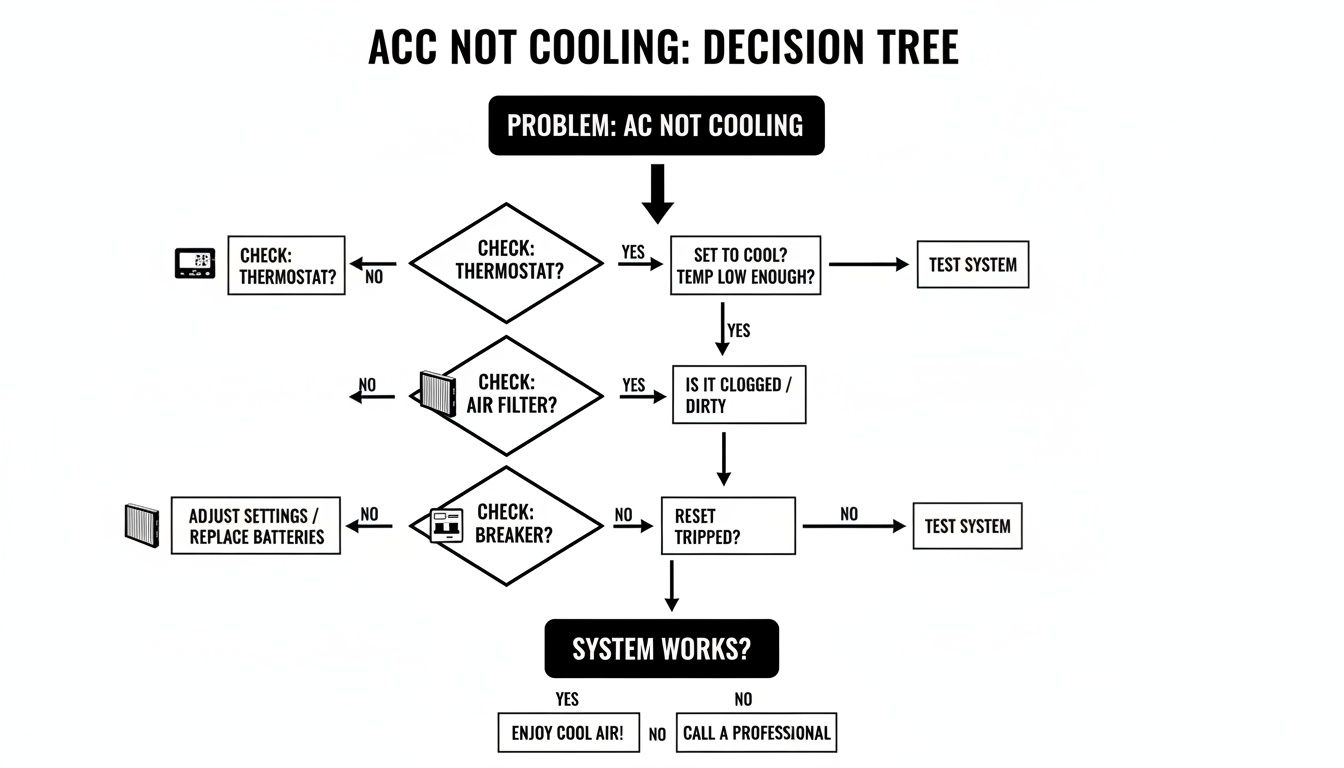
Running through this sequence helps you systematically rule out the easy stuff before you start worrying that a major component has failed.
To make it even easier, here's a quick checklist you can use as a reference.
Immediate AC Troubleshooting Checklist
This table breaks down the initial checks into a simple, scannable format. It helps you quickly identify what to look for and what it might mean.
Check Item | Potential Problem | Action to Take |
|---|---|---|
Thermostat | Incorrect setting, dead batteries | Set to "Cool," lower temp 3-5° below room temp, replace batteries. |
Air Filter | Clogged with dust & debris | Inspect the filter. If it's dirty, replace it with a new one. |
Circuit Breaker | Tripped breaker for indoor or outdoor unit | Find the breaker, flip it fully OFF, then back ON. Do not repeat if it trips again. |
Vents & Registers | Blocked or closed vents | Walk through your home and ensure all air vents are open and unobstructed. |
Outdoor Unit | Debris blocking airflow | Visually inspect the outdoor condenser unit. Clear away any leaves, grass, or debris. |
By following these initial troubleshooting steps, you can often solve the problem yourself. If you've gone through this list and your AC still isn't cooling, it's time to consider that the issue might be more complex.
Solving Common Airflow Problems Yourself
Okay, so you've checked the thermostat and the circuit breaker, and everything seems fine. What’s next? Nine times out of ten, the culprit is airflow.
I always tell homeowners to think of their ductwork as their home's respiratory system. If it can't breathe, it can't cool. It's surprising how often an AC that’s “not cooling” is really just an AC that's being choked off, and thankfully, it's often something you can sort out on your own.
A simple blockage can starve the entire system of the air it needs. This doesn't just make your house feel warm; it forces your AC to work way harder than it should, driving up your energy bills and putting extra wear and tear on expensive components.
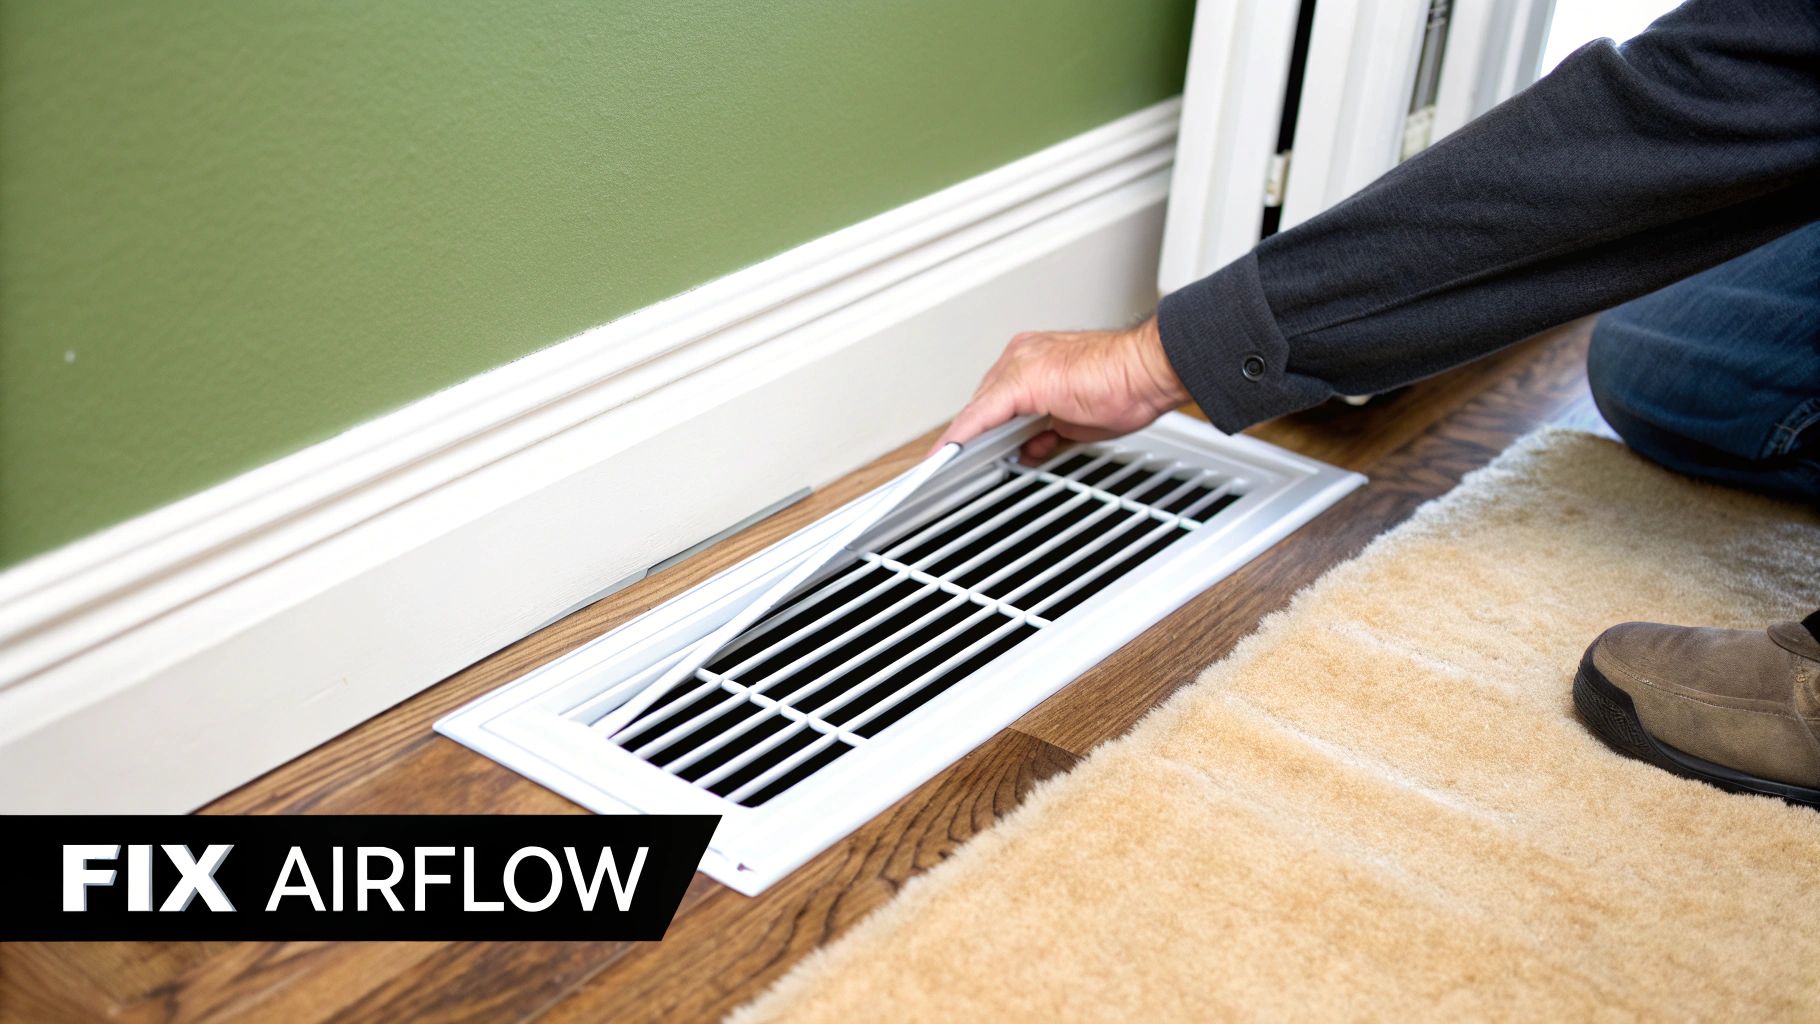
Inspecting Your Vents and Registers
The first and easiest check is to just walk through your house. Take a look at every single vent: the supply registers blowing air out and the bigger return vents pulling air back in. You'd be amazed at how often we find these things blocked.
Did you recently rearrange the living room? A sofa might be sitting right on top of a floor vent. Is a toy chest blocking that low return vent in the kid's bedroom? Even these small obstructions can throw off the balance and dramatically reduce cooling in that part of the house.
Give every vent a quick check:
Is it clear? Make sure furniture, rugs, and curtains aren't covering any part of the vent opening.
Is it open? Check the little lever on the supply registers. They sometimes get bumped closed during cleaning.
Cleaning the Outdoor Condenser Unit
Your air conditioner is basically a heat-moving machine. It pulls heat from inside your house and dumps it outside. That big metal box in your yard with the fan on top, the condenser unit, is where all that heat gets released.
If the metal fins around that unit are caked with dirt, leaves, grass clippings, or that fluffy cottonwood stuff we get here in Tucson, it can't breathe. It’s like trying to run a marathon in a winter coat. The system will keep running, trying its best, but it just can't get rid of the heat, so your house stays warm.
Safety First: Before you touch that outdoor unit, you have to kill the power. Find the electrical disconnect box; it's usually a small gray metal box mounted to the house right by the condenser. Open it up and either flip the switch to OFF or pull the fuse block out. To be extra safe, I always recommend flipping the corresponding breaker in your main electrical panel, too.
Once the power is off, grab a garden hose. Using a gentle spray, rinse the fins from the top down to wash all that gunk away. Don't use a high-pressure nozzle! Those fins are delicate aluminum and you can easily bend them, which would create an even worse airflow problem.
Identifying a Frozen Evaporator Coil
A frozen evaporator coil is a classic sign of an airflow problem. This coil is inside your indoor unit (the air handler), and its job is to absorb heat from the air passing over it. But when not enough air moves across it, usually because of a clogged filter or blocked vents, the coil gets too cold, and any moisture in the air freezes solid right onto it.
If you suspect you've got a frozen coil, here's what to do. Go to your thermostat and switch the system to OFF, but turn the fan setting to ON. This stops the cooling process but keeps the fan running to circulate air and help thaw the ice. It can take several hours, so be patient. Never, ever try to chip or scrape the ice off; you'll likely damage the coil.
For a deeper dive into this, you can check out our guide on what to do when your A/C unit is not blowing hard.
After the ice has completely melted, put in a clean air filter, double-check that all your vents are open, and then you can switch your system back to "Cool." If it freezes up again, that's a sign of a bigger issue, like low refrigerant, and it's time to call in a pro.
Alright, you’ve checked the thermostat, swapped out the air filter, and made sure all the vents are clear, but your house is still uncomfortably warm. When the simple fixes don’t work, it’s a sign the problem is likely deeper; something mechanical or electrical has probably gone wrong.
This is where we move past the basic DIY checklist and start looking at the heart of your AC system. You don’t need to grab a toolbox for this part. Instead, you just need to use your eyes and ears. Understanding the symptoms of these more serious issues is the key to having an intelligent conversation with a technician and getting the problem fixed fast.
Think of your air conditioner like a patient that can't talk. It uses strange sounds and specific behaviors to tell you what's wrong. Learning to interpret these distress signals can help you (and us) pinpoint the issue before a minor hiccup turns into a full-blown system meltdown.
Listening for Clues Your AC Is Failing
That gentle hum your AC usually makes is the sound of everything working correctly. When that sound changes to something more alarming, it’s a clear cry for help. Different noises often point directly to specific components that are on their last legs.
Here are a few common sounds I hear about from homeowners all the time, and what they usually mean:
Loud Humming or Buzzing: This is almost always an electrical issue. The sound often comes from a failing contactor (a switch that powers the outdoor unit) or, more frequently, a bad capacitor.
Clicking Sounds: If you hear rapid clicking from the outdoor unit as it tries to start up, it’s often another sign of a faulty capacitor or a problem with the compressor's electrical relay.
Squealing or Screeching: A high-pitched squeal is a classic symptom of a failing motor. It could be the blower motor inside your home or the fan motor in the outdoor unit. The bearings are likely shot.
Grinding or Banging: These are the sounds you never want to hear. Grinding often means the compressor's internal parts are breaking down. Banging could be a loose or broken part, like a connecting rod. If you hear either, shut the system off at the breaker immediately to prevent catastrophic damage.
Being able to tell a technician, "I hear a loud buzzing from the outdoor unit," is much more helpful than just saying, "It's making a weird noise." It gives us a head start. And if your system is constantly turning on and off, you might want to learn more about the causes of AC compressor short cycling.
Understanding Key Component Failures
Beyond the noises, some component failures have other distinct symptoms. Two of the most common culprits we see in the Tucson area are failed capacitors and refrigerant leaks. Both need a professional, but for very different reasons.
The capacitor is like a small battery that gives the compressor and fan motors the jolt of electricity they need to get started. When a capacitor dies, you'll often hear the motor hum as it tries to start but can't quite get going. This is a fairly quick and inexpensive fix for a trained technician, but it's dangerous for a homeowner because capacitors can hold a powerful electric charge even when the power is off. It's also important to understand what can cause a breaker to trip, as this is another common electrical symptom tied to AC failure.
A refrigerant leak is a trickier beast. Refrigerant is the lifeblood of your AC; it's the substance that actually absorbs heat from your home's air. If the level is low, your system simply can't cool effectively. Telltale signs include hissing sounds near the unit, visible ice buildup on the copper lines, or vents blowing air that’s just slightly cool, not cold.
Key Takeaway: Refrigerant doesn't get "used up" like gas in a car. It runs in a closed loop. If your system is low, it means there's a leak somewhere. A certified technician must find and repair the leak before adding more refrigerant.
To give you a clearer picture of what to look for, here’s a quick-glance table breaking down common symptoms, their likely causes, and what you might expect in terms of urgency and cost.
Symptom Checker for AC Mechanical Failures
Symptom (What You See or Hear) | Likely Cause | Urgency Level | Estimated Repair Cost Range |
|---|---|---|---|
AC unit hums but won't start | Bad Capacitor or failed motor | High - Continued attempts can burn out the motor. | $150 - $450 |
Circuit breaker trips repeatedly | Electrical short, failing compressor, or bad motor | High - Potential fire hazard. Shut system off. | $200 - $2,500+ |
Ice on outdoor lines or unit | Low Refrigerant (leak) or severe airflow blockage | High - Can lead to compressor failure. | $450 - $1,800+ (leak detection + repair) |
Grinding or banging noises | Failing compressor or broken internal parts | Immediate - Shut system off to prevent total failure. | $2,000 - $5,000+ (compressor replacement) |
Water pooling near indoor unit | Clogged drain line or cracked drain pan | Medium - Can cause water damage and mold. | $100 - $350 |
Vents blowing warm or lukewarm air | Low Refrigerant, bad compressor, or ductwork leak | High - Your system is not functioning properly. | Varies widely from $450 to $5,000+ |
This table is a guide to help you make sense of what your system is doing. While some issues are less critical than others, any mechanical or electrical problem warrants a professional diagnosis to ensure it's fixed safely and correctly.
Stop Future Breakdowns Before They Start with Proactive Maintenance
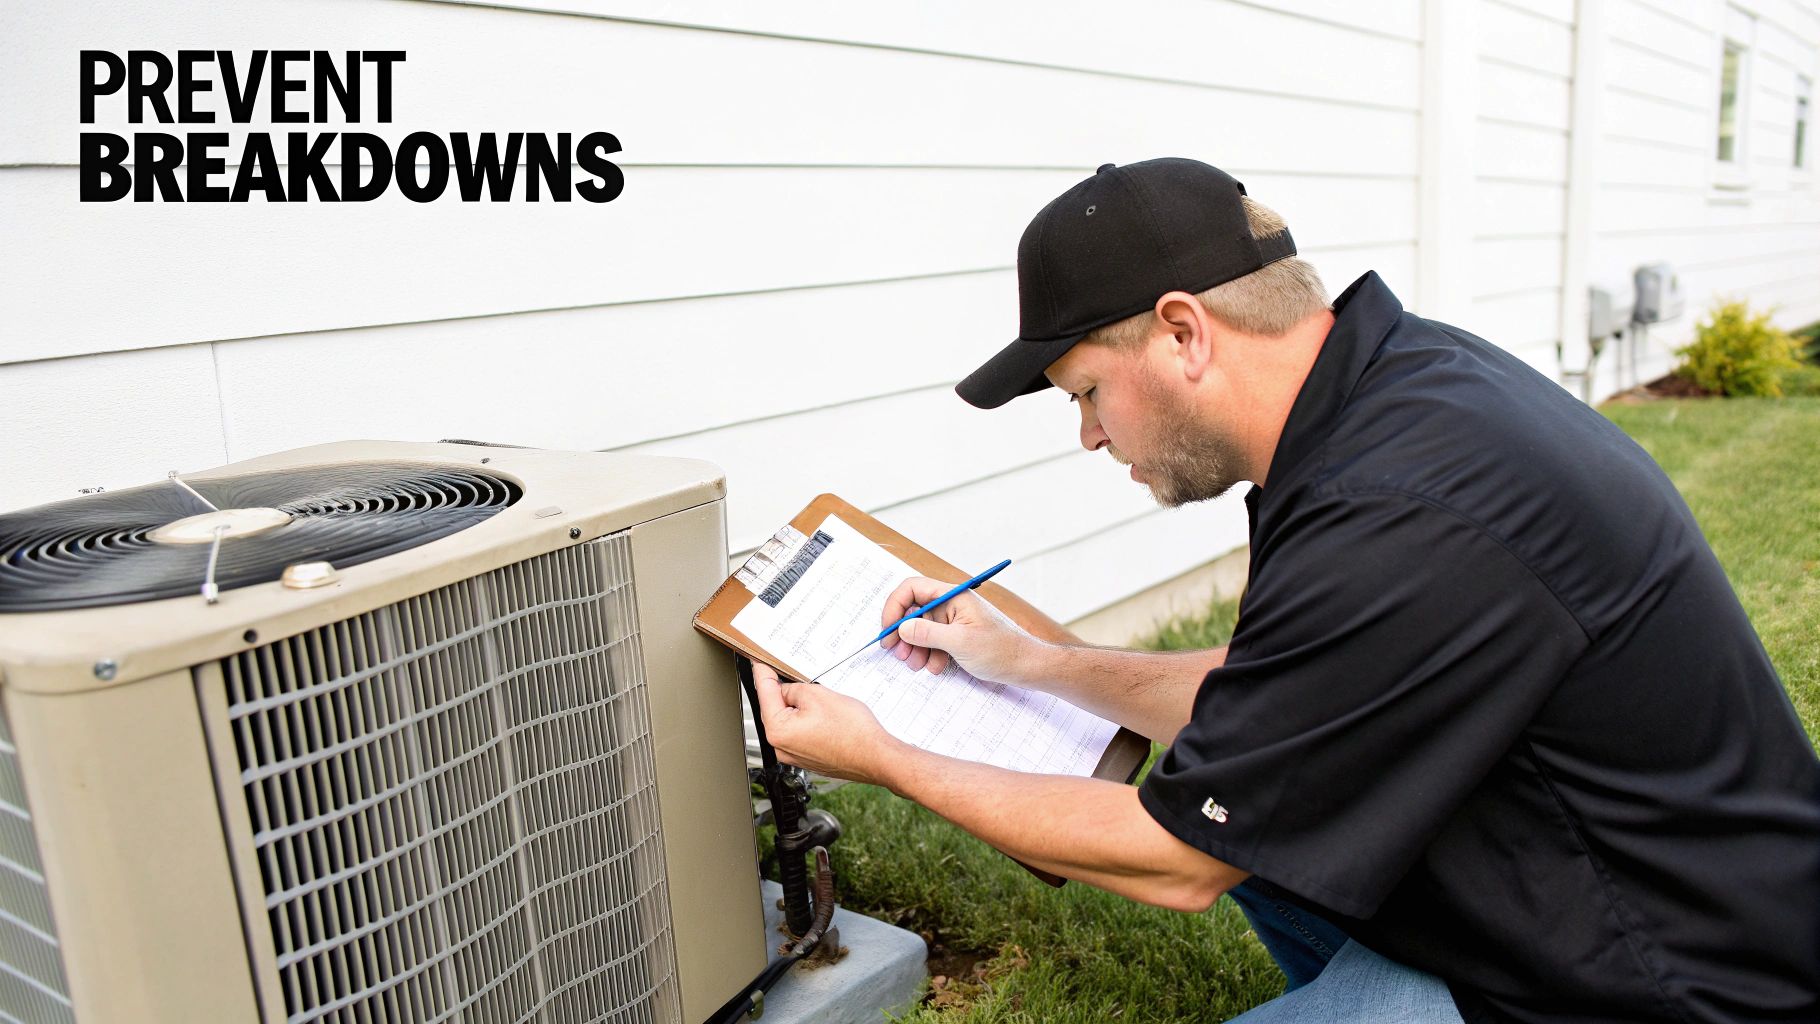
Honestly, the best way to handle an AC that's not cooling is to prevent it from happening in the first place. Think of proactive maintenance as your system's best defense against the brutal stress of a Tucson summer. A little consistent care saves you from the frustration and expense of an emergency breakdown.
Following a simple routine can dramatically extend your unit’s lifespan and keep it running at its best when you need it most. This isn’t about becoming an HVAC technician overnight; it’s about forming good habits. Many of the most important tasks are simple enough for any homeowner and take just a few minutes a month.
When you combine these small efforts with professional servicing, you create a powerful strategy to keep your home cool and your energy bills right where they should be.
Your Monthly DIY Checklist
Consistent, small actions are your best weapon against the most common causes of AC failure, like restricted airflow and unnecessary strain on the system. Spending just a few minutes each month on these tasks can help you catch minor issues before they spiral into costly problems.
Here are the top three things you should do yourself every month:
Inspect and Change Your Air Filter: We can't say it enough: a clogged filter is your AC's worst enemy. A dirty filter essentially suffocates your system, drastically reducing its cooling power and driving up energy costs. Check it monthly and replace it every 1-3 months, maybe even more often during our dusty seasons.
Clear the Outdoor Condenser Unit: Your outdoor unit needs to breathe to push the heat from your home outside. Keep the area around it clear for at least two feet in all directions. Trim back any overgrown shrubs, rake away fallen leaves, and make sure grass clippings aren't blocking those delicate fins.
Check Your Condensate Drain Line: When it's humid, your AC pulls a lot of water from the air. This moisture exits through a condensate drain line, which can get clogged with algae and sludge. A quick visual check to ensure water is dripping freely outside can prevent a backup that could shut down your system and cause water damage.
The Value of Professional Tune-Ups
While your monthly checks are critical, they aren’t a substitute for a comprehensive professional tune-up. Scheduling a professional service visit twice a year, once in the spring for your AC and again in the fall for your furnace, is the single best investment you can make for your home's comfort and your system's longevity. This preventative care is so important that we wrote a complete guide on how often you should service your air conditioner.
A professional tune-up goes far beyond just cleaning. Our technicians perform a detailed inspection of electrical connections, check refrigerant levels, test capacitors, and deep-clean critical components like the evaporator and condenser coils. This process doesn't just improve efficiency; it catches failing parts before they cause a complete system meltdown.
The global demand for reliable cooling is soaring. In fact, the air conditioning market is projected to grow to USD 268.91 billion by 2034, driven by a need for more energy-efficient systems. Educating homeowners on proper maintenance is key to meeting this demand sustainably and preventing common performance issues.
Making sure your AC runs efficiently through proactive maintenance is also a huge part of your home's overall energy strategy. You can learn more about other energy-efficient home upgrades to see how a well-maintained system fits into the bigger picture of saving money. By staying ahead of problems, you ensure your AC is ready for whatever the summer throws at it.
You’ve done everything you can. You followed the troubleshooting steps, you’ve been patient while the coils thawed out, and you even gave the outdoor unit a gentle cleaning. And yet, the air drifting from your vents is still stubbornly warm.
Knowing when to hang up your DIY hat and pick up the phone isn't a sign of defeat. Honestly, it’s the smartest move you can make for your safety, your home, and the long-term health of your HVAC system.
While plenty of common AC issues are simple enough to fix, some problems are just not worth the risk. We're talking about complex electrical components, high-pressure refrigerant lines, and intricate internal mechanics that are both complicated and potentially dangerous. When you hit a serious red flag, stepping back and letting a certified professional take the lead is always the safest and most effective path forward.
Trying to tackle these complex issues without the right training can easily turn a manageable repair into a complete system replacement. More importantly, you could be risking a serious electrical shock or exposure to hazardous chemicals. Your well-being has to be the top priority.
Red Flags That Demand Immediate Attention
Some symptoms aren't just little hints that something is wrong; they're blaring alarms that your AC needs expert help right away. If you notice any of the following, shut your system down at the circuit breaker immediately and give a professional a call. Waiting it out can lead to a catastrophic system failure or create a dangerous situation in your home.
These are the clear signs that an issue is way beyond a DIY fix:
Burning Smells: Any odor that smells like burning plastic, wiring, or hot metal coming from your vents or the unit itself is a major red flag. This points to a serious electrical problem, like an overheating motor or fried wiring, which is a significant fire risk.
Loud, Unusual Noises: A gentle hum is perfectly normal. But sounds like grinding, screeching, or banging mean you’ve got a severe mechanical failure on your hands. A grinding noise often means the compressor is on its last legs, while a screeching sound could be a bad motor bearing. Continuing to run the unit could completely destroy it.
Frequently Tripping Breaker: If your AC breaker trips once, it's okay to reset it. But if it trips again right away, that’s a clear sign of an electrical short or an overloaded circuit. Don't keep resetting it; this is your system telling you to call for help.
Signs of a Refrigerant Leak: Noticing ice buildup on the copper lines, hearing a distinct hissing sound, or finding an oily residue around the unit are all classic signs of a refrigerant leak. Refrigerant is a hazardous substance that only a certified technician is legally allowed to handle and repair safely.
For a deeper dive into handling these urgent situations, our emergency air conditioning repair guide has some more valuable insights.
Choosing the Right HVAC Company
When your AC gives out in the middle of a Tucson heatwave, the temptation is to call the very first company you find online. But taking just a few extra minutes to choose a reputable contractor will save you a world of headaches, time, and money down the road.
Let's be real: not all HVAC companies are created equal. A quality contractor is more than just a repair person; they're a partner in maintaining your home’s comfort. A reliable company will have a solid local reputation built on trust and excellent service: someone who is transparent, knowledgeable, and focused on finding the right solution for you, not just making a quick sale.
Key Insight: When you're choosing an HVAC contractor, their credentials are what matter most. Always, always verify they are licensed, bonded, and insured. This is your protection against liability if an accident happens and ensures the technicians are qualified to do the job right.
Questions to Ask When You Call for Service
When you do reach out for help, having the right information and a few key questions ready can make the whole process smoother. It helps you vet the company and understand exactly what to expect before they even show up at your door.
Here’s a quick list of what you should ask:
"Are your technicians certified and background-checked?" This is just to confirm you’re letting a qualified and trustworthy professional into your home.
"Do you offer upfront pricing or provide a detailed estimate before any work begins?" This is the key to making sure there are no nasty surprises on your final bill.
"What is your service call fee, and does that fee get applied toward the repair cost?" It’s always good to understand the initial diagnostic fee for budgeting purposes.
"Do you guarantee your work or offer a warranty on repairs?" A reputable company will always stand behind its service and the parts it installs.
By knowing when to call and who to call, you can navigate an AC breakdown with confidence, ensuring a fast, safe, and effective resolution that gets your home cool again.
Have Questions About Your AC? We've Got Answers.
After you've done some initial troubleshooting, it’s completely normal to still have questions, especially if the fix isn't as simple as changing a filter. Homeowners across the Tucson area run into the same uncertainties when their AC starts acting up.
We hear these questions all the time, so we've put together some straight answers to help clear things up. Our goal is to demystify these common cooling problems so you feel more in control of the situation.
Why Is My AC Running but Not Blowing Cold Air?
This is probably the number one call we get. The unit is humming away, you can hear it running, but the air coming out of your vents is lukewarm at best. It’s frustrating, but it usually points to a handful of specific culprits.
Here’s what’s likely going on:
A Clogged Air Filter: We can't stress this enough; it's always the first thing to check. A filthy filter chokes your system, blocking the airflow it needs to cool your home.
A Dirty Outdoor Condenser Unit: That big fan unit outside? If it's covered in dust, leaves, or our lovely Arizona dirt, it can't release the heat it has pulled from your house.
Low Refrigerant Levels: If you have a refrigerant leak, your system has lost its cooling power. Think of it as the lifeblood of your AC; without enough of it, it just can't do its job.
A Mechanical Failure: Sometimes, it’s a part that has simply given out, like a failing compressor or another internal component that has stopped working.
You can easily swap out a filter or gently hose down your condenser. But for refrigerant leaks and mechanical problems, you’ll want a certified pro to handle it.
How Long Should I Wait Before Calling for AC Repair?
Honestly? Don't wait. In the middle of a Tucson summer, a struggling AC isn't just an inconvenience; it can become a serious problem fast.
Once you’ve done the basic checks: thermostat settings, air filter, circuit breaker, and the problem is still there, it’s time to pick up the phone. Delaying the call can turn a small, inexpensive fix into a huge, costly one. For instance, a failing capacitor is a relatively simple repair, but letting it go can burn out the compressor motor, which is a much bigger deal.
If you hear grinding or screeching noises, smell something burning, or see a thick layer of ice on the refrigerant lines, that's an emergency. Shut the system down completely at the breaker and call for service immediately. The faster an expert gets their eyes on it, the better your odds of avoiding a catastrophic failure.
What Is a Fair Price for an AC Repair?
This is a tough one because "fair" depends entirely on what’s wrong. AC repair costs can swing wildly because every situation requires different parts and a different amount of labor.
A minor repair, like replacing a bad capacitor or clearing out a clogged drain line, might run you a few hundred dollars. But a major job, like tracking down and fixing a significant refrigerant leak or replacing a blower motor, will be substantially more. And if the compressor has failed? That’s one of the most expensive repairs you can face, short of a full system replacement.
Any reputable HVAC company will give you a clear, itemized quote before they start any work. That way, you know exactly what you’re paying for with no nasty surprises on the final bill.
Can I Add Refrigerant to My AC Myself?
The answer to this is a firm and absolute no. Handling refrigerant is not a DIY job, and here’s why.
First, refrigerant is a federally regulated chemical. You need an EPA certification and specialized equipment to handle it legally and safely. Second, and just as important, your AC is a sealed system. If it’s low on refrigerant, that means you have a leak.
Simply topping it off is like putting air in a tire with a nail in it. It’s a temporary fix that completely ignores the real problem. A certified technician will find the leak, repair it properly, and then recharge the system with the exact amount of refrigerant it was designed for. Anything else is just asking for more trouble down the road.
When your AC isn't keeping up, you need help from someone you can trust to get it right the first time. The certified technicians at Covenant Aire Solutions are ready to diagnose your cooling issues and get your home comfortable again. Don't let a small annoyance turn into a major headache; contact us today for expert AC repair in the Tucson area.