
Air Conditioning Older Homes
83% of U.S. homes built before 1950 used air conditioning in 2020, compared with 93% of homes built between 2010 and 2020. That gap shows why cooling an older house is not just a matter of choosing a larger unit, because the electrical system, insulation, windows, and ductwork may all need attention first.
Air conditioning older homes requires a different sequence from installing equipment in new construction. A new condenser can cool the air, but it can't correct a leaking attic duct, absorb heat through an uninsulated wall, or make an undersized electrical panel safer. The cheapest-looking option often becomes expensive after those hidden constraints appear.
A successful retrofit starts with the house rather than the equipment. Once you understand how the building handles heat, moisture, airflow, and electrical demand, you can choose between ductless mini-splits, packaged equipment, or a central system with much greater confidence.
The Cooling Gap in Older Homes
The difference between older and newer housing stock is more than a construction date. It reflects decades of changing expectations about comfort, electrical service, insulation, windows, and mechanical systems. In the United States, 83% of homes built before 1950 used air conditioning in 2020, compared with 93% of homes built between 2010 and 2020. In the marine climate region, the gap was wider, with AC in only 39% of homes built before 1950, compared with 66% of homes built between 2010 and 2020. The U.S. Department of Energy's history of residential air conditioning places those figures in the broader context of how cooling entered American homes.
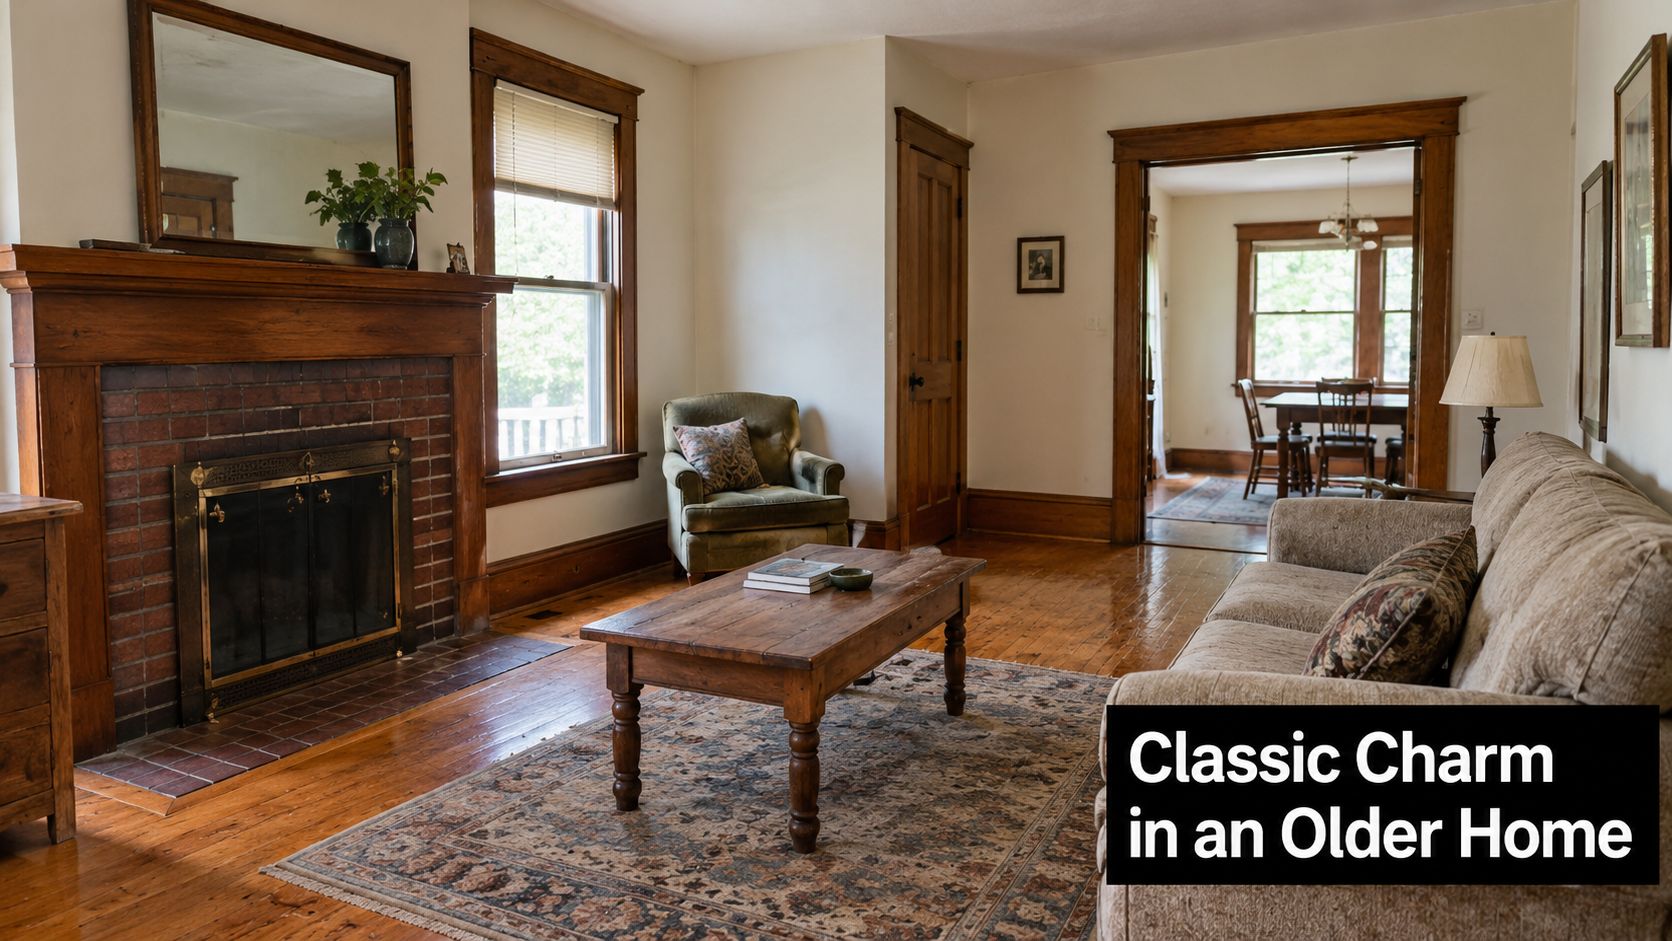
Consider a prewar house with plaster walls, a brick chimney, single-pane windows, and a small electrical service. It may have been designed around open windows, ceiling fans, fireplaces, or radiators. Running conventional supply and return ducts through finished rooms can mean losing closet space, lowering ceilings, or disturbing original trim. Even when the structure can accept the work, the electrical system may not have enough capacity for a modern compressor and its associated equipment.
Why the construction era matters
The first home air conditioner was installed in 1914 in a Minneapolis mansion. Practical residential units did not reach the mass market until 1931, when a window-ledge design allowed homeowners to add cooling without major structural changes. By 1947, 43,000 of those small systems had been sold, and by the late 1960s, most new homes had central air conditioning. Today, air conditioning is present in nearly 100 million American homes, equal to 87% of households, according to ASHRAE's industry history.
That progression explains why an older house may have heating infrastructure but no practical path for conventional cooling. The building wasn't necessarily defective. It was built before central air became a standard expectation.
Before choosing a system, inspect the attic, crawlspace, windows, wall insulation, duct routes, panel, and available outdoor-unit locations. A useful overview of basic cooling approaches is how to cool down a house, but older properties need a site-specific assessment rather than a room-size recommendation alone.
Comparing Ductless Mini-Splits, Packaged Units, and Central Retrofits
Older homes usually fall into one of three retrofit paths. Ductless mini-splits avoid the need for a full distribution network. Packaged units keep the major components together and can work where a suitable exterior or rooftop location exists. Central retrofits deliver familiar whole-home distribution, but they require enough space for ducts and often involve the most invasive construction.
Retrofit Path | Invasiveness | Best Use Case |
|---|---|---|
Ductless mini-splits | Low to moderate | Homes without ducts, preserved interiors, or rooms needing independent zones |
Packaged units | Moderate | Homes with a practical outdoor or rooftop equipment location and a compact distribution plan |
Central retrofit | Moderate to high | Major renovations, homes with usable duct routes, or owners prioritizing concealed equipment |
Ductless mini-splits
Mini-splits are often the most practical choice when the house has no ducts or when opening walls would damage plaster, millwork, or historic finishes. Each indoor air handler serves a zone, so the contractor can target the living area, bedrooms, or an upstairs problem area without building a complete central distribution system.
The trade-off is visible equipment and the need for thoughtful placement. A wall-mounted head may be acceptable in a bedroom but distracting in a formal parlor. Ceiling cassettes, floor-mounted units, and concealed short-duct configurations can reduce the visual impact, though each adds design and installation considerations.
A monitored central-Florida field study followed ten homes using supplemental 25.5 SEER and 12 HSPF inverter-driven mini-splits. The homes achieved median cooling energy savings of 33%, median heating savings of 59%, and median annual HVAC energy reduction of 34%, as documented in this ACEEE field study of supplemental mini-splits. The important detail is the operating strategy. The new zone system reduced runtime on the older central equipment instead of requiring immediate whole-home replacement.
Packaged and central systems
A packaged unit can simplify equipment placement because the major components occupy one cabinet. It still needs an effective way to distribute conditioned air, so it isn't automatically a duct-free solution. If the home has limited interior space but a suitable exterior location and an existing distribution arrangement, it may deserve consideration.
Central air remains attractive when the home is already undergoing a substantial renovation. Open walls and ceilings make it easier to install properly sized supply and return ducts, preserve access for service, and hide grilles. It becomes less appealing when the installation requires extensive demolition solely to accommodate the HVAC system.
For homeowners balancing historic character with modern comfort, planning principles used in luxury ADU construction in Arizona can offer useful perspective. Mechanical equipment should be coordinated with circulation, wall assemblies, electrical access, and finished surfaces early, rather than treated as an afterthought.
A practical explanation of how ductless systems distribute conditioned air is available in this guide to ductless cooling. The right system isn't the one with the lowest equipment quote. It's the one that delivers comfort without creating a larger construction, electrical, or maintenance problem.
Improving Insulation and Airflow Before Sizing Equipment
Replacing the AC before reducing the house's cooling load is one of the most common mistakes in older-home work. A contractor can install an efficient unit, but the system will still run too long if attic heat, wall leakage, solar gain, and duct losses remain unchanged. Equipment selection should follow the building assessment, not precede it.
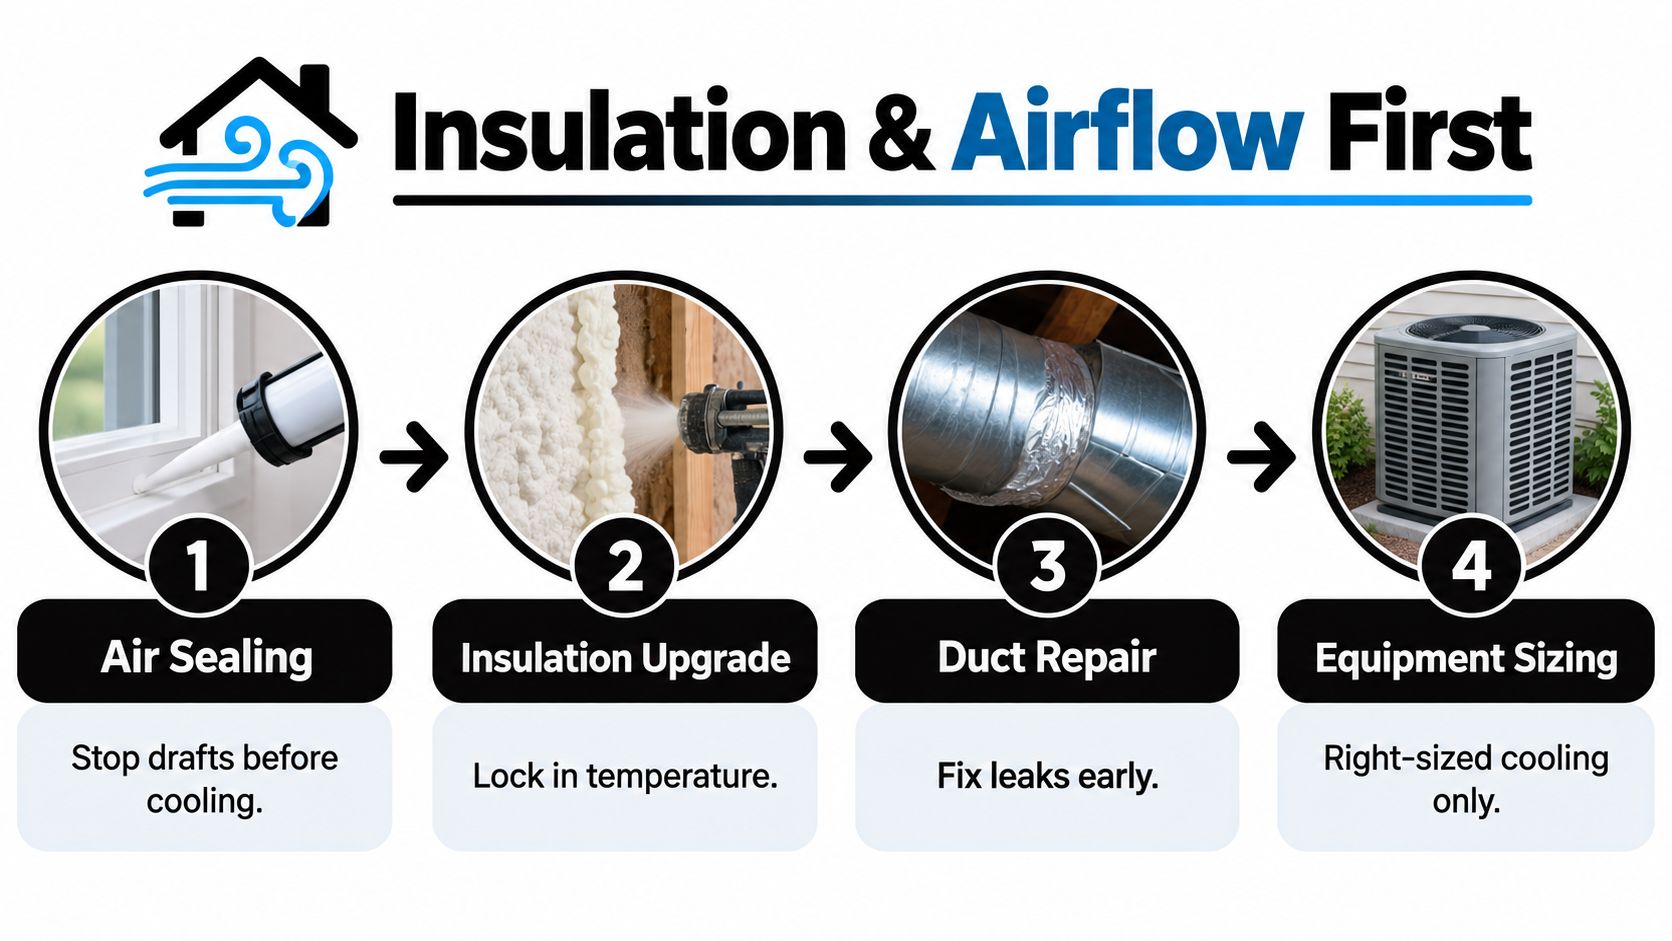
Follow the load-reduction sequence
Air sealing comes first. Seal accessible penetrations at the attic floor, rim areas, plumbing openings, and other locations where conditioned air escapes. The U.S. Department of Energy's historic-home guidance identifies insulation in basements, above-grade walls, and attics as an important energy-saving measure, and it specifically recommends sealing ducts in attics, vented crawlspaces, and rim areas.
Insulation follows the leakage work. Adding insulation without addressing major air paths can leave the building envelope underperforming. In an older house, insulation levels may vary from room to room, especially after additions, repairs, or partial remodeling. A contractor should identify those irregularities before calculating the cooling load.
Ducts need their own inspection. An old attic duct can leak cooled air into a hot space, while an uninsulated run can gain heat before air reaches the room. A focused explanation of the process appears in this guide to duct sealing. Sealing connections, improving insulation, and correcting crushed or poorly routed sections can improve delivery without changing the outdoor unit.
Practical rule: Reduce the load, repair the distribution system, then size the equipment for the house that remains.
Why right-sizing changes the result
A retrofit research-home project in the Central Valley combined short buried attic ducts, smaller AC compressors with larger coils, wall and attic insulation, air sealing, modern windows, and higher evaporator airflow. Older homes in the project achieved an average 75% reduction in cooling energy, according to the ACEEE research on integrated older-home retrofits.
That result came from a package, not a compressor swap. Each improvement reduced the work required from the next component. Smaller loads allowed smaller equipment, and improved airflow helped the system deliver the cooling it produced.
Homeowners who want a broader explanation of insulation materials, continuity, and whole-building planning can review this whole home insulation guide from Aureli Construction. The practical sequence remains the same: inspect first, seal leakage, improve insulation, correct duct losses, and only then finalize the equipment size.
Real Retrofit Costs and Hidden Upgrade Expenses
The equipment price is only one line in an older-home AC proposal. The project can also involve electrical work, duct construction, wall repairs, condensate management, attic access improvements, insulation, and window or shading upgrades. If those items aren't identified during the first visit, the initial quote may look affordable while the finished project becomes difficult to fund.
Current guidance places ductless retrofit costs at approximately $3,000 to $5,000 per zone, while central-air retrofits can range from $6,000 to $15,000 when ductwork must be added or modified. These ranges come from this guide to installing central air in an old house, and they should be treated as planning figures rather than guaranteed bids.
Electrical capacity can change the preferred system
Some older houses have 100-amp or even 60-amp panels, which may be inadequate for modern compressor loads without an electrical upgrade. The question isn't only whether the new AC can run. An electrician must evaluate the service, panel condition, circuit space, disconnect requirements, grounding, and the home's other electrical loads.
That evaluation belongs near the beginning of the project. A mini-split may require less invasive construction than central air, but it still needs appropriate electrical provisions. A central retrofit may look convenient until the panel, wiring, and duct routes are priced together.
Compare total project scope
Ask each contractor to separate equipment, electrical work, ductwork, envelope improvements, finish repairs, permits, controls, and commissioning. A low quote that excludes duct repair isn't necessarily a low-cost solution. It may just transfer the expense to a later phase, when the walls are already closed and access is harder.
Use these questions before approving a contract:
Panel review: Has a qualified electrician confirmed that the existing service can support the proposed equipment?
Duct scope: Are existing ducts being tested, sealed, insulated, repaired, or replaced?
Load calculation: Was the equipment selected from the home's measured conditions rather than floor area alone?
Envelope assumptions: Does the proposal identify missing insulation, air leakage, or window-related cooling load?
Finish protection: Who handles plaster, trim, ceiling, and paint repairs if new distribution routes are needed?
For homes with damaged or poorly routed ducts, review the practical implications of ductwork replacement before comparing central-system bids. The least disruptive installation isn't always the least expensive once electrical and building-envelope work are included.
Passive Cooling Strategies That Reduce Mechanical Load
Older homes often contain passive features that modern renovations remove without replacing their cooling function. High ceilings, porches, awnings, tall windows, deliberate window placement, and thermal-mass walls can moderate indoor conditions when they remain intact and are used correctly.

Passive cooling doesn't mean leaving occupants uncomfortable or refusing to install AC. It means using the building's existing advantages to reduce the hours and intensity of mechanical cooling. Cross-ventilation can move accumulated heat through the home when outdoor conditions allow, while shading limits solar gain before it reaches glass and interior surfaces.
Recent research on historic residential structures in hot-humid San Antonio found that cross-ventilation and related passive strategies can reduce energy use while supporting thermal comfort. The research also identified porches, awnings, high ceilings, window placement, and thermal-mass walls as features that can lower temperatures and cooling loads, as described by Drexel's research on natural ventilation in historic buildings.
Preserve useful features before replacing them
A porch can shade exterior walls and windows. An awning can reduce direct sun on a vulnerable elevation. High ceilings can give warm air somewhere to collect, while properly placed openings can support air movement through connected rooms. These features don't eliminate the need for mechanical cooling in every climate, but they can change the required capacity and improve comfort between cooling cycles.
The strategy must match local conditions. Opening windows during a hot, humid period may bring in moisture rather than relief. In a dry climate, evening ventilation may be more useful when outdoor air is cooler, while daytime shading protects the envelope from solar heat.
The video below illustrates how ventilation and building design can work together in older structures.
A preservation-aware contractor should distinguish between features worth maintaining and openings that genuinely need sealing. The goal is controlled airflow, not uncontrolled leakage. Pairing shading and ventilation with modest zoned cooling can preserve character, limit equipment size, and make the mechanical system less dependent on continuous operation.
Step-by-Step Retrofit Implementation Plan
A reliable retrofit follows the building's logic. Start with evidence, correct the shell and distribution system, select equipment, and verify the finished installation.
Initial assessment: Inspect the attic, walls, windows, crawlspace, ducts, condensate route, outdoor-unit location, and electrical panel. Record comfort problems by room rather than relying on a whole-house impression.
Envelope work: Seal major air leaks and improve insulation where the inspection identifies weak areas. Protect historic trim and finishes by choosing accessible work locations before opening walls.
System selection: Compare ductless, packaged, and central options against the corrected load and the home's available electrical capacity. Avoid oversized equipment, which can cycle poorly and deliver disappointing humidity control.
Distribution and duct verification: For central or short-duct systems, repair leakage and insulation before closing access points. Historic-house guidance calls for every foot of ductwork to be insulated to at least R-11, while modern minimum duct insulation is R-8. Older flex duct may perform better when replaced with new pre-insulated R-8 flex duct rather than re-insulated in place, according to PNNL guidance on air-sealing and repairing ducts.
Final commissioning: Confirm airflow, refrigerant operation, thermostat control, condensate drainage, electrical connections, and zone response. A contractor should explain what was tested and provide maintenance instructions, not just start the system and leave.
For help evaluating installers, use this guide on how to choose an HVAC contractor. In Tucson and surrounding areas, Covenant Aire Solutions provides AC installation, replacement, repair, ductwork, heat pump, and indoor air quality services, with assessments that connect equipment choices to the condition of the home.
Visit Covenant Aire Solutions to arrange an older-home cooling assessment that considers electrical capacity, duct condition, insulation, and equipment sizing together. Their technicians can help Tucson-area homeowners compare practical retrofit options, plan repairs, and commission a system for dependable comfort.