
Air Ducts Repair: Signs, Costs and How to Fix
You're paying to cool the attic. One bedroom stays warm, the system runs long into the evening, and dust shows up at the registers no matter how often you clean. That's often not a failing air conditioner. It's air ducts repair work that nobody's measured yet, and guessing at it wastes money.
Common Duct Repairs, Costs and Who Should Do Them
Start with the repair lookup below. It separates a small, reachable leak from a damaged run that needs replacement, so you don't pay for the biggest job when a targeted fix will do.
Repair | What It Fixes | Typical Cost Level | Who Should Do It |
|---|---|---|---|
Sealing accessible joints with mastic or foil tape | Small leaks at seams, plenums and register connections | Low | Homeowner or pro |
Reconnecting detached duct sections | Air escaping at separated joints | Low to moderate | Pro recommended |
Replacing crushed or torn flexible duct | Restricted airflow and leaks at damaged liners | Moderate | Pro |
Replacing insulation on attic or crawlspace ducts | Heat gain or loss and condensation | Moderate | Pro |
Return-side leak repair | Dust and hot attic air drawn into the system | Moderate | Pro |
Replacing damaged or undersized duct sections | Severe leaks, corrosion and poor airflow | High | Pro |
How to read the cost column
These levels are qualitative, not dollar quotes. Access, duct length, attic conditions and region change the price more than the material itself. A tube of mastic is cheap. Getting a technician safely to a buried joint above a vaulted ceiling isn't.
Sealing accessible joints is the lowest cost fix because the work is at reachable seams, plenums and register connections. Reconnecting detached sections costs more when the run sits in an attic, where the joint needs proper fastening and support, not just pushing the pieces together. Replacing crushed or torn flexible duct is moderate, and it's professional work because a kink or sag in one run restricts airflow to the rooms beyond it.
Replacing insulation on attic or crawlspace ducts addresses heat gain, heat loss and condensation. Sealing alone won't stop a cold duct from sweating or picking up attic heat. Return-side leak repair is also moderate, and it matters out of proportion to its size, because a return leak pulls hot, dusty attic air straight into the system before the filter can help.
Replacing damaged or undersized sections is the highest cost option. Reserve it for severe leaks, corrosion, or runs that can't deliver the airflow the room needs even when tight.
Practical rule: The cheapest repair is the one that fixes a located, measured leak. A broad quote with no locations listed is a guess you're funding.
I would start with the cheapest fix that matches a confirmed problem. A sound quote lists each repair location, the method for that location, and how the result will be checked. If a proposal can't name where the air is escaping, it can't tell you why the price is right.
Signs Your Ducts Are Leaking or Damaged
The sign homeowners notice first is one room that's noticeably hotter or colder than the rest. The other common signs group around it:
Longer runtime: The system runs longer than it used to for the same weather.
Higher bills: Energy use climbs without a change in habits.
Dust: Dust collects around supply registers or throughout the house.
Warm, humid air: Air near the air handler feels warm or damp.
Noise: Whistling or rattling comes from joints.
Visible damage: Flexible duct in the attic looks crushed or pulled apart.
Musty smell: Odor comes from the ducts when the system starts.
The energy side explains the bills. The U.S. Environmental Protection Agency guidance states that about 20% of the air moving through ductwork in typical homes can be lost through leaks, holes, and disconnected sections. Heat transfer adds to that, since the U.S. Department of Energy guidance reports typical duct systems may lose approximately 25–40% of the heating or cooling energy produced through leakage and heat transfer through duct surfaces.
Symptom | Likely Cause | Next Check |
|---|---|---|
One room much hotter or colder than the rest | Supply leak or undersized run to that room | Feel and smoke-test the supply run to that room |
Dust around supply registers or throughout the house | Return-side leak drawing attic or dusty air into the system | Inspect return plenum and return boots for gaps |
Higher energy bills without a change in use | Overall duct loss from leaks and conduction | Ask for a whole-system pressure test |
System runs longer than it used to | Leakage or restricted flexible duct | Inspect for crushed, pulled-apart or disconnected duct |
Warm or humid air at the air handler | Failed or missing insulation, or condensation | Check insulation and condensate drain pan |
Whistling or rattling at joints | Separated or loose joint | Walk every accessible joint with a flashlight |
Musty smell from the ducts | Wet or moldy internal insulation or water leak | Inspect for moisture and follow the decision guidance |
A dusty duct alone isn't proof of damage. Write down which signs appear and in which rooms, because that pattern tells a technician which runs to test first.
How to Confirm Leaks Before You Pay for Repair
Don't pay for sealing until someone shows you where the air goes. These checks run from easiest to most involved, and each one answers a different question.
Checks you can do first
Walk every accessible duct: Use a flashlight in the basement, garage or attic. Look for separated joints, crushed flexible duct, and gaps at the plenum and boot connections.
Check each register and return grille: Note which rooms get weak airflow. A dead register with a strong neighbor points to that branch run, not the equipment.
Feel along seams with the system running: A hand finds larger leaks. A smoke pencil finds smaller ones, since wisps bend toward a return leak and blow away from a supply leak.
Those three steps are enough when you find an obvious disconnect in plain view. They aren't enough for runs above ceilings or inside walls, where your eyes can't go.
Some homeowners try a thermal camera next. It can flag a cold stripe along a ceiling, but read up on thermal leak detection limitations first, because surface temperature shows a pattern, not an airflow rate. It won't tell you how much air you're losing.
Checks that produce numbers
Ask for a duct pressure test: It should report total leakage and leakage to outside separately. Total leakage shows overall tightness, leakage to outside shows what you lose.
Use a smoke test only as a fallback: It's for inaccessible areas that pressure testing can't isolate, not a substitute for measurement.
Record the baseline before work starts: Write down airflow at supply registers, static pressure, and measured leakage.
Our guide to pressure testing ductwork explains how that test is set up and read. Visual inspection alone misses leaks inside walls, and without a before reading, nobody can prove the repair improved anything.
A joint that looks sealed can still leak under pressure. The number is the evidence, the photo is just the location.
Keep a simple baseline sheet: date, rooms affected, readings, and photos of accessible damage. Hand it to anyone quoting the job. It turns a sales conversation into a comparison of methods.
Choosing Between Repair, Cleaning and Replacement
A dusty duct doesn't automatically need cleaning. That assumption sells a lot of unnecessary work.
This photo shows the moment most homeowners face, staring at a dirty vent and assuming cleaning is the answer.
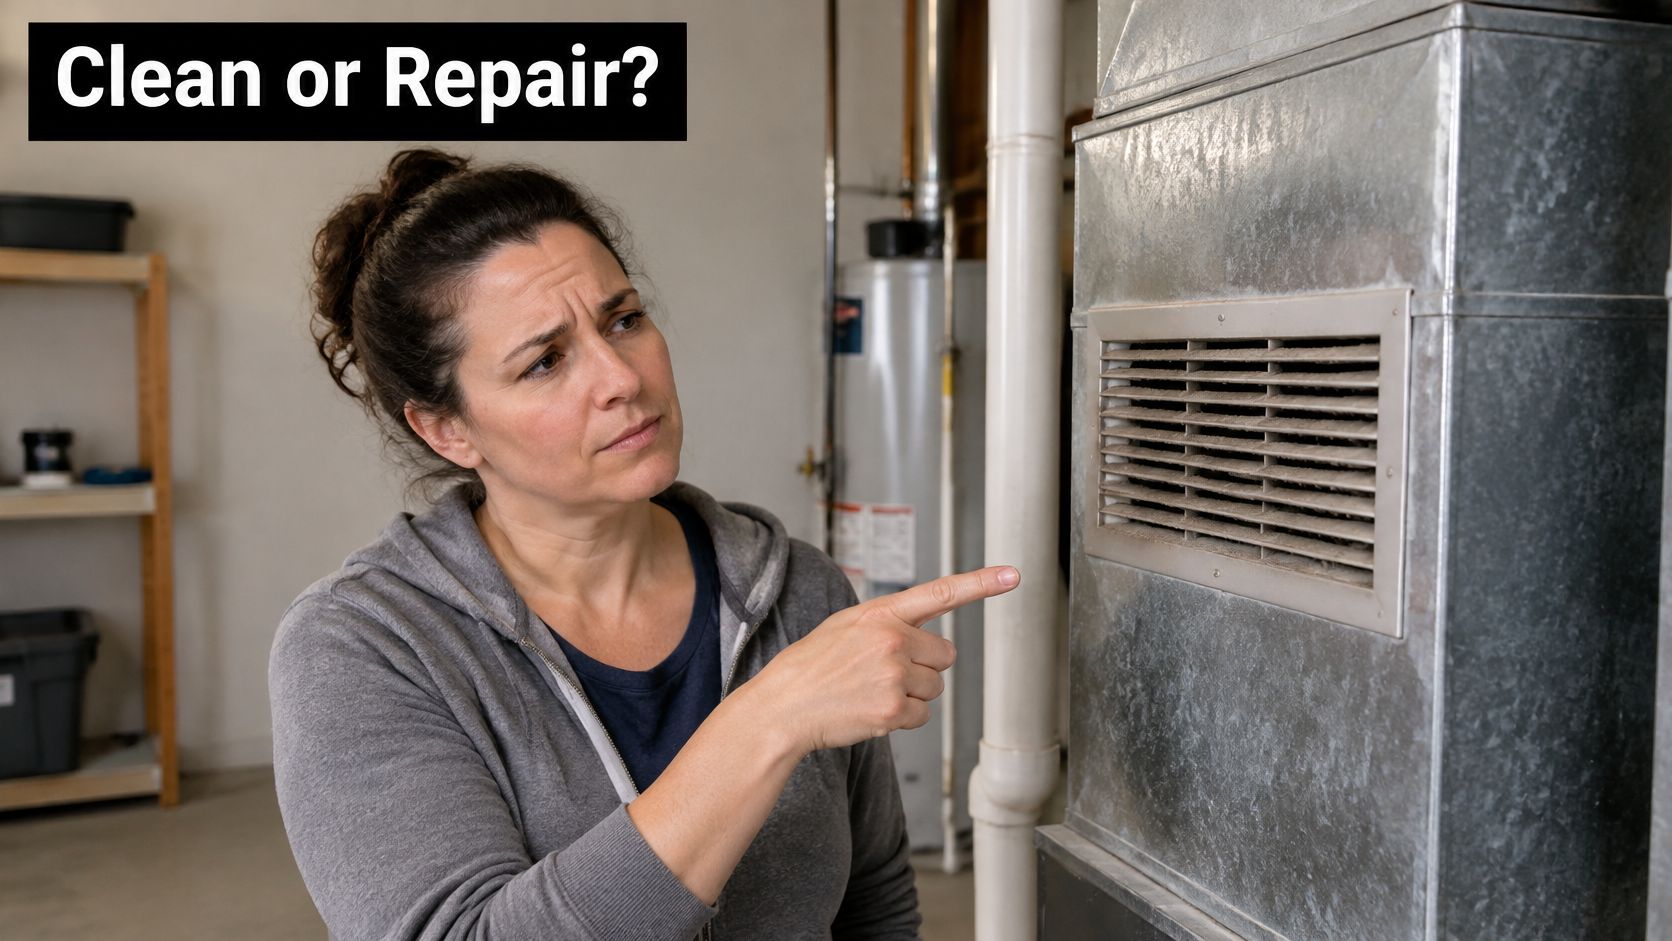
The U.S. Environmental Protection Agency guidance on duct cleaning says duct cleaning has not been shown to prevent health problems, and its field study found mechanical cleaning removed adhered dust without significantly reducing microbial or bioaerosol levels. Settled dust is a housekeeping fact. It isn't diagnostic evidence.
Decision criteria
Repair it: Leaks are located, reachable, and confirmed by feel, smoke or pressure testing.
Clean it: There's visible contamination from mold, vermin, or fire or flood debris.
Replace it: Ducts are undersized, severely crushed or corroded, or the system still fails testing after sealing.
Moisture overrides the cleaning option. The EPA mold course guidance says wet or moldy internal duct insulation cannot be effectively cleaned and should be removed and replaced, water leaks should be repaired promptly, and condensate drain pans should slope toward a freely flowing drain. Cleaning over wet insulation leaves the source in place.
The short video below walks through how a technician separates a cleaning question from a repair or replacement question.
Our overview of ductwork replacement covers the sizing side of that decision. And check the simple causes first. If the filter, blower or coil is the problem, work on the ducts alone won't fix weak airflow or dust.
How to Seal Accessible Duct Leaks Yourself
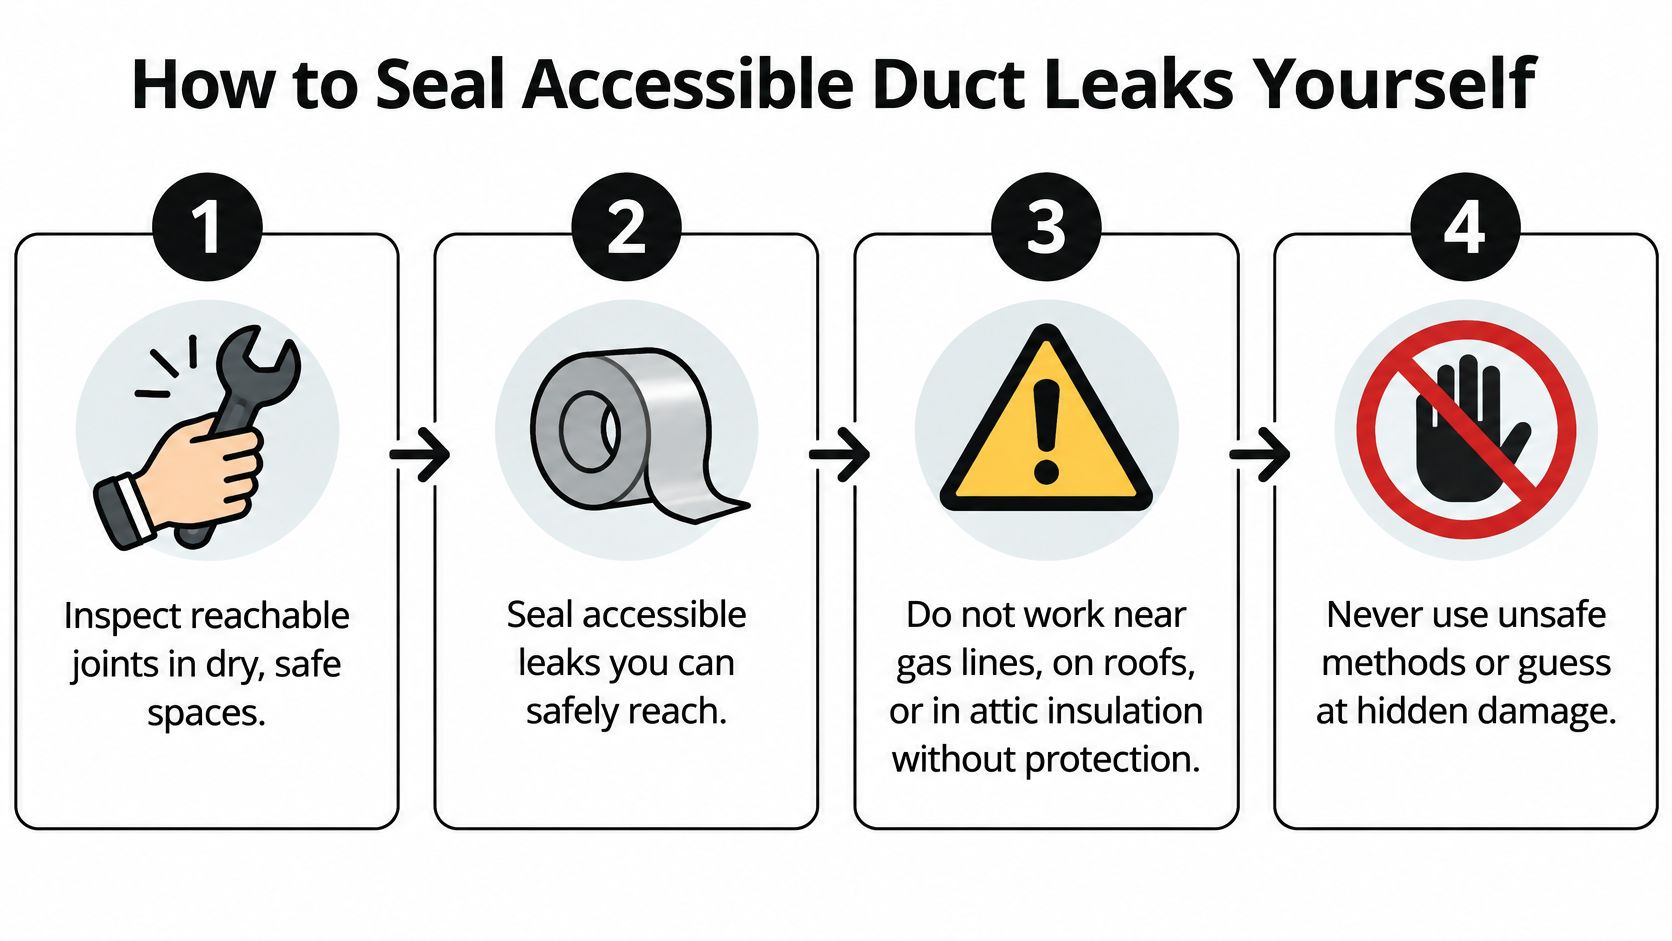
DIY sealing has clear limits. It suits reachable joints in dry, safe spaces, like an exposed basement trunk or a plenum you can stand next to. It doesn't extend to work near gas lines, on roofs, or buried in attic insulation without protection.
Never use cloth-backed duct tape. Despite the name, it dries out, loses adhesion, and fails. You need mastic or foil tape rated to UL 181.
The infographic below summarizes the safe scope before you start.
The sealing steps
Switch the system off: Turn it off at the thermostat and at the breaker, so the blower can't start while your hands are on a joint.
Clean the joint: Wipe off dust, oil and loose insulation. Sealant bonds to metal, not to a layer of grit.
Reconnect separated sections mechanically: Fasten them with screws or straps where reachable. Mastic seals a joint, it doesn't hold one together against duct pressure and vibration.
Brush mastic over the seam: Work it into the gap and feather it out on both sides. Lay fiber mesh into the wet mastic over gaps wider than a fingertip, then coat over the mesh.
Or wrap with UL 181 foil tape: Press it down firmly along its full length with a squeegee or the back of a spoon. Air bubbles under tape become leak paths.
Restore insulation: Put insulation back over sealed accessible runs and keep the vapor barrier intact, taping any cuts you made. A bare cold duct in a humid space will sweat.
Restart and recheck: Feel the joint for escaping air, then compare the room temperature after an hour of runtime.
Our notes on ductwork sealing cover material selection in more detail. Work one joint at a time and label what you've done with a marker and date.
A sealed joint doesn't prove the whole system is tight. If the rooms still differ in temperature after your accessible fixes, the remaining leaks are likely in runs you can't reach, and that's when measured testing earns its cost.
What the Repair Timeline Looks Like and How to Verify It Held
A typical job moves through four phases. The timeline below shows the order, and the order matters more than the speed.
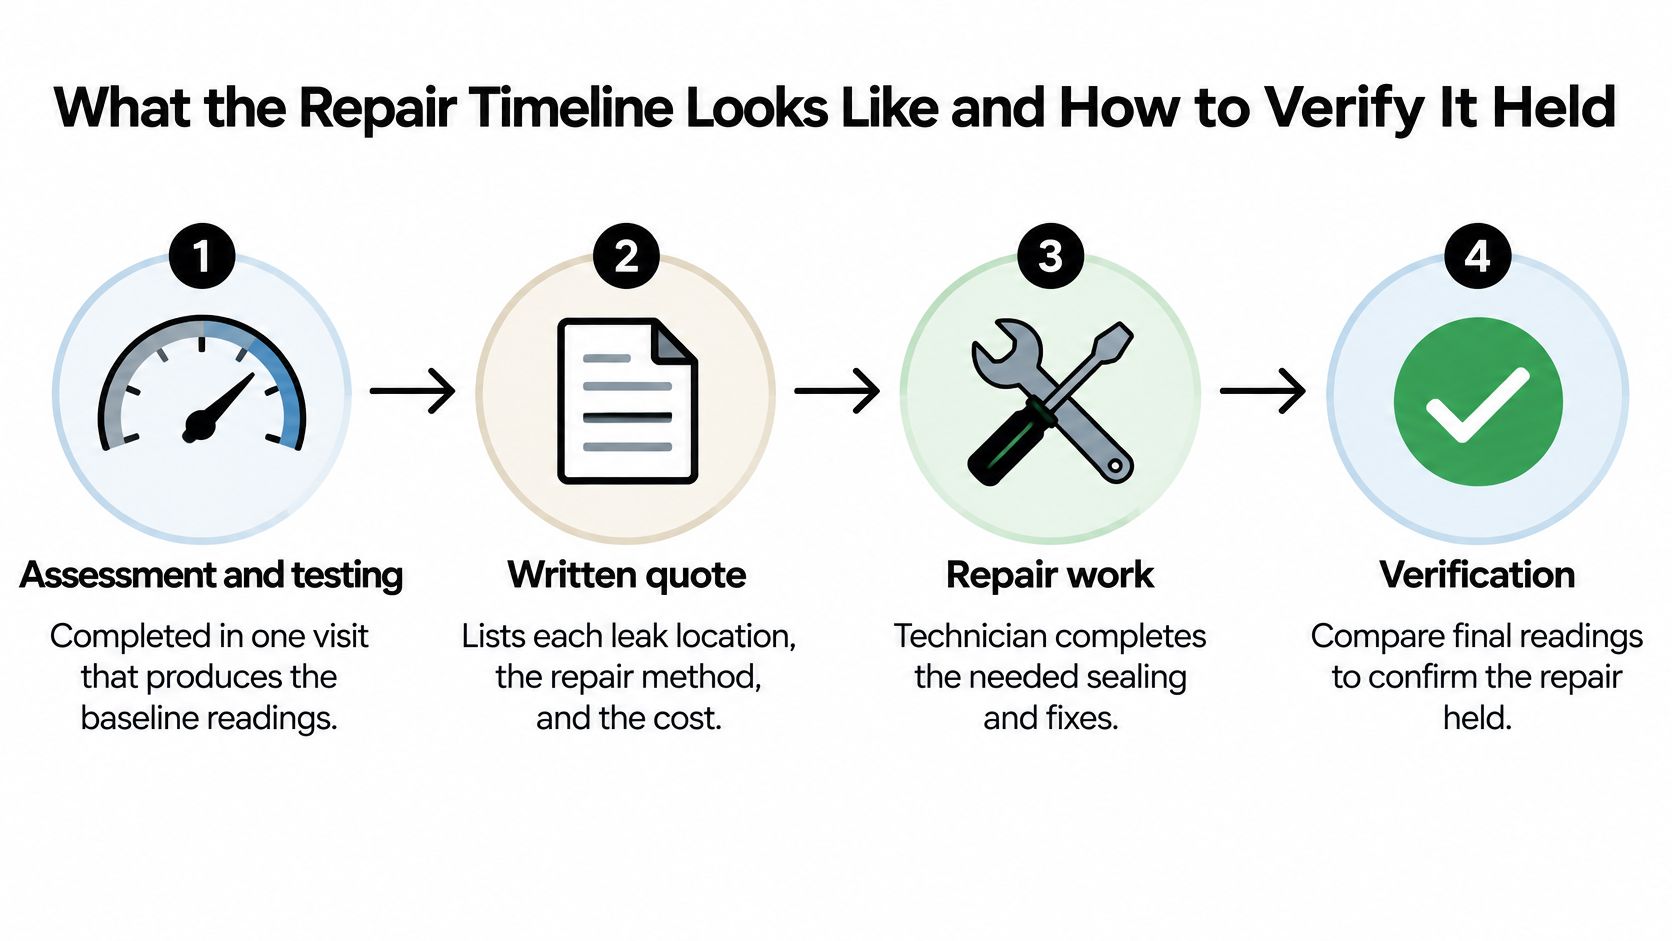
Phase 1, assessment and testing, takes one visit and produces the baseline readings. Phase 2, the written quote, lists each leak location, the repair method, and the post-repair test. Phase 3, the repair, runs a few hours for sealing or reconnecting accessible joints, most of a day for flexible duct replacement or insulation work, and several days for major replacement that depends on access, parts and permits. Phase 4, verification, retests the system and compares airflow, static pressure and leakage against the baseline.
Benchmark | Limit | Source |
|---|---|---|
California residential alteration, total duct leakage | 10% or less | California 2025 HVAC guidance |
California residential alteration, leakage to outside | 7% or less | California 2025 HVAC guidance |
New system pass threshold in cited procedure | 6% | 2025 California testing guidance, cited testing procedure |
Commercial system, recommended maximum system leakage | 5% of design airflow | ASHRAE guidance |
Commercial sections leaking to or from outdoors | 2% | ASHRAE guidance |
Commercial system after effective duct sealing | 5% or less | 2024 California study, Emerging Technologies Coordinating Council |
Those limits come from the California Energy Commission 2025 HVAC guidance, the ASHRAE Handbook guidance, and the Emerging Technologies Coordinating Council report. ASHRAE guidance also recommends testing at least 25% of a commercial system by duct surface area initially, and another 25% if the first sample fails.
A passing result shows measured leakage at or below the benchmark, better balance between rooms, and airflow matching the design. Red flags are simple: a quote with no test, no before-and-after numbers, or a promised result that no measurement will confirm.
Preventive Maintenance to Stop Repeat Damage
Ducts rarely fail all at once. Joints loosen, insulation gets compressed by stored boxes, and flexible runs sag. A short annual routine catches that drift early, and you can download a preventive maintenance checklist to keep the schedule in one place.
Inspect accessible ducts each spring: Do it before the cooling season, since joints loosen over time.
Check attic and crawlspace insulation: Replace sections that are compressed, torn or wet, since wet internal insulation has to come out.
Keep flexible duct straight and supported: Storage and foot traffic crush it, and a sagging run restricts airflow.
Replace filters on schedule: A clogged filter unbalances pressure across the system.
Confirm condensate drain pans drain freely: Standing water near ducts feeds the moisture problems that ruin insulation.
Seal new penetrations: After electrical or plumbing work, gaps around ducts get left open.
Repeat a pressure test every few years: Also test after any major renovation that disturbs runs.
Watch early warnings: Rising bills, rooms drifting apart in temperature, and new dust at registers.
Our preventive maintenance schedule lays out the timing across the year. In hot climates, attic heat breaks insulation down faster, and surrounding heat cuts delivered capacity even when ducts are airtight. In desert and other high-heat regions, check attic insulation over ducts more often than the minimum.
Verify Quotes and Choose a Provider
Turn your diagnosis into a verified repair with a short action list.
Compare at least two written quotes: Check each against the repair table, and question any price for work that doesn't match a measured problem.
Confirm every location is listed: Each quote should name every leak location, the repair method, and the post-repair pressure test with its benchmark.
Require before-and-after readings: Airflow, static pressure and leakage belong in the scope of work, not as an optional extra.
Ask how diagnostics and materials are billed: Many providers bill them separately, so confirm what's included. We offer free diagnostics and evaluations of non-working or failing HVAC units for eligible recipients, and materials and repairs are charged separately.
Ask who retests on a miss: If the first result misses the benchmark, find out whether a retest is included.
Our guide on how to choose an HVAC contractor covers licensing and references. Covenant Aire Solutions is a Tucson-area HVAC company, and our indoor air quality services include air duct cleaning, Aeroseal duct sealing and air purification systems. We provide thorough diagnostics with honest recommendations, and we service all makes and models of HVAC systems.
Confirm current service areas, scope and pricing directly with us before booking. Whichever provider you choose, insist on a test that shows the repair worked, since cleaning alone doesn't repair leaks.
If your rooms won't balance and your bills keep climbing, Covenant Aire Solutions can test your duct system, show you the leakage numbers, and repair the runs that are losing air. We back that work with diagnostics and honest recommendations for Tucson-area homes and businesses. Visit Covenant Aire Solutions to schedule an evaluation and get a written, test-based plan for your ducts.