How to Unclog Condensate Drain Line: Easy Fix for AC Leaks
- Nov 10, 2025
- 13 min read
To unclog a condensate drain line, you'll typically use a wet/dry shop vacuum to suction the blockage out from the exterior pipe. If you're dealing with a really stubborn clog, you can try feeding a thin, flexible brush into the indoor access port or pouring a distilled white vinegar solution in to dissolve the gunk. Honestly, flushing the line regularly is the best way to keep this from happening in the first place.
Why Your AC Condensate Line Clogs and What It Means
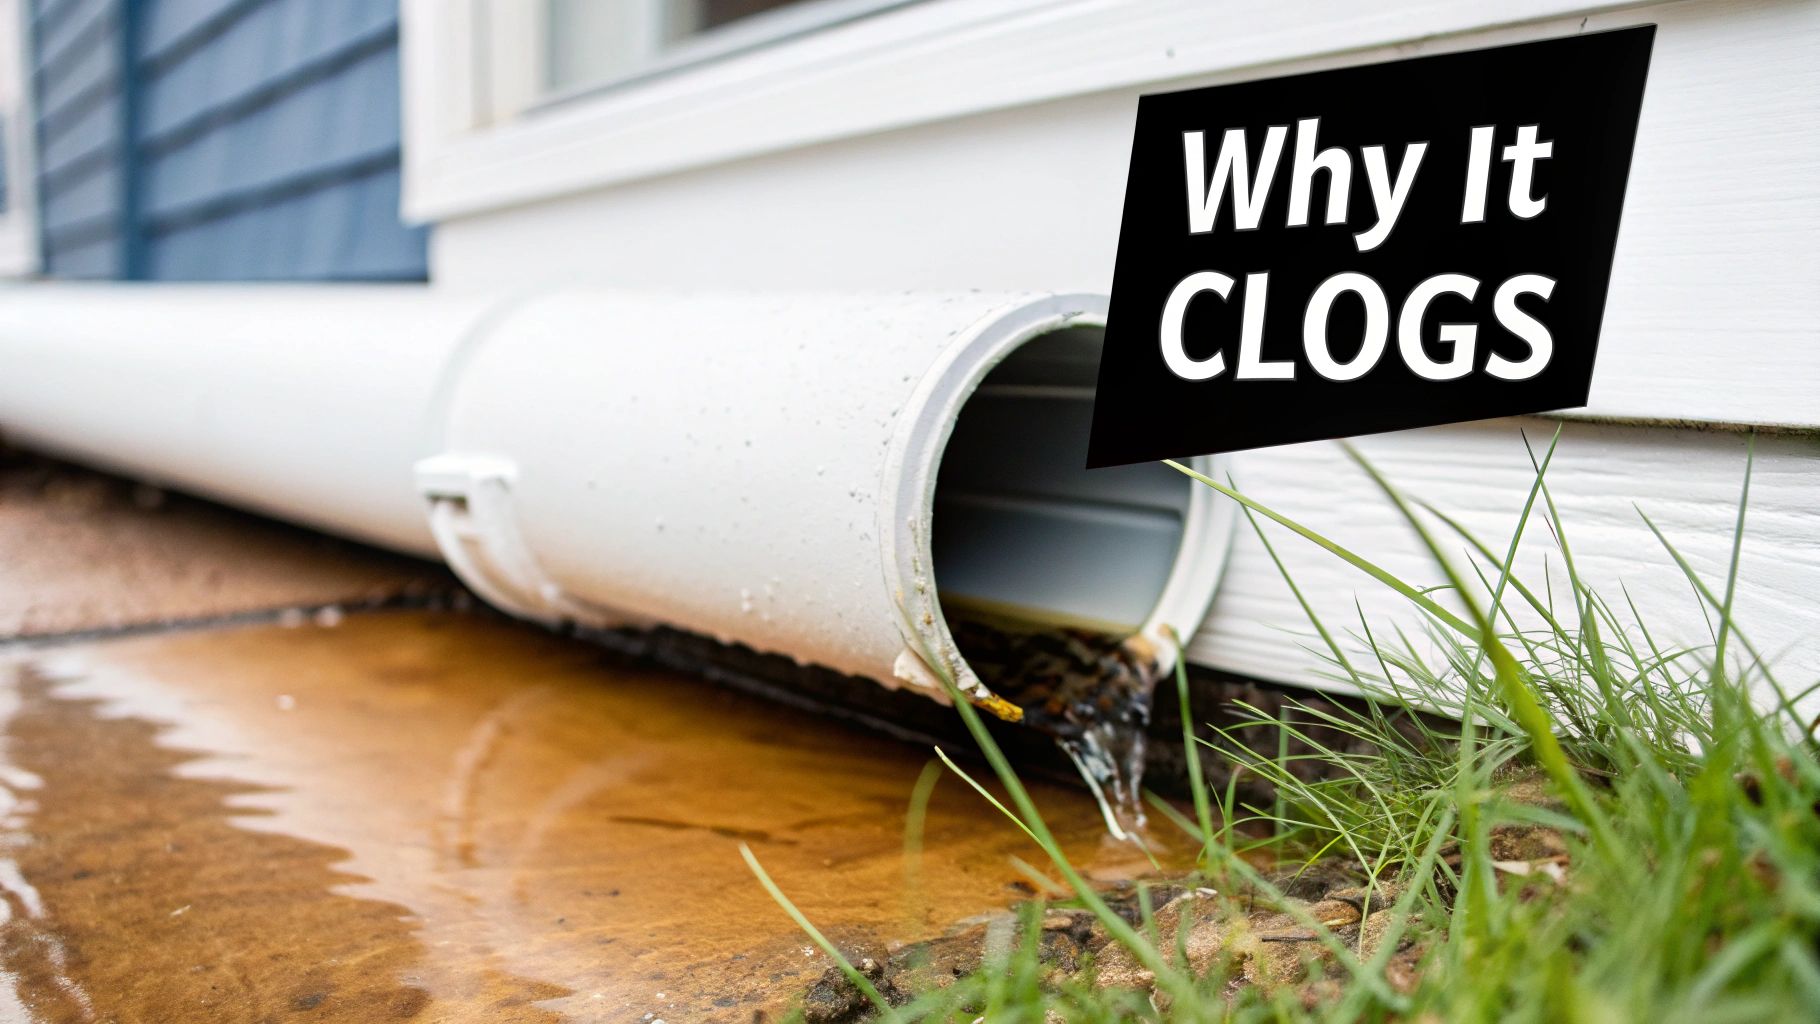
Before you grab any tools, it's helpful to understand why this problem happens. Think about it: your AC's condensate drain line is the perfect storm for biological growth, which is what creates those nasty blockages over time.
The dark, damp interior of that PVC pipe is basically an open invitation for mold, algae, and slimy bacteria. As your air conditioner pulls humidity out of your home, especially during those hot, sticky months, it's sending a constant stream of water down the line, feeding that growth.
Eventually, this biological soup builds up into a thick, gelatinous clog that completely stops water from draining out. When that water has nowhere to go, it backs up right into the drain pan under your indoor air handler.
The Real Risks of a Blocked Drain Line
A clogged drain line is way more than a minor headache; it can spiral into some serious problems for both your home and your HVAC system. Most modern AC units have a float switch, a little safety device that shuts the whole system down when it senses the water in the drain pan is too high. This is the number one reason a clog will suddenly leave you without any cool air.
But if that safety switch fails, or if your system doesn't have one, things can get messy fast. An overflowing drain pan can cause some gnarly damage to:
Ceilings and Walls: Water stains, warped drywall, and peeling paint are the classic calling cards of an overflow, particularly if your air handler is tucked away in the attic.
Flooring: Water loves to seep into carpets, hardwood, and subflooring, which can lead to rot and some eye-watering repair bills.
Mold Growth: That excess moisture creates the perfect environment for mold to grow inside your home's structure, tanking your indoor air quality and creating potential health issues.
A backed-up condensate line is one of the most common, and preventable, reasons for an HVAC service call. In fact, industry surveys show that up to 70% of residential AC water leaks come from this one single issue, and most of them pop up during peak summer humidity.
The cost to fix the aftermath is no joke. An emergency service call just to clear the line can run you anywhere from $150 to $300. If water damage has already set in, you could easily be looking at repair bills well over $1,000.
Catching the early warning signs, like a full drain pan or a musty smell near your indoor unit, is key. If you've already noticed your air conditioner condensation is leaking, our guide can walk you through a quick diagnosis and fix HERE. Understanding these risks is exactly why knowing how to clear a condensate drain line yourself is such a valuable skill for any homeowner.
Getting Your Tools and Safety Gear Ready
Successfully clearing your condensate drain line isn't about brute force. It's about being prepared. Taking a few minutes to get the right gear together will save you from scrambling mid-job and, more importantly, keep you safe.
The very first thing you need to do, before you even think about touching the drain line, is to kill the power to your HVAC system. This is non-negotiable. Head to your thermostat and switch the system completely off. Then, go to your breaker box and flip the breakers for both the air conditioner and the furnace. Now you can get started safely.
With the power off, you can gather your tools with peace of mind.
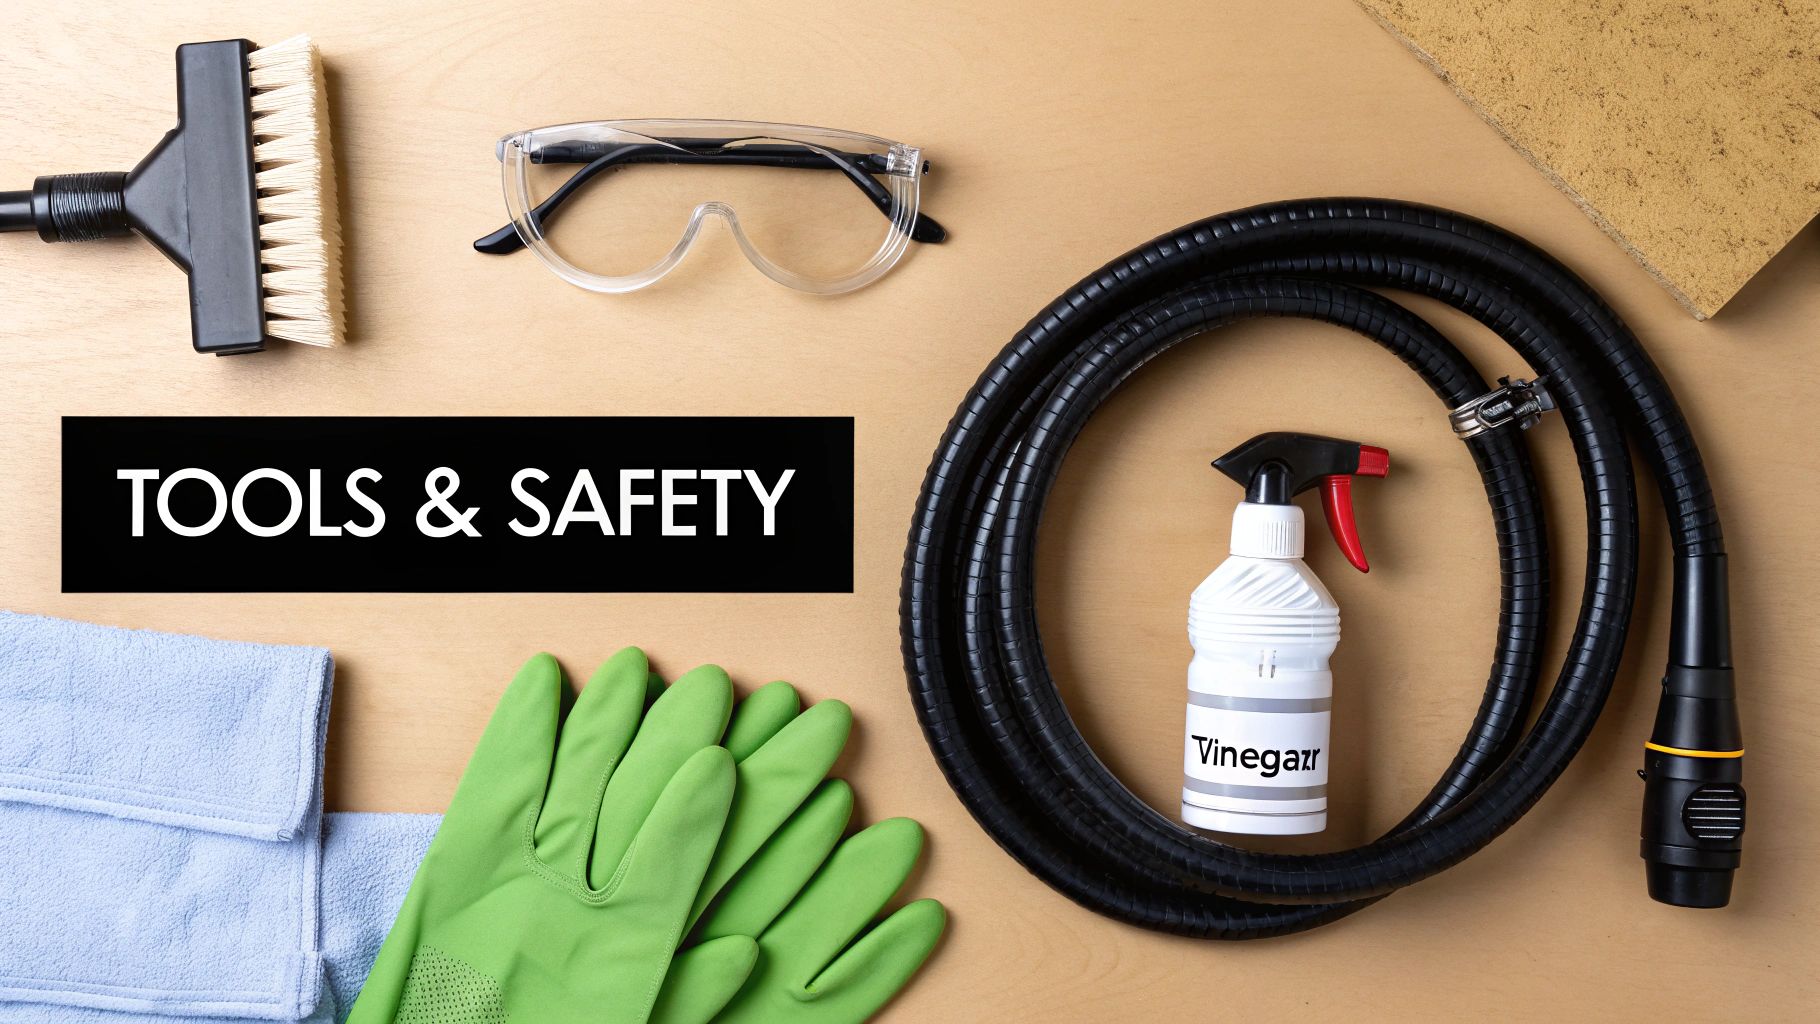
Your Toolbox for Unclogging a Condensate Drain Line
Having these items on hand before you start makes the whole process go much smoother. You probably have most of this stuff lying around your garage or shed already.
Tool | Primary Use | Pro Tip |
|---|---|---|
Wet/Dry Shop Vacuum | This is your main weapon for sucking the clog right out of the pipe. | Do not use a regular household vacuum. The moisture will absolutely ruin it. |
Duct Tape | Creates a tight seal between the shop vac hose and the drain pipe, which maximizes suction power. | Don't be shy with it! A good seal is the key to getting enough pull to dislodge the gunk. |
Distilled White Vinegar | A fantastic, natural solution for flushing the line after removing the main blockage. | Vinegar helps dissolve any leftover biological sludge and deodorizes the line. |
Thin, Flexible Brush | Great for manually breaking up stubborn clogs near the access point. | A plumber's snake works too, but a simple bottle brush can often do the trick for shallow clogs. |
Rags or Towels | Absolutely essential for wiping down the pipe and cleaning up any spills. | You'll want the outside of the pipe completely dry before you try to apply duct tape. |
Safety Glasses & Gloves | Protects your eyes from flying debris and your hands from the nasty slime in the pipe. | This is a messy job. Don't skip the protective gear unless you enjoy weird gunk on your hands. |
Remember, the goal here is to be prepared for the entire process, from breaking up the clog to the final cleanup.
Once you have your tools, you're ready to get your hands dirty. This task is a core part of general system maintenance. If you want to learn more about keeping other parts of your AC in top shape, check out our homeowner's guide to cleaning AC unit components.
With your supplies gathered and safety precautions handled, it's time to find that drain line.
Finding the Drain Line and Access Port
Alright, your first real task is to track down the condensate drain line. Honestly, sometimes it can feel like you're on a bit of a scavenger hunt.
The whole process kicks off with finding your indoor air handler. This is the big metal cabinet that holds the guts of your AC system. You'll usually find it tucked away in an attic, a basement, or a utility closet somewhere out of the way.
Once you’ve zeroed in on the air handler, your next mission is to spot the drain line itself. Look for a white, grey, or black PVC pipe sticking out of the side of the unit. It’s typically about 3/4-inch in diameter, and it's the pathway that carries all that condensation safely out of your home.
Pinpointing the Access Port
So you've found the pipe. Now what? You need to locate the access port, which is where you'll do the actual work of clearing out the clog.
Scan the length of that PVC pipe, staying close to the air handler. You’re looking for a very specific feature: a T-shaped vent with a removable cap. This is your golden ticket, the main entry point for cleaning and flushing the line.
This access port isn't an accident; it's designed specifically for maintenance. It lets you peer inside, pour in a cleaning solution, or even use a tool to break up a blockage. The alternative is cutting the pipe, and that's a much bigger job you want to avoid.
Sometimes that cap is screwed on pretty tight, or it just feels stuck. A gentle twist with a pair of pliers will usually do the trick, but don't go overboard. You don't want to apply so much force that you crack the PVC.
On some older systems, a previous owner or technician might have glued the cap on. If it won’t budge with a reasonable amount of effort, it's smarter to call a pro than to risk breaking the pipe.
Once the cap is off, grab a flashlight and take a look inside. This simple visual check is incredibly helpful. More often than not, you’ll see the slimy, dark gunk from algae and mold right there at the opening. Seeing it firsthand gives you a good idea of how bad the blockage is and where you should focus your efforts.
To get a better sense of how this pipe fits into the grand scheme of things, check out our guide to the parts of a central air conditioner.
Common Locations for Your Indoor Air Handler
Every home's layout is different, so your AC setup can vary. Here are the most common spots where you'll likely find the air handler and its drain line:
Attics: This is a very popular spot, especially in single-story homes. Just make sure you have solid footing and a good light source before you head up there.
Basements: If you have a basement, the air handler is often located near the furnace.
Utility Closets: A dedicated closet on the main floor is another frequent location, which definitely makes access a whole lot easier.
Crawl Spaces: It's less common, but some systems are installed down in crawl spaces. This can make the job a bit more of a squeeze.
Finding this line is the essential first step. With the access port open, you're ready to get in there and tackle the blockage itself.
Effective Methods for Clearing a Clogged AC Drain
Okay, with the access port open, you're ready to get to the root of the problem. There are a few tried-and-true techniques for clearing out a condensate drain line, and the best one really just depends on what tools you have handy and what you're comfortable with.
This visual guide breaks down the simple three-step process for finding your drain line's access port.
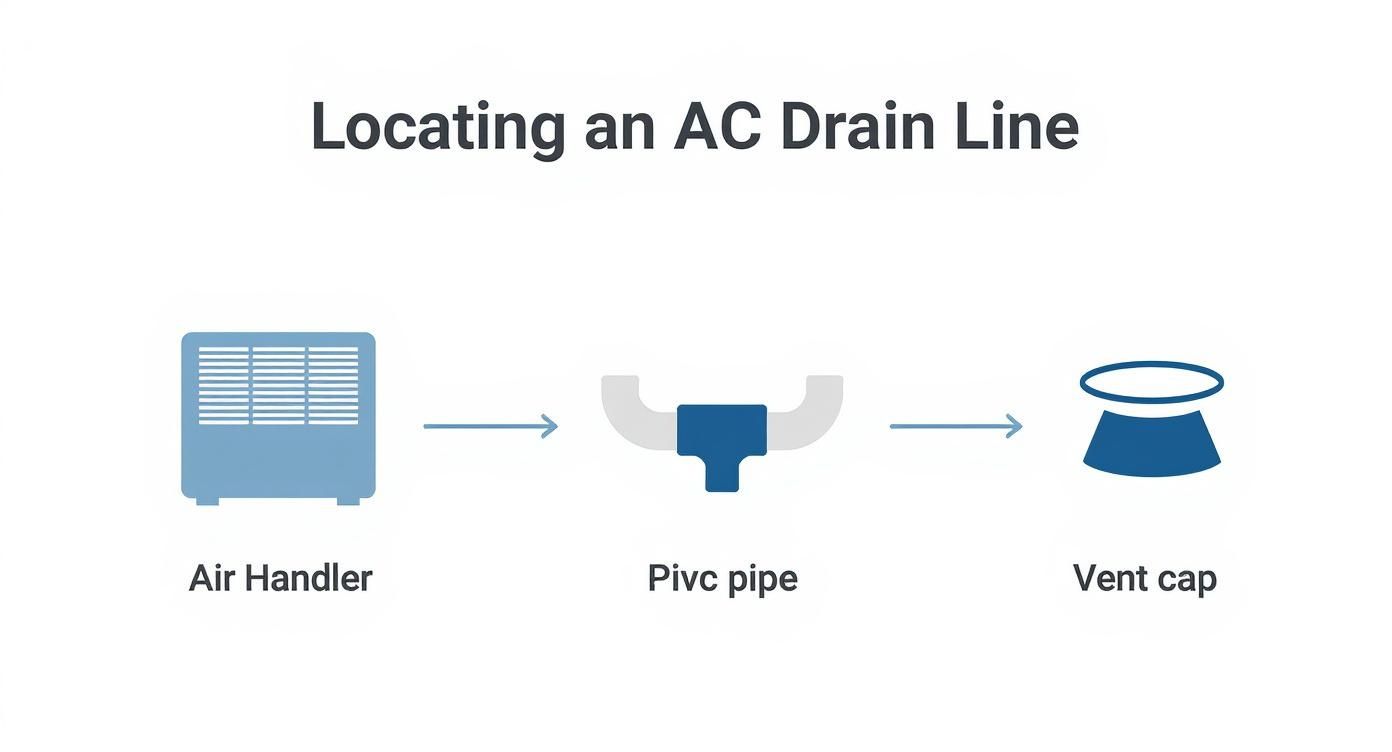
Think of it as a quick treasure map: start at the indoor unit, follow the PVC pipe, and look for that T-shaped cap. That's your entry point.
Using a Wet/Dry Shop Vacuum for Suction
Honestly, one of the most effective, and oddly satisfying, ways to do this is with a wet/dry shop vacuum. This method literally pulls the clog out from the outside of your house, clearing the whole line in one shot.
First, you'll need to find the end of the PVC drain line outside, which is usually hanging out near your outdoor condenser unit. It’s typically just a plain pipe pointing toward the ground. Give the end of it a quick wipe with a rag so you can get a good seal.
Now, fit the hose of your shop vac over the end of that pipe. The trick here is to create a completely airtight seal. I recommend using duct tape and wrapping it generously where the vacuum hose meets the PVC pipe to close off any gaps. A solid seal is what gives you maximum suction power.
Once you’re all sealed up, fire up the shop vac for a minute or two. You should hear the gunk and all that backed-up water getting sucked into the vacuum canister. When you check the vacuum, that dark, slimy stuff you see is the nasty clog you just defeated.
The Manual Approach with a Brush or Snake
If you have a feeling the clog is right near the indoor access port, or you just prefer a more hands-on method, a thin plumber's snake or a stiff, flexible brush works great. This technique is all about physically breaking up the blockage so it can be flushed away.
Gently feed the brush or snake into the access port on the indoor line. Work it in as far as it will comfortably go, moving it back and forth to dislodge all that built-up gunk. You'll probably feel some resistance when you hit the clog; that's your cue to keep working the tool to break it apart.
Just be careful not to get too aggressive. You don't want to accidentally damage the PVC pipe or any of the joints. After you've broken up as much as you can, you can either follow up with the shop vac or move right on to flushing the line.
No matter which method you choose to clear the main blockage, always finish the job by flushing the line. This final step dissolves any leftover residue and helps stop the clog from coming right back.
Flushing the Line with Distilled Vinegar
After you've cleared the main obstruction, it's absolutely crucial to flush the line to wash out any lingering slime and bacteria. Distilled white vinegar is perfect for this job. Its acidity is tough on biological growth but gentle on your pipes.
Slowly pour about one cup of distilled white vinegar right into the access port. Now, let it sit there for at least 30 minutes. This gives the vinegar enough time to really work its magic on any algae or mold that's still clinging to the inside of the pipe.
Once the 30 minutes are up, flush everything out by pouring a few cups of warm water down the same port. This will wash the vinegar and any remaining gunk completely out of the line. Go outside and check the drain pipe to make sure you see water flowing freely, which is how you know you've succeeded.
This flushing process isn't just for clogs; it's a fantastic preventative maintenance step. For more tips on keeping your whole system in top shape, check out our quick guide on how to clean a central air conditioner.
How to Prevent Future Drain Line Clogs
Clearing out a stubborn clog is a great feeling, but the real win is making sure you never have to do it again. The secret isn’t some complicated, expensive trick; it’s all about a simple, consistent maintenance routine. This is what stops those blockages before they even get a chance to form.
Think of it like changing the oil in your car. You wouldn't wait for the engine to seize up, right? The same proactive mindset applies here. A little bit of effort on a regular basis is the best way to avoid emergency service calls, surprise AC shutdowns, and the absolute headache of water damage.
The Power of a Monthly Vinegar Flush
One of the easiest and most effective things you can do is a monthly flush with distilled white vinegar. Its natural acidity is fantastic at dissolving the slimy biofilm and algae that are always trying to grow inside that dark, damp pipe.
Once a month, just pour one cup of distilled white vinegar directly into the drain line’s access port. Let it sit for at least 30 minutes, which gives it time to work its magic and break down any gunk that's starting to build up. After that, flush it all out with a quart of warm water. This five-minute task is your best first line of defense.
Proactive maintenance is always cheaper than reactive repair. A few dollars spent on vinegar or tablets can save you from a $150-$300 emergency service call and the potential for thousands in water damage repairs. It's a small investment with a massive return.
Using Biocide Tablets for Added Protection
If you want more robust, long-term protection, think about using specialized biocide tablets made for AC drain pans. These small, inexpensive tablets are designed to dissolve slowly over several months. As they do, they continuously release a cleaning agent that stops algae, slime, and mold from growing in the first place.
You just place one or two tablets in the drain pan, as far away from the drain opening as you can get them. As condensation forms and drips into the pan, it washes over the tablets, carrying that cleaning agent right down the drain line. It keeps things clear around the clock.
This isn't just a homeowner trick; it's become standard practice in the HVAC industry. Data shows that regularly using biocides can slash the frequency of clogs by as much as 65% in homes, making it a highly cost-effective solution. You can learn more about eliminating condensate headaches from the experts over at RectorSeal.com.
Consistent prevention is the foundation of a healthy HVAC system. To build out a complete maintenance schedule, take a look at our HVAC preventative maintenance checklist for more pro tips.
Still Have Questions About Your Condensate Line?
Even with a step-by-step guide, it's totally normal to have a few questions lingering. Tackling any home maintenance for the first time can feel a little uncertain, so let's clear up some of the most common things homeowners wonder about when dealing with a clogged drain line.
Getting these final points sorted out can give you the confidence you need to either wrap up the job yourself or make the smart call for professional backup.
How Often Should I Clean My Condensate Drain Line?
As a general rule for preventative maintenance, try to flush your drain line at least once every three months. But honestly, your specific situation might demand a bit more attention.
You'll want to clean it more often depending on these factors:
High Humidity Environments: If you're in a humid climate like we have here in Tucson, your AC is constantly working overtime. That means more condensation, which is the perfect breeding ground for gunk. In this case, a monthly flush is a much safer bet.
Older HVAC Systems: Just like anything else, older units can be more prone to issues. It's wise to check the line more frequently to stay ahead of problems.
Pets and Allergies: Homes with pets or allergy sufferers naturally have more dust and dander floating around. That stuff can easily find its way into the drain line, so a monthly cleaning will help keep everything flowing smoothly.
How Can I Tell If the Clog Is Really Stubborn?
Sometimes, a quick flush with vinegar or a few seconds with a shop vac just isn't going to cut it. You could be up against a serious, compacted blockage that's lodged deep inside the pipe.
You'll know you have a tough clog on your hands if you’ve tried the standard methods and the line still won't drain. A dead giveaway is pouring water into the access port and watching it back up immediately.
Another tell-tale sign is if your wet/dry vac runs for several minutes but pulls out hardly any water or gunk. This usually means the blockage is too solid for suction alone to break it free.
When the basic DIY tricks don't work, it's a strong signal that the clog is either too dense or stuck in a part of the line you can't reach. Whatever you do, don't start forcing tools or pouring harsh chemicals down there; you risk cracking the PVC pipe and turning a simple clog into a much more expensive repair.
When Is It Time to Call an HVAC Professional?
Knowing your own limits is the most important part of any DIY project. While many drain line clogs are perfectly manageable, some situations absolutely require a call to a certified HVAC technician.
It's time to put the tools down and pick up the phone if you run into any of these scenarios:
Persistent Clogs: You cleared the line, but it clogs right back up within a week or two. This often points to a bigger problem, like an improper drain slope or a systemic issue that a simple cleaning won't fix.
Visible Water Damage: If you're already seeing water stains on your ceiling or walls, you need a pro to assess the extent of the damage and make sure the leak is stopped for good.
The System Won't Turn Back On: You've cleared the line and reset the breakers, but the AC still won't kick on. The clog may have tripped a safety switch that needs to be reset by a professional, or it might have even caused an electrical problem.
Glued Access Cap: If you can't get the access port open because some previous installer glued it shut, don't try to force it. A technician has the right tools to safely cut and repair the pipe to gain access without causing more damage.
When a stubborn clog goes beyond a simple fix, don't hesitate to call in the experts. The certified technicians at Covenant Aire Solutions are available 24/7 to handle any HVAC emergency, ensuring your system is cleared safely and runs efficiently. Protect your home from water damage and restore your comfort by scheduling a service with us.