How to Clean Central a c Unit: A Guide (how to clean central a c unit)
- Dec 11, 2025
- 17 min read
Cleaning your central AC unit is a job anyone can tackle. It’s a straightforward process that boils down to shutting off the power, grabbing some basic tools, and methodically cleaning both the outdoor and indoor parts. Taking the time to do this once a year can seriously boost your system's efficiency, knock a few bucks off your energy bills, and help your unit last a whole lot longer.
What You'll Need to Clean Your AC Like a Pro
Before you even think about touching a screw or spraying a drop of water, the single most important thing you can do is get properly prepared. Good prep is all about safety and making the job go smoothly, saving you from those annoying mid-project runs to the hardware store. It’s like a chef getting all their ingredients ready before they start cooking; a little organization makes all the difference.
First things first, and this is non-negotiable: completely shut down all power to your air conditioner. This isn't just a friendly suggestion; it's a critical safety step to avoid a nasty electrical shock. You’ll need to do this at two spots: flip the breaker at your main circuit panel inside the house, and then pull the disconnect at the outdoor box, which is usually a small metal box mounted to the wall right next to your condenser unit.
Your Essential AC Cleaning Toolkit Checklist
Once you're 100% sure the power is off, it's time to gather your gear. Having everything within arm's reach makes the whole process faster and way less frustrating. You probably have most of this stuff in your garage already.
Here’s a quick rundown of the must-have tools for this job, along with a few tips from my own experience to make the process smoother.
Tool or Supply | Purpose | Pro Tip |
|---|---|---|
Wet/Dry Vacuum | Sucks out leaves, dirt, and gunk from the condenser base and clears clogs in the condensate drain line. | Use a crevice tool attachment to get into the tight corners of the condenser unit for a more thorough clean. |
Garden Hose & Spray Nozzle | Gently rinses the condenser coils from the inside out. | Set your nozzle to a gentle shower or fan spray. High pressure can easily bend the delicate aluminum fins. |
Commercial Coil Cleaner | A foaming, no-rinse cleaner designed to break down stubborn grime without damaging the coils. | Spray it on and let it sit for about 10-15 minutes. The foam will work its way deep into the fins to lift out dirt. |
Screwdriver or Nut Driver | Removes the top grille and any access panels on the outdoor unit. | Take a quick picture of the fasteners with your phone before you start so you grab the right tool from the get-go. |
Soft Brush & Gloves | A soft-bristled brush dislodges caked-on dirt; gloves protect your hands from sharp fins and chemicals. | An old paintbrush with soft bristles works great. Don't use a wire brush: it'll destroy the fins. |
Coil Fin Comb | An optional but highly recommended tool for straightening bent condenser fins. | Work slowly and gently. Straightening just a few bent fins can make a noticeable difference in airflow. |
Having these items ready ensures you won't have to stop mid-task, turning what could be a quick job into an all-day affair.
A coil fin comb is a cheap but incredibly useful tool to have. It's made specifically to straighten out bent fins on your condenser coils. Even a few bent fins can block airflow, so spending a couple of minutes gently combing them back into place can really boost your system's performance.
Prepping the Work Area
With your tools laid out, the last prep step is to clear the space around your outdoor condenser. You need at least two feet of clear space on all sides of the unit. Go ahead and trim back any bushes, pull weeds, or cut back overhanging branches that are crowding it.
This step is more critical than most people think. Good airflow is everything for an AC unit. In fact, the HVAC cleaning market, valued at US$ 12.41 billion in 2024, is growing partly because homeowners are catching on to how much simple maintenance improves efficiency. With 87% of US homes equipped with air conditioning, keeping them in top shape is essential for performance, especially here in Tucson. You can see more insights about the HVAC services market on Factmr.com.
Finally, make sure you have the correct replacement air filter ready to go. A clean filter is the cornerstone of good indoor air quality. If you or your family struggle with seasonal sniffles, you might want to read our guide on the best HVAC filters for allergies.
Cleaning Your Outdoor Condenser Unit
Your outdoor condenser is the workhorse of your central AC system, constantly battling the Arizona elements. It pulls in massive amounts of air to release the heat from your home, but it also pulls in leaves, dust, grass clippings, and cottonwood fluff, all of which can choke its performance.
A clean condenser runs more efficiently, cools better, and ultimately lasts longer. Let's get it back to peak condition. This process is pretty straightforward, but you need to be careful and methodical to avoid damaging the unit.
This simple infographic outlines the crucial first steps before you touch a single screw.
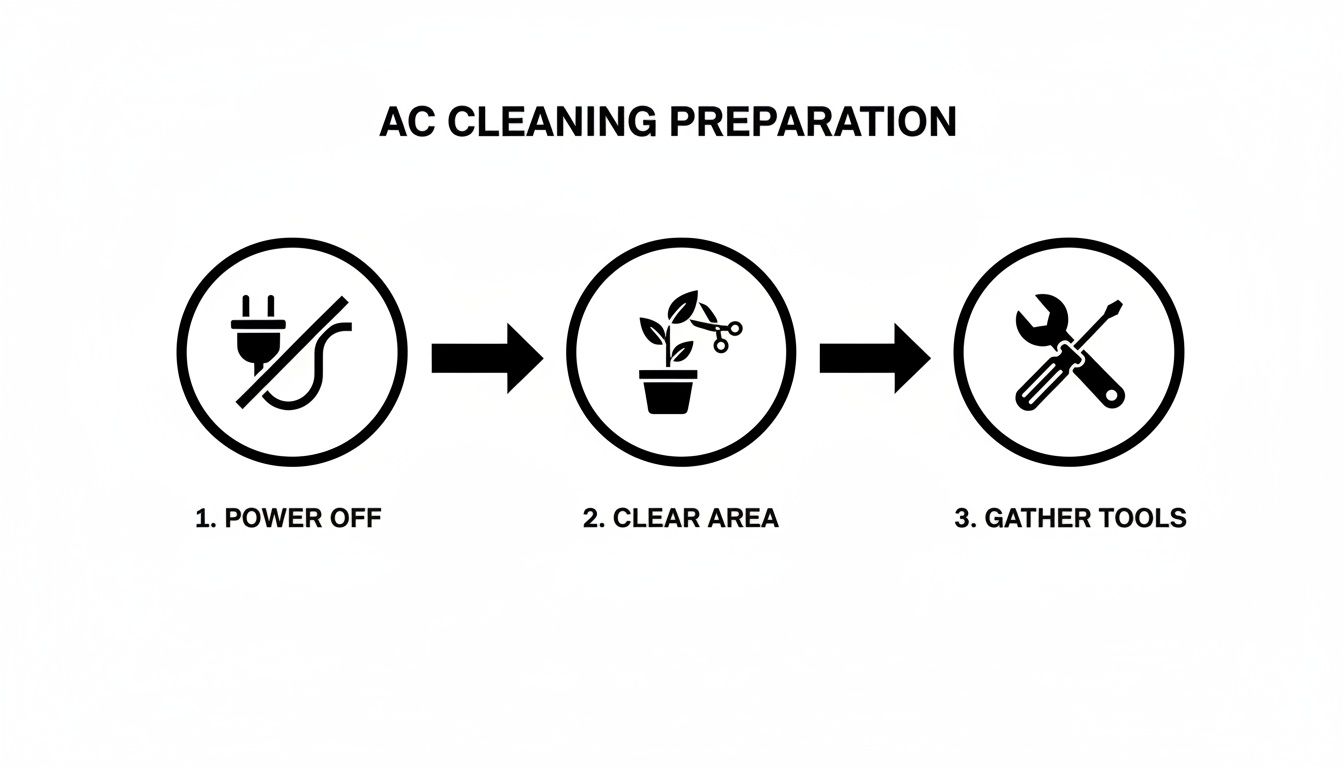
These three actions: killing the power, clearing the area, and getting your tools ready, are the foundation for a safe and successful cleaning session. Don't skip them.
Removing the Grille and Cleaning Debris
Once you've confirmed the power is off, your first task is to get inside the unit. Most condensers have a protective top grille held on by a few screws. Use your screwdriver or nut driver to remove them and pop them into a small container so they don't get lost in the grass.
Now, carefully lift the top grille. Be really mindful of the fan motor attached to it; there are wires connecting it to the main unit. Gently set the grille and fan assembly to the side, making sure you don't pull or damage the wiring.
Look inside. You'll probably find a surprising amount of gunk, from a thick blanket of leaves to fine dust settled at the bottom. Use your gloved hands or a wet/dry vac to get all of this junk out. Cleaning this out is a huge step toward restoring proper airflow.
Washing the Condenser Fins Correctly
This is where your technique really matters. The goal is to clean the delicate aluminum fins that wrap around the unit without bending them. Using the wrong pressure or direction can do more harm than good.
Pro Tip: Whatever you do, never use a pressure washer on your condenser coils. The force is far too strong and will flatten the fins, creating a solid wall that air can't pass through. This is one of the most common and costly mistakes homeowners make.
For a more detailed walkthrough, our easy DIY guide on how to clean condenser coils offers extra tips and visuals to help you nail this step.https://www.covenantairesolutions.com/post/how-to-clean-condenser-coils-easy-diy-guide
The right way to do this is with your garden hose and a spray nozzle. You want to position the nozzle inside the now-empty condenser and spray outward through the fins.
Start at the top and work your way down in sections.
Use a gentle shower or fan spray setting, nothing too aggressive.
The water will push the trapped dirt, dust, and grime out of the coils instead of driving it deeper inside.
You’ll see a muddy stream of water flowing out. Keep rinsing each section until the water runs clear, then move on to the next.
Straightening Fins and Cleaning the Fan
After a good rinse, take a close look at the fins. It's totally normal for them to get a little bent from hail, stray rocks from a lawnmower, or just general wear and tear. This is where a coil fin comb is a lifesaver.
Gently insert the comb at a straight angle above or below the bent section and slowly pull it through the fins. Don't force it. This simple action reopens the channels for air to flow freely, which makes a huge difference in your unit's efficiency.
Next, turn your attention to the fan blades on the grille you set aside. Wipe them down with a damp cloth to remove any caked-on dust and grime. A clean fan moves more air with less effort.
While you're cleaning, you might notice other parts of your home's exterior could use a good wash. If you're thinking about a bigger project, it helps to know how to pressure wash a house properly, since the techniques for siding or concrete are very different from what you'd do around your AC unit.
Finally, put everything back together. Carefully place the top grille and fan back in position and secure it with the screws. Before you call it a day, grab a level and check that the condenser pad is still flat. An unlevel unit can cause premature wear on the compressor's motor bearings, leading to a much bigger problem down the road.
Clearing the Indoor Evaporator Coil and Drain Line
With the outdoor unit sparkling, it’s time to head inside and give some attention to the heart of your cooling system. Your indoor components, mainly the evaporator coil and the condensate drain line, are pulling all the heat and humidity out of your home's air. Keeping them clean is every bit as important as rinsing down the condenser outside.
This part of the job really boils down to two key areas. First, we’ll gently clean the delicate evaporator coils. After that, we’ll tackle the condensate drain line: a small PVC pipe that can cause massive headaches and water damage if it gets clogged.
Accessing and Cleaning the Evaporator Coils
You'll typically find the evaporator coil tucked away inside the air handler or furnace cabinet, which might be in a closet, the attic, or down in the basement. Since you already killed the power at the breaker, you can safely open the main access panel on this unit.
Once you’ve got it open, you'll see a V-shaped or A-frame assembly of metal fins; that’s the evaporator coil. Over time, any dust and microscopic gunk that manages to sneak past your air filter builds up here, choking off airflow and tanking your cooling efficiency.
For this task, a no-rinse foaming coil cleaner is your best friend. This stuff is made specifically for indoor coils where you obviously can't just hose things down. It sprays on as a thick foam that cleverly expands into all the tiny spaces between the fins.
Spray the cleaner evenly across the entire surface of the coils. Don't be shy; you want to get good, solid coverage.
Just let the foam sit and do its thing for about 10-15 minutes. It’s actively breaking down all that caked-on dirt and grime.
As the foam liquefies, it drips down into the condensate drain pan below, carrying the dirt with it and washing it all away through the drain line.
This cleaner does all the heavy lifting for you, so there's no need for any scrubbing, which could easily bend or damage those fragile aluminum fins.
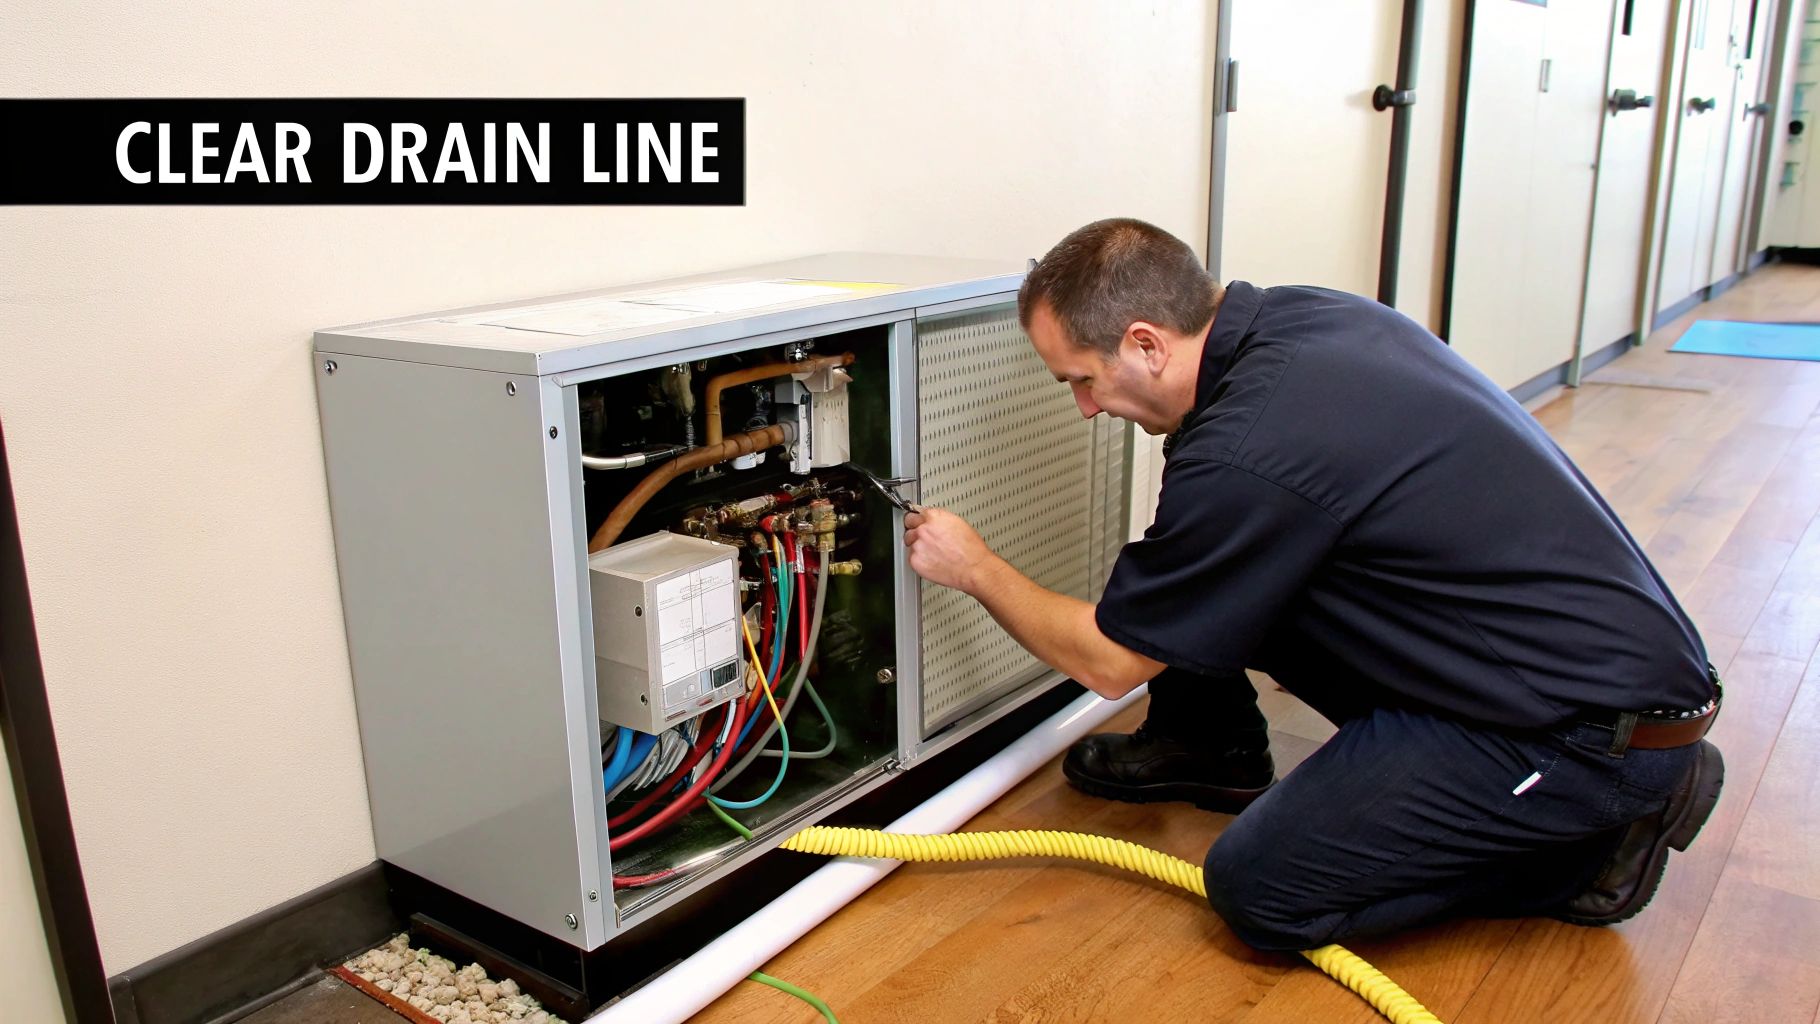
Unclogging the Condensate Drain Line
Now for the real hero of this section: clearing out the condensate drain line. As your AC pulls humidity from the air, it generates a surprising amount of water. This moisture collects in a pan and is supposed to flow outside through a small PVC pipe.
But here’s the problem: that damp, dark pipe is the perfect breeding ground for algae, mold, and sludge, which eventually creates a stubborn clog. When that happens, the drain pan overflows. This can cause serious water damage to your ceilings or floors and will likely trigger a system shutdown if you have a safety float switch installed.
The perfect tool for this job is a simple wet/dry vacuum.
First, find the drain line's termination point outside your house. It’s usually a short PVC pipe sticking out near the foundation, often close to your outdoor condenser.
Securely attach the wet/dry vac’s hose to the end of this pipe. You might need to use your hands or a bit of duct tape to create a good seal.
Flip the vacuum on for a minute or two. The powerful suction will pull any sludge, algae, and blockages right out of the line.
You’ll be amazed (and probably a little disgusted) at what comes out. This one simple action is one of the most effective ways to learn how to clean central a c unit and prevent one of its most common, and messy, failure points.
A clogged drain line is one of the top reasons for emergency AC service calls, especially during Tucson's monsoon season when humidity is high. Suctioning it clear once a year is a simple preventive measure that can save you from a costly, and very sweaty, situation.
Keeping the Drain Line Clear Proactively
After you've cleared the line, a little preventive maintenance goes a long way. This easy trick helps stop all that gunk from growing back, keeping the water flowing freely all summer long.
About once every few months, pour one cup of distilled white vinegar down the condensate drain line. You can usually access this via a T-shaped vent or a removable cap on the pipe near your indoor air handler.
The vinegar's mild acidity is fantastic at preventing the growth of algae and bacteria without being harsh enough to damage your system's components. For a more detailed guide with pictures, check out our post on how to clean your AC condensate drain line like a pro at https://www.covenantairesolutions.com/post/how-to-clean-ac-condensate-drain-line-like-a-pro. This simple habit helps ensure you won't be dealing with an unexpected water leak on the hottest day of the year.
Time to Boost Your Airflow: Tackling the Indoor Unit
Excellent cooling performance is about more than just clean coils; it's about getting clean, cool air moving freely through your entire home. Now that we've handled the heavy hitters like the coils and drain line, let's switch our focus to two critical indoor tasks that have a massive impact on your system's airflow and efficiency: changing the air filter and cleaning out the blower compartment.
Think of these parts as the lungs of your HVAC system. A clogged filter or a dusty blower forces the whole unit to gasp for air, slashing its performance and putting a ton of strain on expensive components.
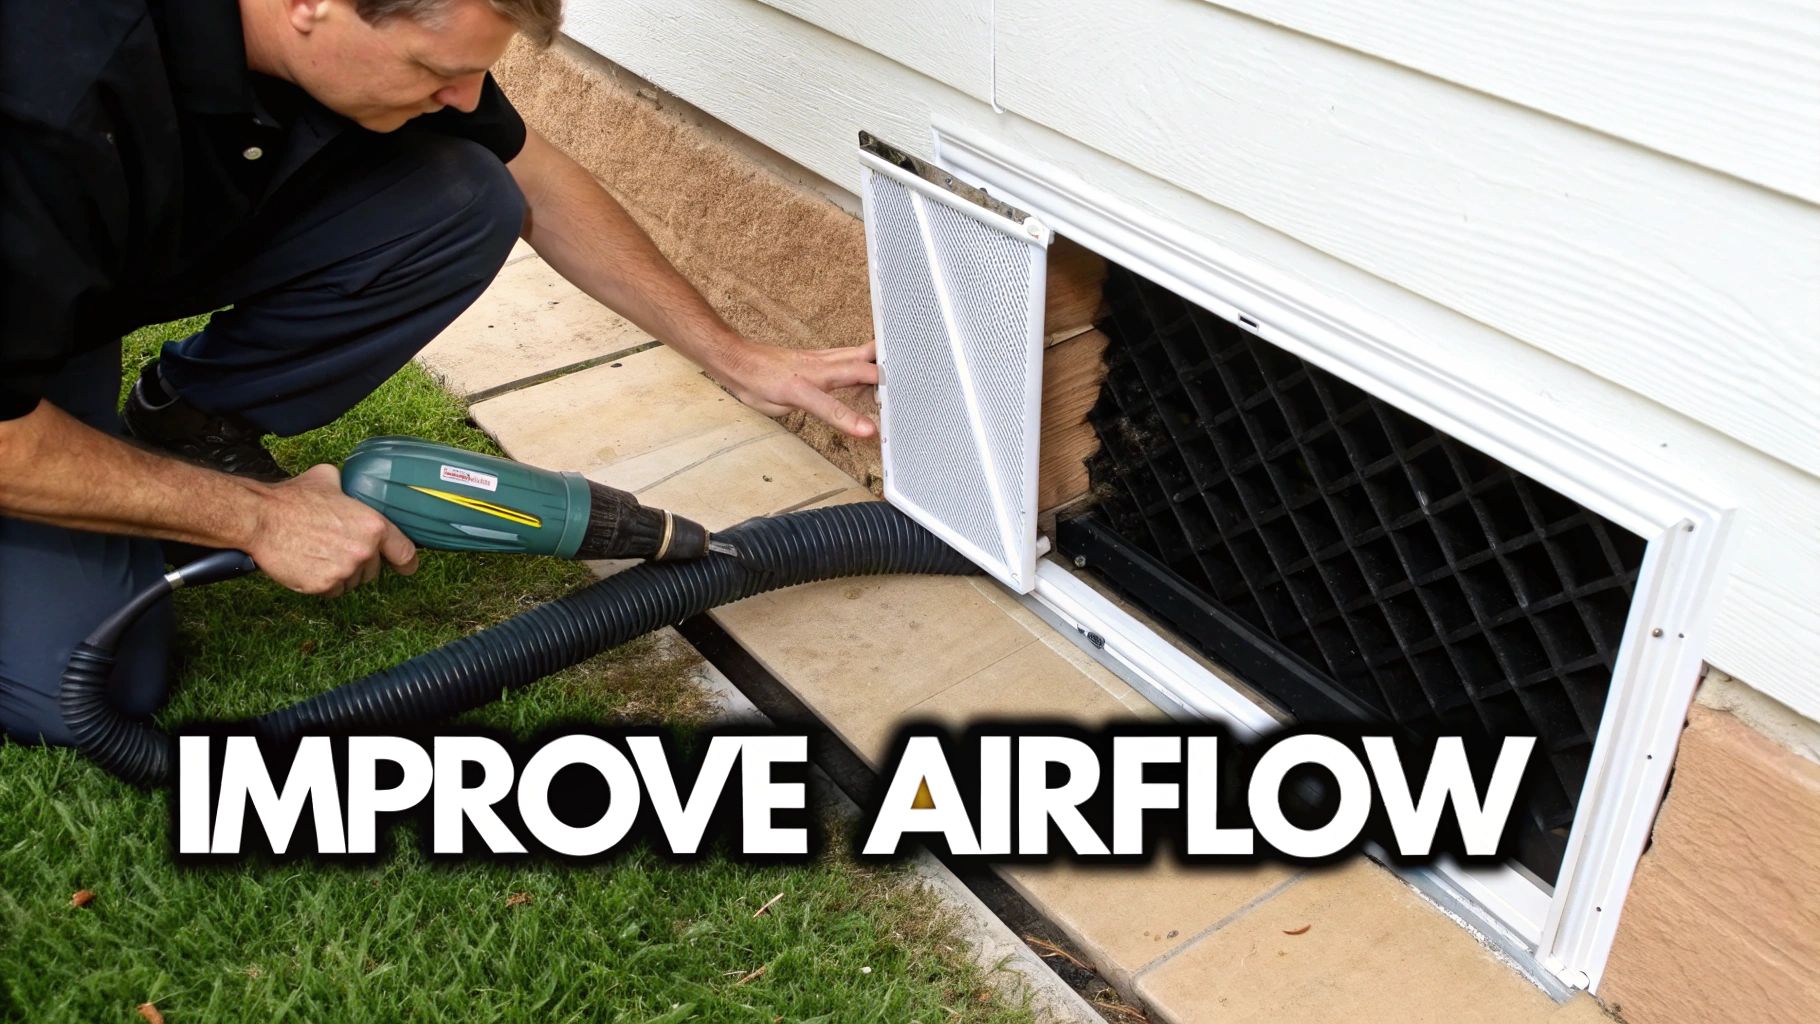
The Air Filter Change: This One's a Must-Do
Your AC’s air filter is the frontline soldier in the war against dust, pollen, and all the other gunk floating around your home. I can't tell you how many service calls I've been on where the root of the problem was simply a dirty, clogged filter. It's one of the most common culprits behind poor cooling, frozen coils, and even catastrophic system failure.
Making a habit of checking your filter every month is non-negotiable. For most homes, a full replacement every 1-3 months will do the trick. But if you've got pets, family members with allergies, or live in a dusty spot like Tucson, you'll probably need to swap it out more often.
When you're grabbing a replacement, keep an eye on the MERV (Minimum Efficiency Reporting Value) rating. A higher MERV number means the filter is better at trapping tiny particles, which is fantastic for air quality but can also choke your system if it’s too restrictive.
MERV 6-8: This is a great all-around choice for most households. It strikes a good balance between effective filtration and healthy airflow.
MERV 9-12: A solid upgrade if you're dealing with allergies or pet dander.
MERV 13+: This offers hospital-grade filtration but can be too much for a standard residential system. Only use these if your HVAC unit is specifically designed to handle the extra resistance.
Choosing a filter with a MERV rating that's too high can be just as damaging as using a filthy one. It makes your blower motor work way too hard, driving up energy bills and causing it to wear out faster. Always stick to the manufacturer's recommended range for your specific unit.
Cleaning the Blower Fan and Compartment
Moving past the filter, the blower assembly itself can get caked with a surprising amount of grime. Over time, a thick layer of dust builds up on the fan blades of the blower wheel (often called a "squirrel cage"). This buildup isn't just ugly; it throws the fan off balance and seriously cuts down on how much air it can move.
With the power still shut off at the breaker, go ahead and open the access panel to your air handler where you were working on the evaporator coil. The blower is almost always located right below or next to the coils.
Start by using a vacuum with a brush attachment to clear out all the loose dust, cobwebs, and other debris that has settled at the bottom of the blower compartment.
Now, let's get those fan blades clean. You can usually do a pretty good job without having to remove the whole assembly.
Grab a soft-bristled brush (an old toothbrush or a small paintbrush works perfectly) and gently break loose the caked-on dust from each individual blade.
Come right behind it with your vacuum's crevice tool to suck up all that dirt you just dislodged.
For any stubborn grime left behind, use a damp cloth to wipe it clean. Just be extra careful not to get any moisture on the electrical components.
A clean blower fan doesn't just move more air, it also runs quieter and uses less energy. This simple step is a key part of learning how to clean a central AC unit, and it can bring back lost performance and cut down on that annoying operational noise.
This proactive approach to maintenance is becoming more common everywhere. For example, the HVAC services market in the Asia-Pacific (APAC) region is expected to skyrocket by USD 46.04 billion between 2025 and 2029. This boom is fueled by a growing understanding that routine cleaning is essential for better air quality and lower running costs. You can see more about this trend on Technavio.com. It all comes back to taking care of your system's core components, which is something we dive into in our guide on the https://www.covenantairesolutions.com/post/expert-cleaning-air-conditioning-coils-for-better-efficiency, to ensure you get years of efficient service.
Knowing When to Call an HVAC Professional
Learning how to clean your central AC is a fantastic skill for any homeowner, but knowing your limits is just as important. It’s one thing to handle routine upkeep; it’s another to recognize when a problem is way beyond a DIY fix.
Some symptoms are clear signals to put down the tools and call a licensed technician. Pushing your luck can turn a minor repair into a major expense, or worse, create a dangerous situation. Understanding the importance of professional home services for complex jobs is just responsible homeownership. You wouldn't rewire your own electrical panel, and some AC repairs require that same level of specialized expertise.
Red Flags That Demand Professional Attention
Some HVAC problems look simple on the surface but are actually pointing to serious, underlying failures. If you notice any of these signs, it's time to get an expert opinion.
Unusual and Persistent Noises: A healthy AC hums. If you hear loud grinding, squealing, or metallic clanking, that’s not normal. Those are serious red flags pointing to mechanical trouble, like a failing motor or a worn-out compressor.
Warm Air from Vents: If the air blowing from your vents feels lukewarm, or just isn't as cold as it used to be, a pro needs to investigate. This is often a symptom of a refrigerant leak or a failing compressor, both of which are complex and potentially hazardous to handle.
Frequent Cycling: Is your unit turning on and off every few minutes? That’s called short cycling, and it puts a ton of strain on the system. It could be caused by anything from an oversized unit to low refrigerant levels.
Ignoring these warnings is a gamble that can lead to a complete system breakdown. If you're in the middle of a cooling crisis, our emergency air conditioning repair guide for homeowners provides crucial next steps.https://www.covenantairesolutions.com/post/emergency-air-conditioning-repair-guide-for-homeowners
DIY Maintenance vs Professional HVAC Service
It can be tough to know which tasks you can tackle and which ones are strictly for the pros. This table breaks it down clearly.
Task | DIY Friendly? | When to Call a Pro |
|---|---|---|
Changing Air Filters | Yes | If you're unsure of the correct size or type. |
Cleaning Outdoor Unit Fins | Yes (gently!) | If fins are severely bent or damaged. |
Clearing the Condensate Drain Line | Yes, with caution. | For persistent clogs or signs of water damage. |
Checking the Thermostat | Yes | For any wiring issues or if it's unresponsive. |
Handling Refrigerant (Freon) | Absolutely Not | Always. This requires an EPA license. |
Electrical Repairs (Capacitors, etc.) | Absolutely Not | Always. High-voltage components are dangerous. |
Diagnosing/Replacing the Compressor | Absolutely Not | Always. This is the heart of your system. |
Measuring System Pressures | Absolutely Not | Always. Requires specialized gauges and knowledge. |
Ultimately, your safety and your system's health are what matter most. When in doubt, call for help.
Issues Strictly Reserved for the Pros
Some jobs are non-negotiable; they're off-limits for even the most ambitious DIYer due to the high risk of injury or irreversible system damage. These tasks require certified training and diagnostic tools you just won't have in your garage.
Never attempt to handle refrigerant yourself. It's a federally regulated chemical that requires an EPA license to handle. A leak not only cripples your AC's performance but also poses an environmental risk.
Beyond that, any and all electrical work should be left to a professional. This includes:
Replacing Capacitors: These components store high-voltage electricity, even when the power is off. Handling them incorrectly can give you a severe shock.
Fixing Electrical Faults: A technician can safely trace and repair issues with wiring, contactors, and control boards without risking personal injury or creating a fire hazard.
Diagnosing Compressor Issues: The compressor is the engine of your AC system. Repairing or replacing it is an intricate job that absolutely requires a professional touch.
The Value of an Annual Professional Tune-Up
Beyond just fixing things when they break, scheduling a yearly professional tune-up offers value that no amount of DIY cleaning can match. A technician performs a deep diagnostic check, measuring refrigerant pressures, testing electrical components, and calibrating the whole system for peak efficiency.
Think of it as a smart investment. Consumers in the U.S. spend over $10 billion annually on HVAC repair and maintenance, a figure that shows just how costly reactive fixes can be. A well-maintained system not only runs more efficiently but can even have its energy use cut by up to 50% with certain upgrades.
By extending the life of your unit with professional care, you help delay becoming one of the up to 3 million U.S. households that have to replace their systems entirely each year.
Common Questions We Hear About Cleaning AC Units
Even with a step-by-step guide, you're bound to have questions when you tackle this for the first time. We get it. Here are the answers to the questions we hear most often from homeowners, so you can get the job done right and avoid some costly mistakes.
How Often Should I Really Be Cleaning My Central AC Unit?
For most homes, giving the entire system a thorough cleaning once a year is the sweet spot. The best time to do this is in the spring, right before that intense Tucson summer heat kicks in. This gets your unit primed and ready for the heavy lifting ahead.
But your local environment makes a huge difference. If you live near a new construction site, have cottonwood trees dropping fluff everywhere, or are just in a super dusty part of Arizona, you'll want to clean that outdoor condenser unit twice a year.
The air filter inside your home is a completely different story; that needs your attention far more often.
Make it a habit to check it monthly. No exceptions.
Expect to replace it every 1-3 months.
If you have pets shedding dander or family members with allergies, you should be swapping it out closer to every 30 days.
Is It Okay to Use a Pressure Washer on My AC Coils?
Absolutely not. Using a pressure washer is probably the fastest way to wreck your air conditioner. That high-pressure blast will instantly bend and mat down the thousands of delicate aluminum fins on the coils.
Once those fins are flattened, air can't pass through them. This chokes off airflow, traps heat inside the unit, and puts immense strain on the compressor. A failed compressor is one of the most expensive repairs you can face. Always, always stick to a regular garden hose with a gentle spray nozzle.
Your goal is to rinse, not blast. Think about it like you're watering a delicate flower: you want a steady, gentle stream that cleans without causing damage. The fins on your AC are just as fragile.
What Are the Telltale Signs of a Clogged AC Drain Line?
Your air conditioner is pretty good about giving you clear warnings when its condensate drain line gets backed up. Catching these signs early can save you from a world of water damage and an emergency shutdown on a 100-degree day.
The most glaring clue is water pooling on the floor around your indoor air handler or furnace. Never ignore a mysterious puddle in that area.
Other common signs to watch for include:
A funky musty or moldy smell wafting from your vents whenever the AC kicks on.
The entire system suddenly shuts down on a hot afternoon and won't turn back on.
You spot water stains appearing on the ceiling or wall near the indoor unit.
Most modern systems have a safety float switch in the drain pan for this very reason. It detects the rising water level from a clog and automatically cuts power to the whole system to prevent a flood. That's why a clog often leads to a system that just won't run.
Is It a Good Idea to Use Bleach to Clean the Drain Line?
It's best to steer clear of bleach for this job. While it's great for killing mold and mildew, bleach brings some serious downsides when it comes to your HVAC system.
For starters, bleach is corrosive. Over time, it can eat away at metal components like your drain pan or even the evaporator coils. It also puts out some harsh fumes that you definitely don't want circulating through your home's ductwork. A much safer, and just as effective, alternative is plain distilled white vinegar.
Just pour about one cup of vinegar down the drain line's access port every couple of months. Its mild acidity is perfect for breaking down and preventing algae or sludge buildup without posing any risk to your equipment or your indoor air quality.
At Covenant Aire Solutions, we believe an informed homeowner is an empowered one. While DIY cleaning is a great way to maintain your system, a professional tune-up can catch issues you can't see. If you're in the Tucson area and want to ensure your AC is running at its absolute best, contact us today.